How to Test Phosphate Levels in Aquarium Water
That stubborn green film spreading across your glass, the sudden explosion of hair algae choking your plants, or the mysterious browning of your prized SPS corals—they all share a hidden culprit: unmeasured phosphate levels. When you don’t know how to check phosphates in aquarium water, you’re fighting invisible battles against nutrient imbalances that fuel algae and stunt coral growth. This guide cuts through the confusion with battle-tested methods used by professional reef keepers and planted tank enthusiasts. You’ll learn exactly how to test phosphate levels with laboratory-grade accuracy using tools from $10 colorimetric kits to pro-grade Hanna Checkers, interpret results for your specific tank type, and troubleshoot false readings that waste your time and money.
Why Excess Phosphate Causes Algae Blooms and Coral Growth Issues
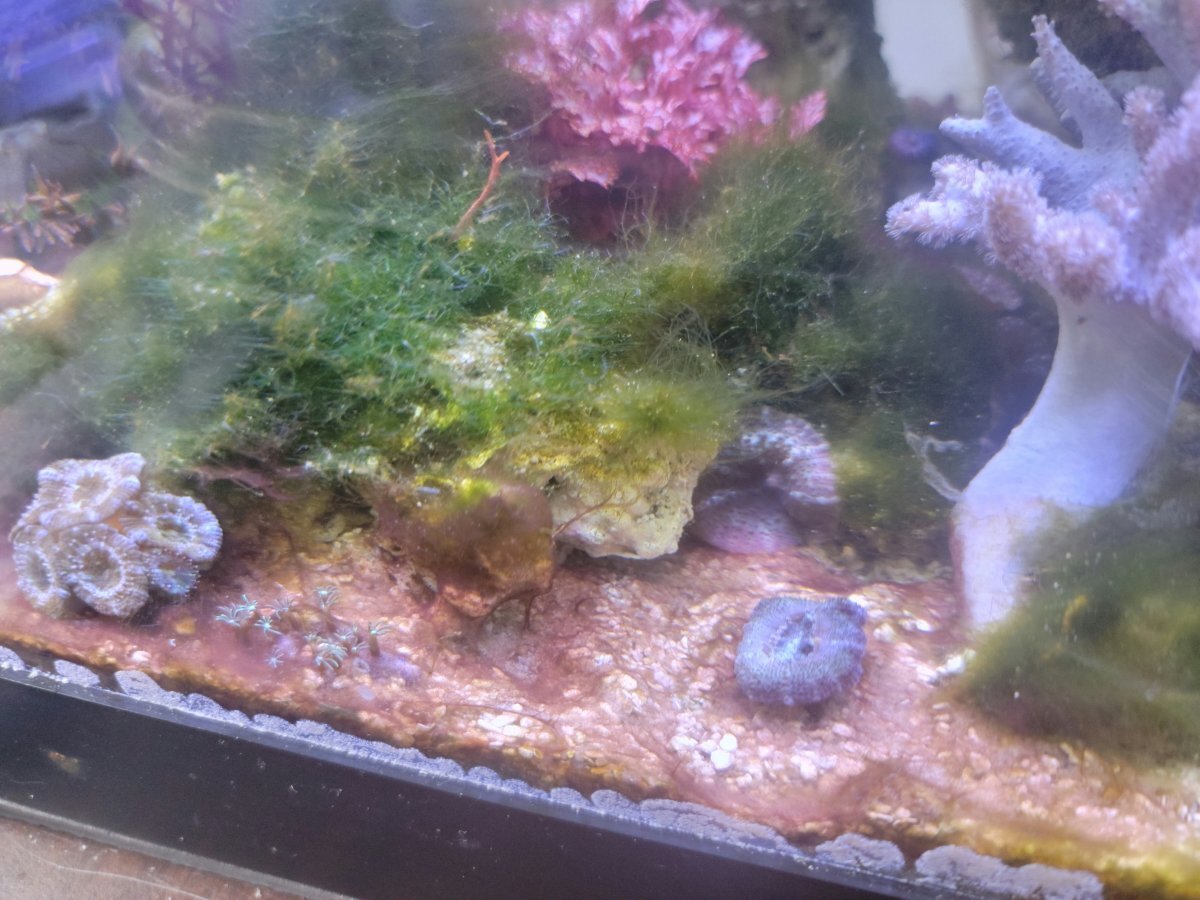
Phosphate isn’t inherently evil—it’s a critical nutrient for aquatic life—but uncontrolled levels become your tank’s silent crisis. In reef systems, concentrations above 0.03 ppm directly inhibit coral calcification, causing stunted growth and washed-out colors. Planted freshwater tanks suffer when phosphate exceeds 2.0 ppm, triggering explosions of hair algae that strangle delicate stems. The real danger? You won’t see phosphate accumulating until it’s too late. Unlike cloudy water or gasping fish, this invisible nutrient builds silently from fish food residues and decaying matter until algae erupts in full force. Testing isn’t optional maintenance—it’s your early-warning system against ecosystem collapse.
How Phosphate Enters Your Tank Without Warning
Every feeding session floods your water with phosphate as uneaten pellets decompose. Tap water sources often contain 0.1-1.0 ppm phosphate, silently poisoning your system during water changes. Even high-quality salt mixes can introduce phosphate if not properly purified. Without regular testing, these invisible inputs accumulate until your tank hits the tipping point—typically around 0.5 ppm in freshwater or 0.1 ppm in reef setups—where algae colonies suddenly dominate.
Compare Hanna Checkers vs. Colorimetric Test Kits for Precision

Choosing the right testing method makes the difference between guessing and knowing. Budget colorimetric kits work for basic freshwater tanks but fail reef keepers who require parts-per-billion accuracy. Professional photometers eliminate human error but require proper handling. Your tank type dictates your tool: SPS coral enthusiasts need Hanna ULR precision, while planted tank beginners can start with API kits.
Why Hanna ULR Checkers Dominate Reef Testing
The Hanna Phosphate Ultra-Low Range Checker (HI-736) delivers lab-grade results in 3 minutes with 0.001 ppm resolution. Unlike color charts, its photometer measures blue tint intensity digitally, eliminating subjectivity. For SPS tanks targeting 0.01-0.02 ppm, this precision is non-negotiable—your corals’ growth rates depend on detecting 0.005 ppm differences. Always verify readings against Hanna’s calibration standards monthly, as reef keeper “Fisherman Joe” discovered when his drifting tester showed falsely low 0.01 ppm readings during a major algae outbreak.
When API or Salifert Kits Suffice for Freshwater
For planted tanks targeting 0.5-2.0 ppm, API’s colorimetric kit offers 80% accuracy at 10% of the cost. Success hinges on technique: shake Bottle 1 vigorously for 60 seconds before use (settled reagents cause false lows), and compare colors against pure white paper in north-facing daylight. Never test over black backgrounds—that darkens hues and inflates readings. The critical limitation? These kits can’t reliably detect below 0.25 ppm, so if you see algae but test “0 ppm,” you’re actually in the danger zone (0.05-0.2 ppm) where only a Hanna Checker can see.
Gather Essential Tools for Reliable Phosphate Testing
Skipping proper prep guarantees flawed results. Before testing, assemble these non-negotiable items: a 10mL graduated syringe (not cups—volume errors skew results), two clean cuvettes (one for zeroing, one for samples), reagent packets stored in foil (light degrades them in weeks), and a logbook. For reef tanks, add Hanna’s phosphate standard solution ($15) to verify calibration weekly. Most critical? Never dip test bottles directly into your tank—contamination ruins reagents within days.
Avoid These 3 Contamination Traps
- Fingerprints on Cuvettes: Oils scatter light, causing 15-30% high readings. Wipe with microfiber cloth before each use.
- Tap Water Rinse Residue: Chlorine alters chemistry. Always rinse tools with distilled water.
- Reagent Cross-Contamination: Use separate droppers for each bottle—mixing causes false positives.
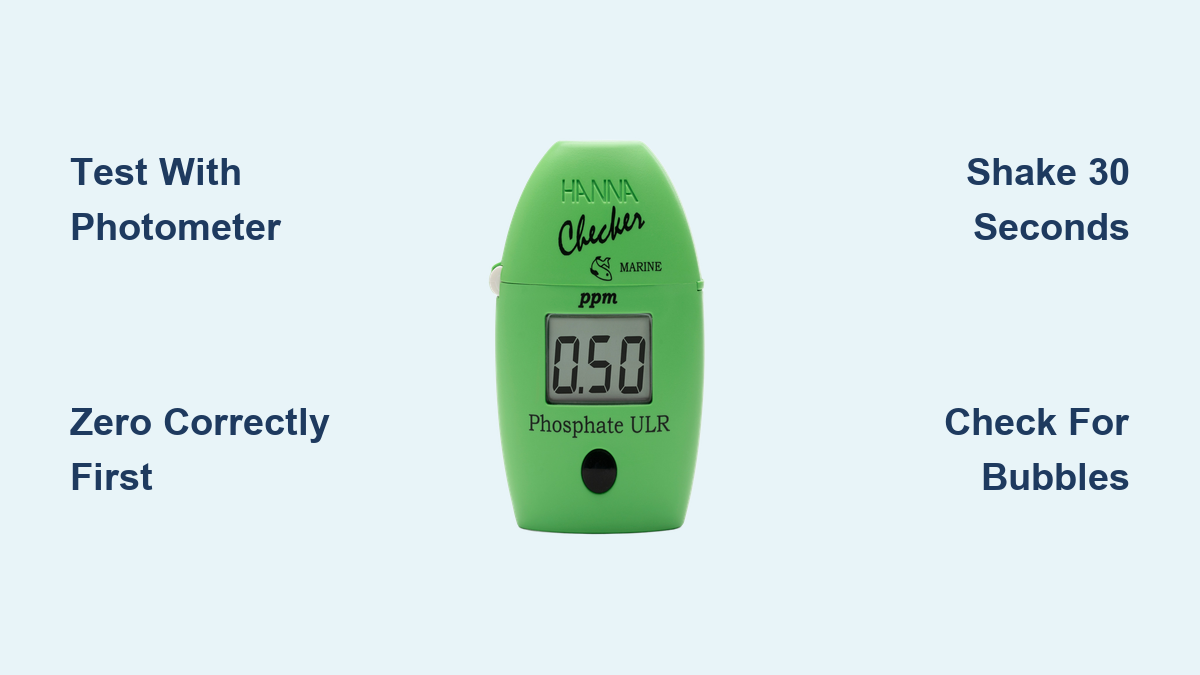
Perform a Flawless Hanna ULR Phosphate Test in 5 Minutes
This step-by-step method prevents the #1 error: rushing the color development phase. For the Hanna HI-736, precision demands strict timing. Start your phone timer the moment reagents hit water—deviating by 30 seconds creates 20%+ variance.
Step 1: Zero the Checker Correctly
Fill cuvette to 10mL line with tank water. Insert, press “zero,” then remove and discard this water. Never reuse the zero sample—that traps bubbles causing false highs.
Step 2: Perfect the Color Reaction
Add one phosphate reagent packet to fresh 10mL sample. Cap tightly and shake horizontally for 30 seconds (vertical shaking traps bubbles). Place on flat surface—do not disturb—for exactly 3 minutes. Bubbles forming? Shake too vigorously; results will read 0.02 ppm higher.
Step 3: Capture the True Reading
At 3:00, insert cuvette without wiping (water spots cause refraction errors). Press “read.” If the display flickers, bubbles are present—restart the test. A stable 0.03 ppm reading means your SPS corals are in the growth zone.
Decode Your Phosphate Reading: Ideal Levels for Reef, Planted, and Fish-Only Tanks
Your number means nothing without context. A 0.5 ppm reading terrifies reef keepers but delights planted tank owners. Match your result to these species-specific thresholds:
| Tank Type | Ideal Range | Danger Zone | Critical Action Required |
|---|---|---|---|
| SPS Reef | 0.01-0.02 ppm | >0.03 ppm | Immediate GFO dosing |
| Mixed Reef | 0.02-0.05 ppm | >0.10 ppm | Water change + skimmer tune |
| Planted Freshwater | 0.5-2.0 ppm | >2.5 ppm | Reduce feeding + add fast plants |
| Fish-Only Marine | 0.05-0.1 ppm | >0.3 ppm | Increase water change frequency |
Why Planted Tanks Need Higher Phosphate
In low-tech planted tanks without CO₂ injection, phosphate below 0.1 ppm starves plants of essential nutrients, causing yellowing leaves and stunted growth. Your goal? Maintain 1.0-1.5 ppm to outcompete algae—this requires testing after feeding when levels peak. If algae appears despite “good” readings, test nitrate simultaneously; a broken N:P ratio (below 10:1) triggers outbreaks even at 0.8 ppm phosphate.
Troubleshoot False Zero Readings in Problem Tanks
When your API kit shows “0 ppm” but green slime coats rocks, you’ve hit the kit’s detection limit—not a phosphate-free tank. This false negative fools 70% of new reef keepers. The solution? Switch to a Hanna ULR Checker immediately. Its 0.002 ppm sensitivity reveals hidden phosphate spikes as low as 0.015 ppm that invisible to color charts.
Three Signs Your Test Kit Is Lying to You
- Persistent algae with “0 ppm” readings → Reagent degradation from light exposure
- Color won’t develop past pale yellow → Expired reagents (check bottle dates)
- Readings jump from 0 to 1.0 ppm → Missing the critical 0.1-0.5 ppm danger zone
Prevent Reagent Degradation and Calibration Drift
Hanna Checkers lose accuracy when stored improperly—never leave them on sunny tank stands. Refrigerate reagents in original foil packets; room-temperature storage cuts shelf life from 18 months to 6 weeks. For colorimetric kits, shake bottles for 60 seconds before every test—reagents separate when stored vertically. Check calibration monthly by testing Hanna’s 0.05 ppm standard; if it reads 0.07 ppm, replace the cuvette (scratches scatter light).
The 30-Second Reagent Lifesaver
Before adding reagents to your sample, invert the bottle 10 times while covered with a finger. This remixes settled compounds that cause 50% of “zero” false readings. Reef keeper “Bear22” documented how this simple step made his Salifert kit readings match his Hanna Checker within 0.01 ppm.
Track Trends, Not Single Readings: Log Your Phosphate Data
A single phosphate number is meaningless—it’s the trajectory that matters. Test every Tuesday before feeding at 9 AM (phosphate peaks 2 hours post-feeding). In your log, note:
– Water change volume the prior day
– New fish or coral additions
– GFO media changes
– Algae observations
When your graph shows phosphate rising 0.005 ppm weekly despite stable feeding, you’ve detected a hidden source like decaying rock rubble. This predictive power lets you fix problems before algae appears.
Stop Bubble and Turbidity Interference in Photometric Tests
Bubbles clinging to cuvette walls cause the most common Hanna Checker errors—readings jump 0.01-0.03 ppm higher. Fix this by swirling (not shaking) the sample after reagent addition. For turbid tanks, filter samples through coffee filters before testing; particulate matter scatters light, inflating results by up to 40%. Never test water with active medication—copper treatments create false highs by reacting with reagents.
Final Note: Mastering how to check phosphates in aquarium water transforms you from a reactive cleaner to a proactive ecosystem engineer. For reef tanks, commit to weekly Hanna ULR testing to maintain that critical 0.01-0.03 ppm sweet spot where corals explode with growth. Freshwater plant keepers should test biweekly with API kits, adjusting fertilization to stay between 0.5-2.0 ppm. Always test source water first—your tap may be the hidden phosphate bomb. When algae strikes, revisit your phosphate logs; the spike that started it happened weeks earlier. For next-level precision, pair phosphate tests with nitrate checks to maintain the 16:1 Redfield ratio that starves algae while feeding corals and plants. Your crystal-clear, thriving tank starts with one accurate test today.