How to Get Clear Aquarium Water Fast
Your aquarium water looks like pea soup after feeding, or maybe it’s developed a stubborn milky haze that won’t clear despite weekly water changes. That cloudy water isn’t just unsightly—it stresses fish, blocks light for plants, and signals an unbalanced ecosystem. The good news? You don’t need expensive equipment or chemistry degrees to achieve that glass-like clarity everyone admires. By targeting the specific cause of your cloudiness and optimizing your filtration system, you can transform murky water into a crystal-clear showcase within two days. This guide cuts through the confusion with actionable steps based on proven mechanical, chemical, and biological solutions—no vague advice or temporary fixes.
Identify Your Cloudiness Type: White, Green, Brown, or Hazy
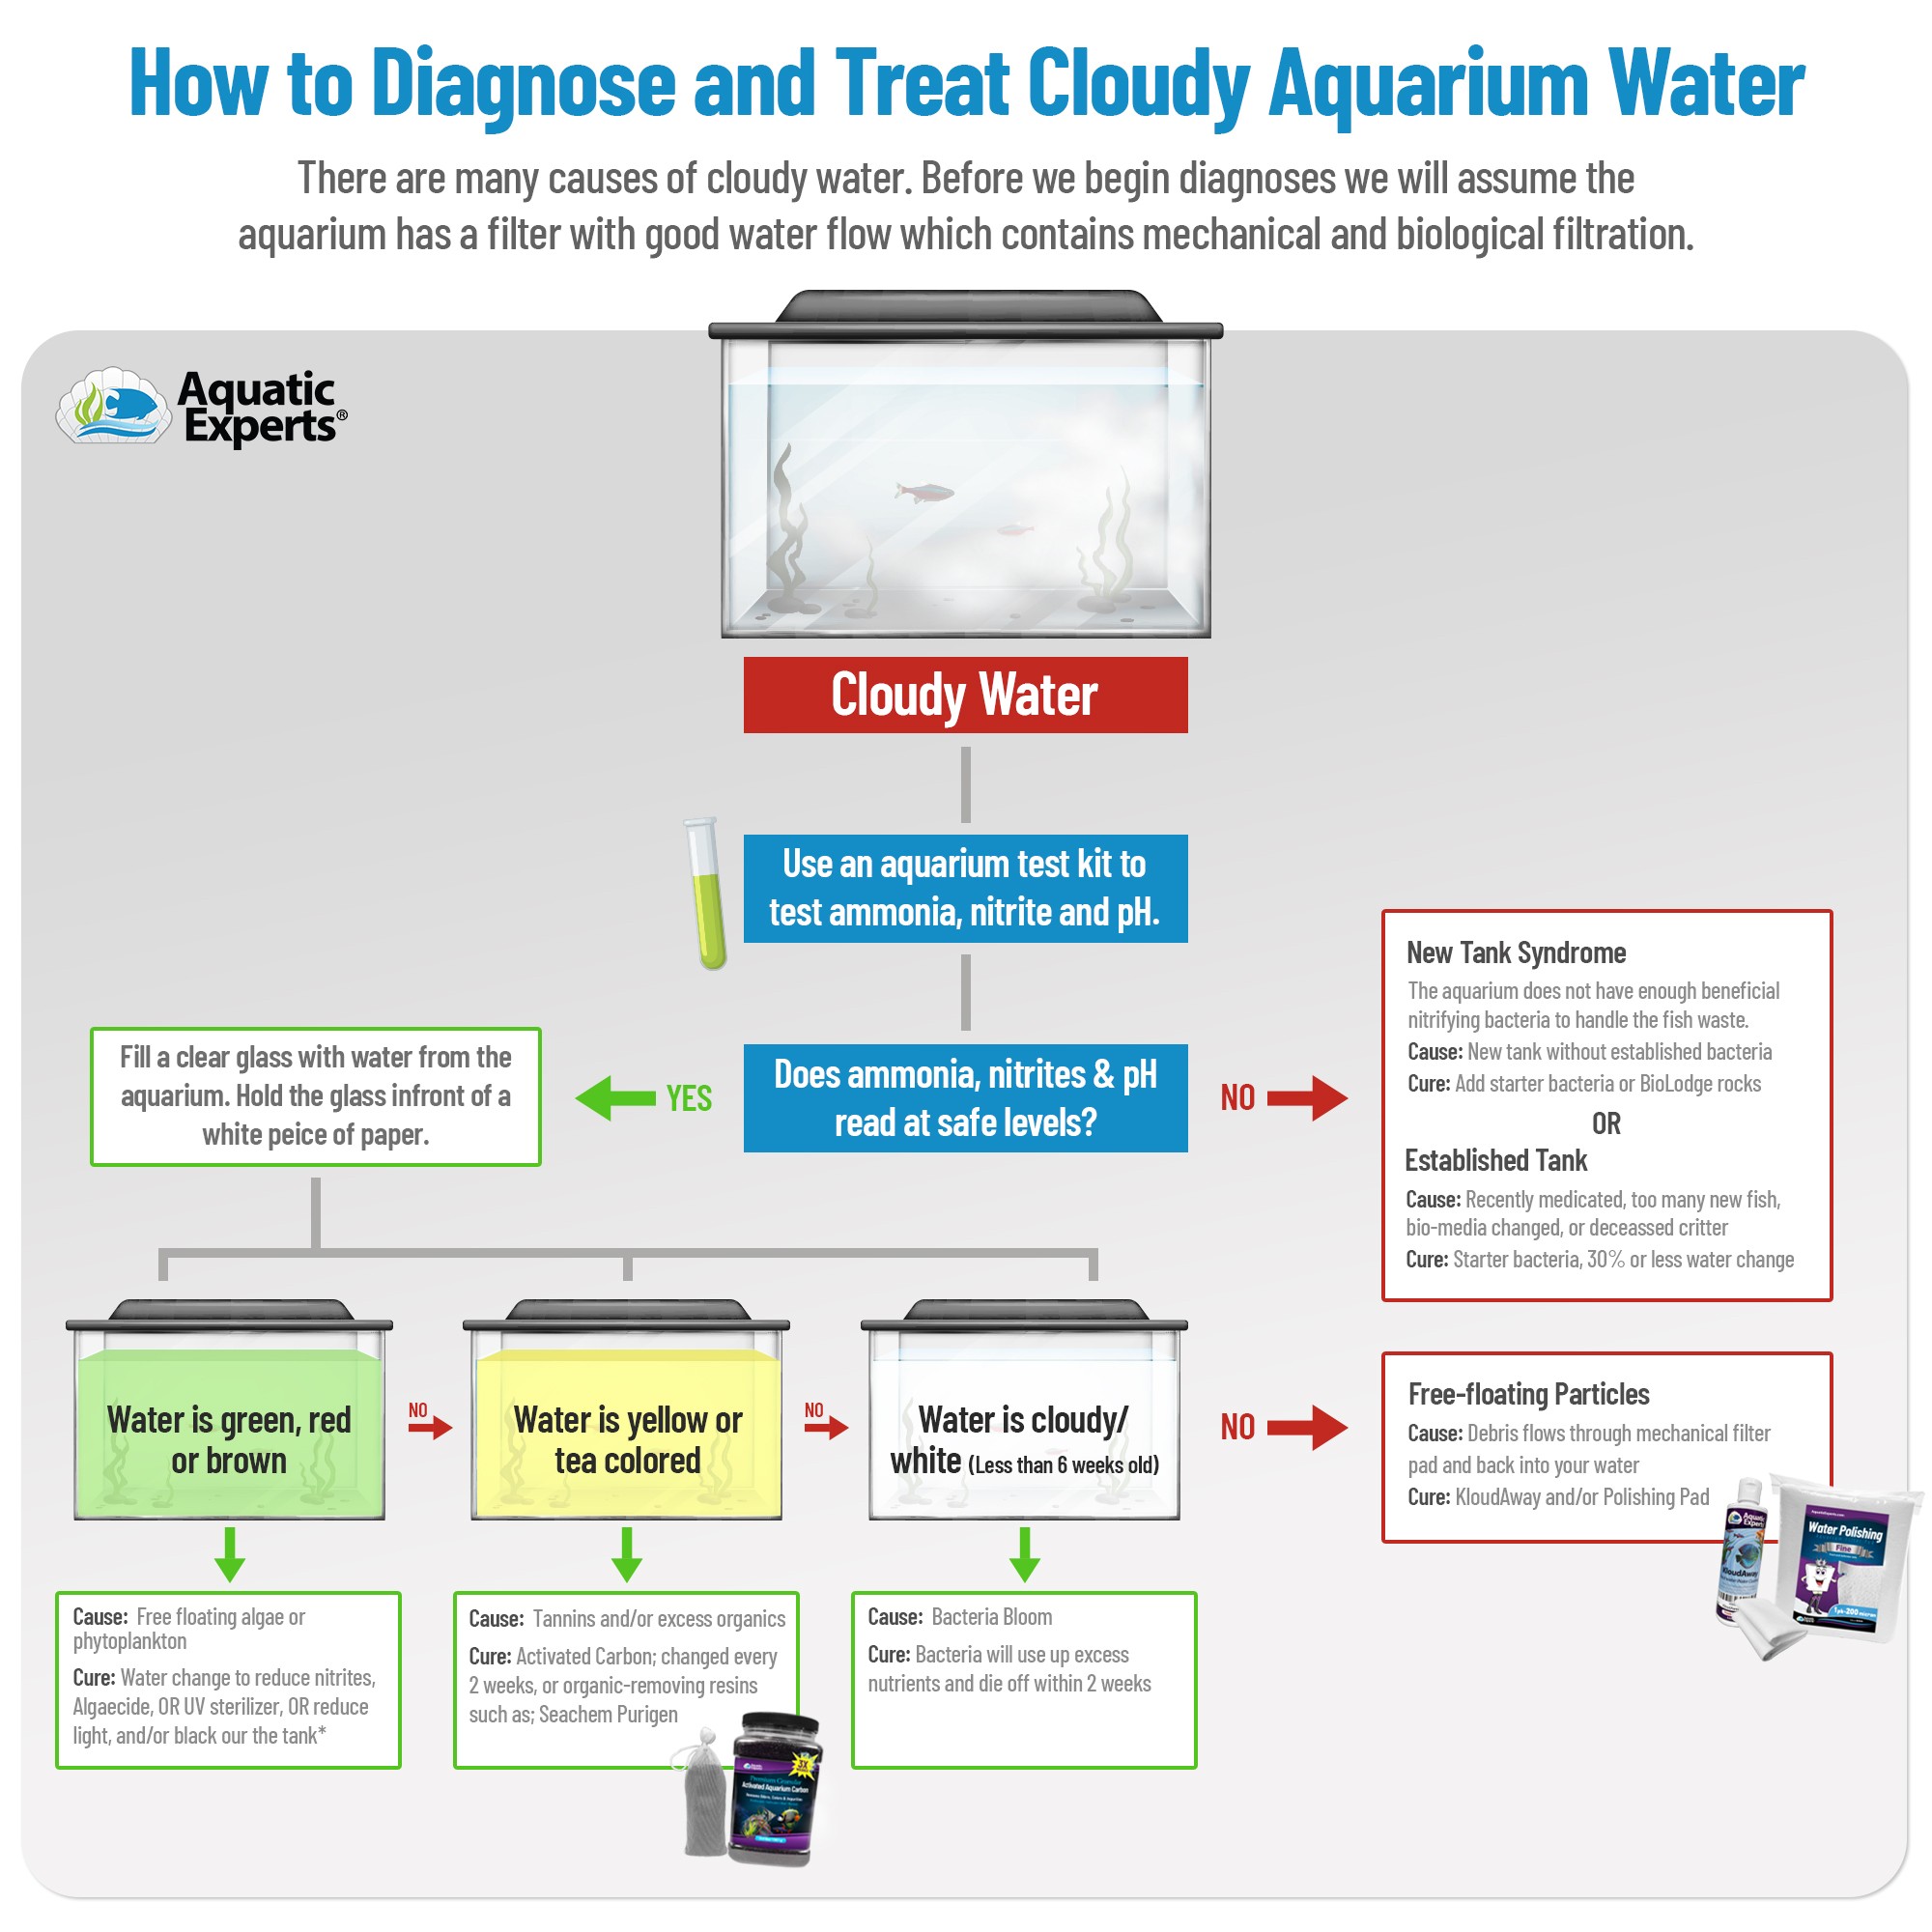
Before grabbing your siphon hose, pinpoint exactly what’s clouding your tank. Each type requires a different solution, and misdiagnosis wastes time while the problem worsens. Hold a flashlight sideways across your tank to reveal the true color and texture of the cloudiness.
White or Gray Haze: Bacterial Bloom in New Tanks
This milky, opaque cloud appears suddenly in new aquariums or after deep cleaning. It’s caused by a bacterial bloom as beneficial microbes multiply rapidly to process waste. While harmless to fish, it indicates an immature or disrupted nitrogen cycle. Don’t panic—this usually clears in 3-5 days as bacteria colonies stabilize. Never perform massive water changes during this phase, as it resets the cycling process and prolongs cloudiness.
Green Water: Algae Bloom from Light and Nutrients
When your tank resembles liquid spinach, you’re dealing with free-floating single-celled algae. This explosive growth occurs when excess nutrients (nitrates and phosphates from overfeeding or decaying matter) combine with too much light. Unlike surface algae, green water particles are microscopic and pass through standard filters. The key giveaway? Water clarity changes within hours of turning on lights—proof that light fuels the bloom.
Brown or Yellow Tint: Tannins from Driftwood
A tea-colored tint typically comes from driftwood leaching tannins, especially in new setups. While natural and harmless (even beneficial for some fish species), it obscures visibility. Test if it’s tannins by placing a white paper behind the tank—if the water casts a yellow shadow, tannins are the culprit. Purigen resin that’s reached absorption capacity can also cause this discoloration.
Persistent Hazy Film: Suspended Particles Too Fine for Filters
This faint, non-settling haze often appears after substrate disturbance or using low-quality gravel. It’s caused by ultrafine dust particles smaller than 10 microns that bypass your filter’s mechanical media. Unlike bacterial blooms, this cloudiness won’t clear naturally—it requires upgrading your filtration to capture sub-micron particles.
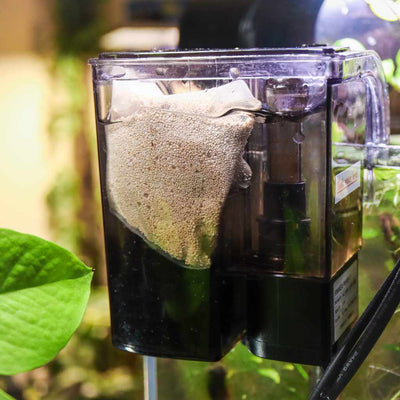
Upgrade Mechanical Filtration for Immediate Particle Removal
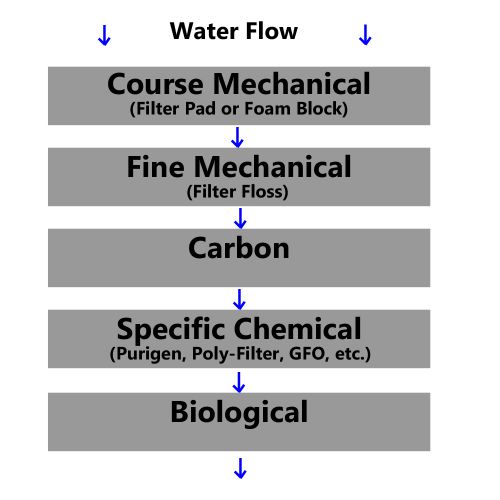
Your filter’s mechanical stage is the frontline defense against visible cloudiness. Most standard filters capture only large debris, leaving microscopic particles circulating. The solution? Add micron-level polishing media without disrupting beneficial bacteria.
Use 20-50 Micron Filter Socks for Final Polishing
Attach a micron sock directly to your filter outlet or place it inside your canister filter. These capture particles as small as 20 microns—ten times finer than standard filter floss. For severe haze, start with a 50-micron sock, then switch to 20-micron after 24 hours. Replace or rinse these weekly; when water visibly darkens the sock, it’s working. Pro tip: Position the sock so water flows through it vertically, not horizontally, for maximum particle capture.
Layer Filter Media from Coarse to Fine
Arrange media in this order inside your filter: coarse sponge → fine filter pad → micron sock. This “wedding cake” approach prevents clogging by trapping larger debris first. Never clean all layers at once—stagger maintenance to preserve bacteria colonies. Replace the fine pad monthly, but only rinse sponges in old tank water (never tap water) to avoid killing beneficial microbes.
Clean Micron Bags Weekly Without Disrupting Bacteria
When changing micron socks, squeeze them in a bucket of removed tank water—not under the tap. Tap water’s chlorine destroys the biofilm on media that houses nitrifying bacteria. If flow slows dramatically, it means the sock is overloaded; replace it immediately rather than rinsing, as trapped particles will re-enter water when disturbed.
Deploy Chemical Filtration to Remove Dissolved Impurities
Mechanical filtration handles visible particles, but dissolved compounds cause yellowing and fuel algae. Chemical media targets these invisible culprits. Skip generic “water polishers” and use these specific solutions.
Replace Activated Carbon Monthly for Yellowing Compounds
Activated carbon removes medications, odors, and organic compounds that tint water yellow. But it exhausts quickly—replace it every 30 days. For immediate results during cloudiness episodes, double the carbon dose temporarily. Note: Carbon won’t fix green water algae but prevents tannin-related yellowing.
Use Seachem Purigen for Nitrogenous Waste and Tannins
Purigen outperforms carbon for persistent clarity. This synthetic resin removes nitrogenous waste, tannins, and discoloration down to the molecular level. When exhausted (turns dark brown), regenerate it with a bleach solution—it lasts years. Place it after mechanical media so particles don’t clog it. Critical for planted tanks: Purigen won’t strip essential trace elements like some carbon products.
Add Phosphate Remover to Starve Algae Blooms
Drop a PhosGuard pouch into your filter compartment. Phosphates from fish waste and decaying plants feed algae blooms. Removing them starves green water at the source. Use alongside Purigen for combined nitrate/phosphate control. Test phosphate levels monthly; if above 0.5 ppm, leave the remover in until readings drop.
Stop Green Water Algae in 72 Hours with UV Sterilization
When mechanical and chemical fixes fail for green water, UV sterilization delivers rapid results. Unlike blackout methods that stress plants, UV kills algae cells instantly as water passes through the unit.
Install a UV Sterilizer on Your Filter Outlet
Mount a 5-9 watt UV unit inline with your filter’s outflow. Run it 24/7 for 3 days—algae cells die within seconds of UV exposure. For a 50-gallon tank, choose a unit rated for 100+ gallons to ensure sufficient dwell time. No electricity? Skip to the blackout method below.
Alternative: 3-Day Blackout Method for Algae Starvation
Cover the tank completely with opaque material (not just turning off lights). Algae dies within 72 hours without light, but plants weaken—so limit to 3 days max. Remove all decaying matter beforehand, as decomposition during blackout worsens water quality. Restore normal lighting gradually afterward.
Reduce Light Duration to 6 Hours After Clearing
Once water clears, prevent regrowth by limiting light to 6 hours daily. Use a timer to avoid accidental overexposure. If algae returns, add fast-growing plants like hornwort that outcompete algae for nutrients.
Prevent Cloudiness by Controlling Feeding and Stocking
Most cloudiness stems from excess waste overwhelming your filter. These two adjustments reduce the root cause by 50%.
Feed Only What Fish Eat in 1 Minute, Twice Daily
Overfeeding causes 80% of water clarity issues. Drop tiny portions—any uneaten food decays into ammonia within hours. Use sinking pellets for bottom feeders to prevent surface cloudiness from floating crumbs. If food remains after 60 seconds, you’re overfeeding.
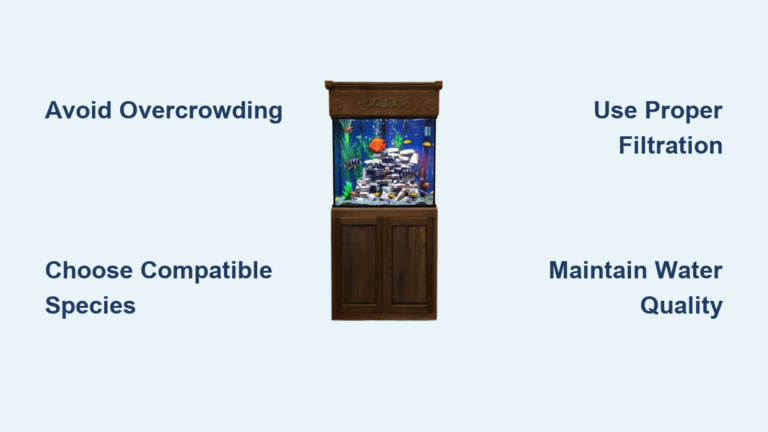
Calculate Fish Capacity: 1 Inch Per Gallon Rule
Overstocking drowns filters in waste. For community tanks, allow 1 inch of adult fish length per gallon (e.g., 10 fish in a 10-gallon tank). Large or messy fish like goldfish need double that space. Remove excess fish immediately if cloudiness persists after other fixes.
Vacuum Gravel During Water Changes to Remove Waste
Siphon 25-50% of water weekly while disturbing the top 1/4 inch of substrate. This removes trapped detritus before it decays. Hold the siphon tube just above the gravel—sucking up substrate stirs up particles and causes immediate cloudiness.
Implement a Weekly Maintenance Routine for Crystal Water
Consistency beats intensity. This 20-minute weekly ritual prevents 90% of cloudiness issues:
Monday: 30% Water Change and Gravel Vacuuming
Use a gravel vacuum siphon to remove debris while changing water. Match new water temperature within 1°F of tank water to avoid shocking fish. Always add dechlorinator to new water first.
Wednesday: Rinse Filter Media in Old Tank Water
Remove only the coarse sponge and fine pad—never all media at once. Swish gently in a bucket of removed tank water until debris clears. Never replace biological media unless crumbling.
Saturday: Test Water Parameters and Clean Glass
Check ammonia (should be 0 ppm), nitrites (0 ppm), and nitrates (<20 ppm). High nitrates indicate overfeeding. Scrape algae with a magnetic cleaner—avoid chemicals that cloud water.
Achieving crystal clear aquarium water requires diagnosing your specific cloudiness type, then deploying targeted filtration and maintenance. Start with mechanical upgrades like micron socks for instant particle removal, add chemical media like Purigen for dissolved impurities, and implement strict feeding controls to prevent recurrence. Within 48 hours of following these steps, your tank will transform from murky to mirror-like. Remember: clarity isn’t about perfection—it’s about balance. A well-maintained tank develops natural clarity as its ecosystem matures, turning your aquarium into the stunning focal point it was meant to be.