How to Use a Gravel Vacuum in an Aquarium
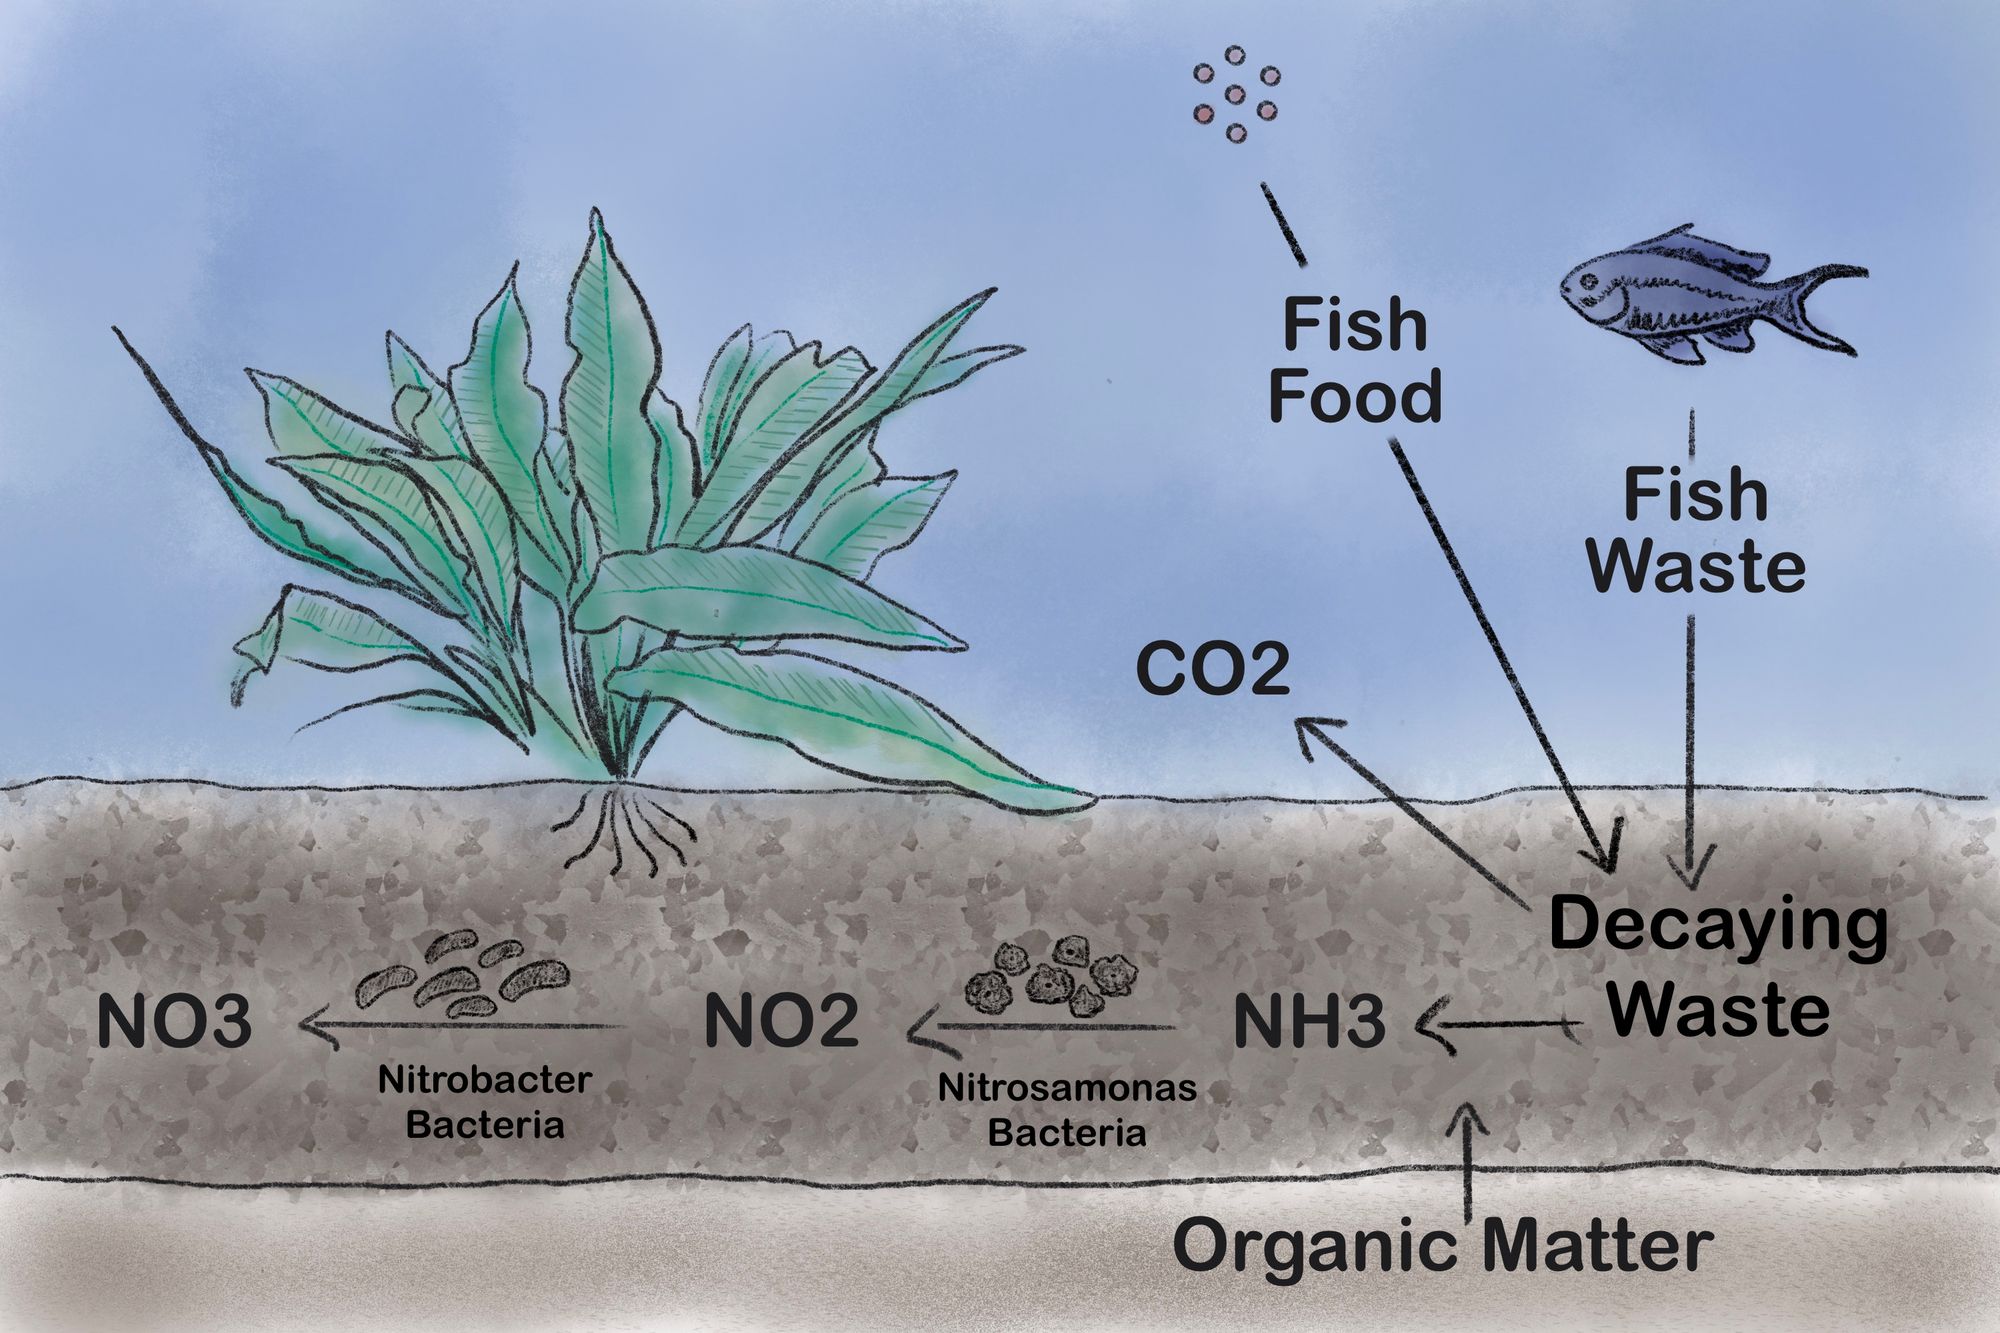
Your aquarium’s gravel hides dangerous waste that clouds water and threatens fish health, yet many hobbyists struggle with the simplest solution: learning how to use a gravel vacuum in an aquarium properly. Without regular gravel cleaning, uneaten food and fish waste decompose into toxic ammonia and nitrates, causing algae blooms and fish stress. This guide cuts through the confusion with field-tested techniques that remove debris while preserving your tank’s beneficial bacteria. You’ll master siphon-starting tricks that avoid mouth contact, discover the exact pressure needed to clean without disturbing substrate, and learn critical timing rules to prevent ecosystem collapse—all while keeping your fish calm and your water crystal clear.
Why Mouth Siphoning Risks Your Entire Aquarium Ecosystem
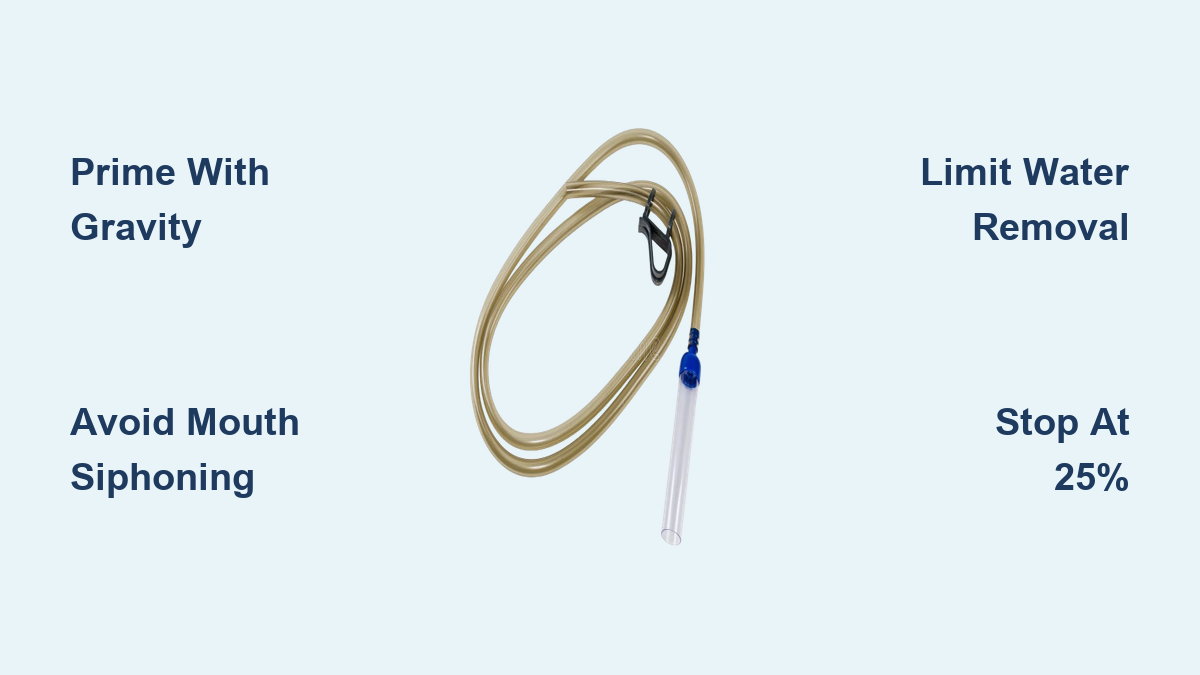
Forcing water flow by sucking on a gravel vacuum tube introduces human bacteria into your tank and risks accidental ingestion of contaminated water. Chemical residues from your mouth can also disrupt the delicate nitrogen cycle, triggering dangerous ammonia spikes within hours. Professional aquarists universally avoid this method because it compromises water chemistry and exposes you to pathogens from decaying organic matter. Instead, leverage physics-based priming techniques that create instant siphon flow without any mouth contact—keeping your tank sterile and your family safe. These methods work reliably whether you’re maintaining a 10-gallon betta tank or a 55-gallon community setup.
Gravity-Priming Method for Instant Flow
Submerge your entire gravel vacuum tube and connected hose in the aquarium until completely filled with water. Seal the discharge end of the hose tightly with your thumb while lifting the tube vertically. Position the sealed hose end into your drain bucket (which must sit lower than the tank). Release your thumb the moment the tube’s top edge breaks the water surface—gravity immediately pulls water down the hose, establishing a powerful siphon. This technique works flawlessly for standard Python-style vacuums and requires zero special equipment. Watch for the water stream to turn clear within 2 seconds, confirming proper siphon formation.
Bucket Lift Technique for Stubborn Siphons
When gravity priming fails due to air pockets, use this foolproof alternative: Fill the vacuum tube and hose completely underwater, then keep the discharge end sealed while transferring it to your empty bucket. Submerge the entire assembly back into the tank, ensuring the bucket remains positioned below the tank’s water level. Unseal the hose end while fully submerged—the sudden pressure change triggers instant siphon flow. This method excels with wider-diameter hoses (over ½ inch) that resist standard priming. If flow stalls, gently wiggle the tube near the gravel surface to dislodge trapped air bubbles without disturbing substrate.
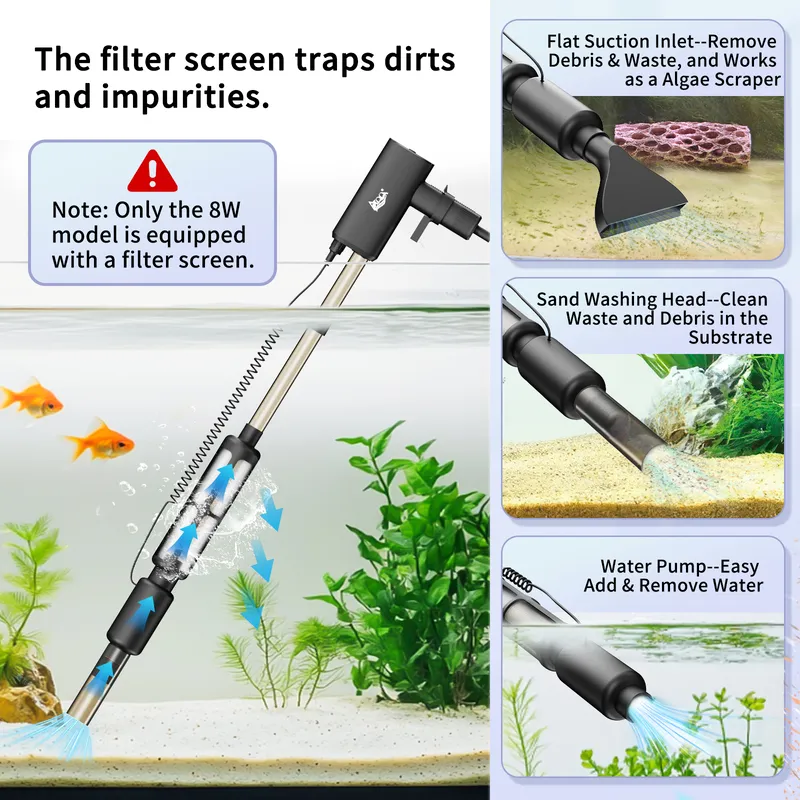
Pump-Style Vacuum Operation for Effortless Cleaning

Models like the Dennerle Cleanator eliminate manual siphon struggles through built-in hand pumps. Submerge the vacuum head completely, then squeeze the pump bulb 3-5 times until water flows steadily through the discharge hose. The pump creates negative pressure that pulls water through the tube without requiring bucket positioning tricks. This system prevents accidental over-draining since flow stops immediately when you release the bulb—critical for tanks with fry or delicate shrimp. While these units cost more upfront, they’re indispensable for frequent water changes in reef tanks where even minor chemical fluctuations harm corals. Note that imported models may face 3-month shipping delays, so order early.
Preparing Your Tank for Safe Gravel Vacuuming
Place your empty drain bucket on the floor beneath the aquarium to ensure proper siphon physics. Connect the vacuum tube securely to your hose, checking for cracks that could break suction. Remove decorations blocking access to dirty gravel zones, but leave plants undisturbed to avoid uprooting. Dim tank lights 15 minutes beforehand to reduce fish stress—most species become less active in low light. Confirm your replacement water is dechlorinated and matches the tank temperature within 1°F using a dual thermometer; sudden changes cause lethal shock during refills.
Critical Bucket Positioning Mistake to Avoid
Never position your drain bucket higher than the aquarium water line—this reverses siphon flow and floods your floor. Always place buckets at least 6 inches below the tank’s rim. For stand-mounted aquariums, use a bucket on the ground rather than a chair. Test positioning by starting a brief siphon before vacuuming; if water flows upward toward the bucket, immediate repositioning is required. This single adjustment prevents 90% of beginner flooding disasters.
Executing the Perfect Gravel Vacuum Pass
Insert the vacuum tube vertically into the substrate until the head sits 1-2 inches deep. Gently wiggle the tube side-to-side to lift embedded debris without sucking gravel into the hose. The ideal motion resembles stirring coffee—small circular motions dislodge waste while heavier stones fall back. Maintain 45-degree tube angles when near plant roots to avoid uprooting. Focus on high-traffic zones like feeding areas where uneaten pellets accumulate, but skip recently planted sections to protect root systems.
How to Adjust Suction for Delicate Inhabitants
If fry or shrimp appear near the vacuum head, immediately reduce flow by pinching the hose midway or bending it into a gentle U-shape. Models with flow control valves should be set to 30% capacity near vulnerable species. Never hover the tube within 3 inches of bottom-dwellers like corydoras—these fish panic and dart into the suction stream. For planted tanks, vacuum only every other row of gravel to leave bacterial colonies undisturbed between cleanings.
Knowing When to Stop: Avoiding Bacterial Collapse
Remove no more than 25-30% of your tank’s water during each session, and vacuum only half the substrate area. Over-cleaning strips essential nitrifying bacteria that convert ammonia, causing dangerous “new tank syndrome” spikes even in established aquariums. Stop immediately if water turns milky white—this signals excessive bacterial clouding from over-agitation. A healthy vacuum session should take 8-12 minutes for a 30-gallon tank; timing yourself prevents over-enthusiastic cleaning. Always leave visible brownish biofilm on gravel surfaces, as this indicates thriving beneficial colonies.
Troubleshooting Weak Siphon Flow in 60 Seconds
If water trickles instead of flowing steadily, submerge the entire assembly and restart using the bucket lift method. Check for kinks in coiled hoses—straighten all bends before restarting. For persistent weak flow, detach the tube and inspect the head for hair-like algae clogs; a pipe cleaner clears obstructions in seconds. If using well water, mineral deposits may narrow the tube interior—soak components in vinegar for 10 minutes monthly. Never force flow by lowering the bucket further; this usually indicates an air leak at hose connections.
Preventing Accidental Over-Draining Disasters
When water levels approach the 30% removal mark, lift the vacuum tube completely out of the substrate while keeping it submerged. The siphon breaks instantly as air enters the tube. Alternatively, kink the hose tightly against the tank rim to halt flow without disconnecting. Never rely on bending the hose alone—this often fails during critical moments. Pro tip: Mark your tank glass with a grease pencil at the 25% water level before starting; this visual cue prevents guesswork during cleanup.
Setting Your Gravel Vacuum Schedule for Crystal Water
Vacuum weekly for heavily stocked tanks (over 1 inch of fish per gallon) or with messy eaters like goldfish. Tanks with algae-eaters or sand substrates need biweekly sessions. Skip vacuuming entirely during new tank cycles (first 4-6 weeks) to preserve developing bacteria. Always vacuum before feeding to capture uneaten pellets, and never on the same day as medication treatments—this flushes critical additives. Track sessions in your aquarium log; consistent timing prevents nitrate buildup that causes chronic fish illness.
Water Temperature Matching Protocol for Stress-Free Refills
Refill with dechlorinated water warmed to within 1°F of tank temperature using a separate container. Float the replacement water container in the aquarium for 20 minutes before adding. Pour new water slowly over a plate placed on the gravel to prevent substrate disturbance. Add water in 10% increments with 5-minute pauses between additions, monitoring fish behavior for stress signs like rapid gill movement. Never add water directly from the tap—even “conditioned” water shocks fish if temperature differs by more than 2°F.
Post-Cleaning Fish Health Monitoring Checklist
Observe fish for 1 hour after vacuuming: normal behavior includes resumed feeding and relaxed fin positioning. If fish dart frantically or hide excessively, test ammonia levels immediately—values above 0.25 ppm require a 15% emergency water change. Cloudy water clearing within 24 hours indicates healthy bacteria rebound; persistent murkiness after 48 hours signals over-cleaning. Document any unusual behaviors in your log to adjust future sessions. Within 72 hours, nitrate levels should drop 10-20 ppm, confirming effective waste removal.
Final Note: Mastering how to use a gravel vacuum in an aquarium transforms maintenance from a chore into a precise science that safeguards your ecosystem. By following these physics-based siphon techniques and bacterial preservation rules, you’ll maintain spotless gravel without endangering fish—keeping nitrates low and oxygen levels high. Commit to weekly 10-minute sessions using the gravity-priming method, and you’ll rarely face algae outbreaks or mysterious fish deaths. For deeper dives, explore our guide on “Choosing Between Gravel and Sand Substrates for Low-Maintenance Tanks” to optimize your cleaning routine from the ground up.