How to Make an Aquarium Divider – Easy DIY Guide
Is your betta relentlessly flaring at its reflection in the glass, or do you need to safely separate aggressive fish in a community tank? Creating a custom aquarium divider solves these problems without breaking the bank. Unlike store-bought options that often warp, leak, or restrict water flow, a DIY divider gives you precise control over fit, visibility, and fish safety. Whether you’re consolidating two bettas into a 20-gallon long—or creating a nursery for fry—this guide delivers battle-tested methods used by experienced aquarists. You’ll learn exactly how to build a secure, water-permeable barrier using affordable materials, avoid toxic mistakes that endanger fish, and implement pro tips that ensure long-term success. By the end, you’ll have a reliable divider that maintains tank harmony while keeping your aquatic residents stress-free.
Why Your Tank Needs a Custom-Built Divider
Off-the-shelf dividers frequently fail because they’re mass-produced for generic tank sizes, leading to dangerous gaps where small fish escape or get trapped. A properly fitted DIY divider eliminates these risks while solving specific behavioral issues. One aquarist successfully separated two bettas in a 20-gallon long by building a custom acrylic barrier that prevented constant line-of-sight aggression—a common problem causing chronic stress. Unlike flimsy commercial options, your handmade divider can be tailored for optimal water flow, ensuring consistent temperature and chemistry on both sides. This precision is critical for sensitive species like dwarf cichlids or shrimp colonies where even minor imbalances cause fatalities. Most importantly, you’ll avoid the $20–$50 cost of retail dividers while gaining a solution designed for your exact tank dimensions and fish needs.
Essential Materials for Every DIY Divider Method

Your material choice depends on tank size, fish species, and whether you need temporary or permanent separation. Always prioritize aquarium-safe components—non-toxic silicone, food-grade plastics, or untreated glass—to prevent chemical leaching. Here’s what you’ll need for each proven method:
Plastic Mesh Divider Essentials
- Plastic canvas mesh (1/4-inch grid, craft store): Flexible enough for friction-fit installation yet rigid for structural integrity
- 100% aquarium-safe silicone (black or clear): For sealing edges and creating gaskets—never use household silicone
- Foam weather-stripping (1/4-inch diameter, low-density): Creates fish-safe seals around edges
- Scissors with serrated edges: Prevents mesh unraveling during cutting
- Permanent marker & ruler: For precise measurements
Rigid Plastic Divider Kit
- Heavy-duty binder dividers or 1/8-inch acrylic sheets: Ideal for tanks under 30 gallons
- Drill with 1/16-inch bit: For creating uniform water-flow holes
- Aquarium-safe super glue gel: Bonds foam gaskets without fumes
- Suction cups with plastic connectors: For adjustable height positioning
Glass Divider Supplies (For 30+ Gallon Tanks)
- 1/4-inch tempered glass (cut 1/4 inch smaller than tank interior): Prevents seam stress—critical for large tanks
- Glass cutter & running pliers: For DIY cutting (or use Lowe’s free cutting service)
- Silicone applicator tool: Ensures smooth, bubble-free sealant application
Plastic Mesh Divider: Step-by-Step Build Guide
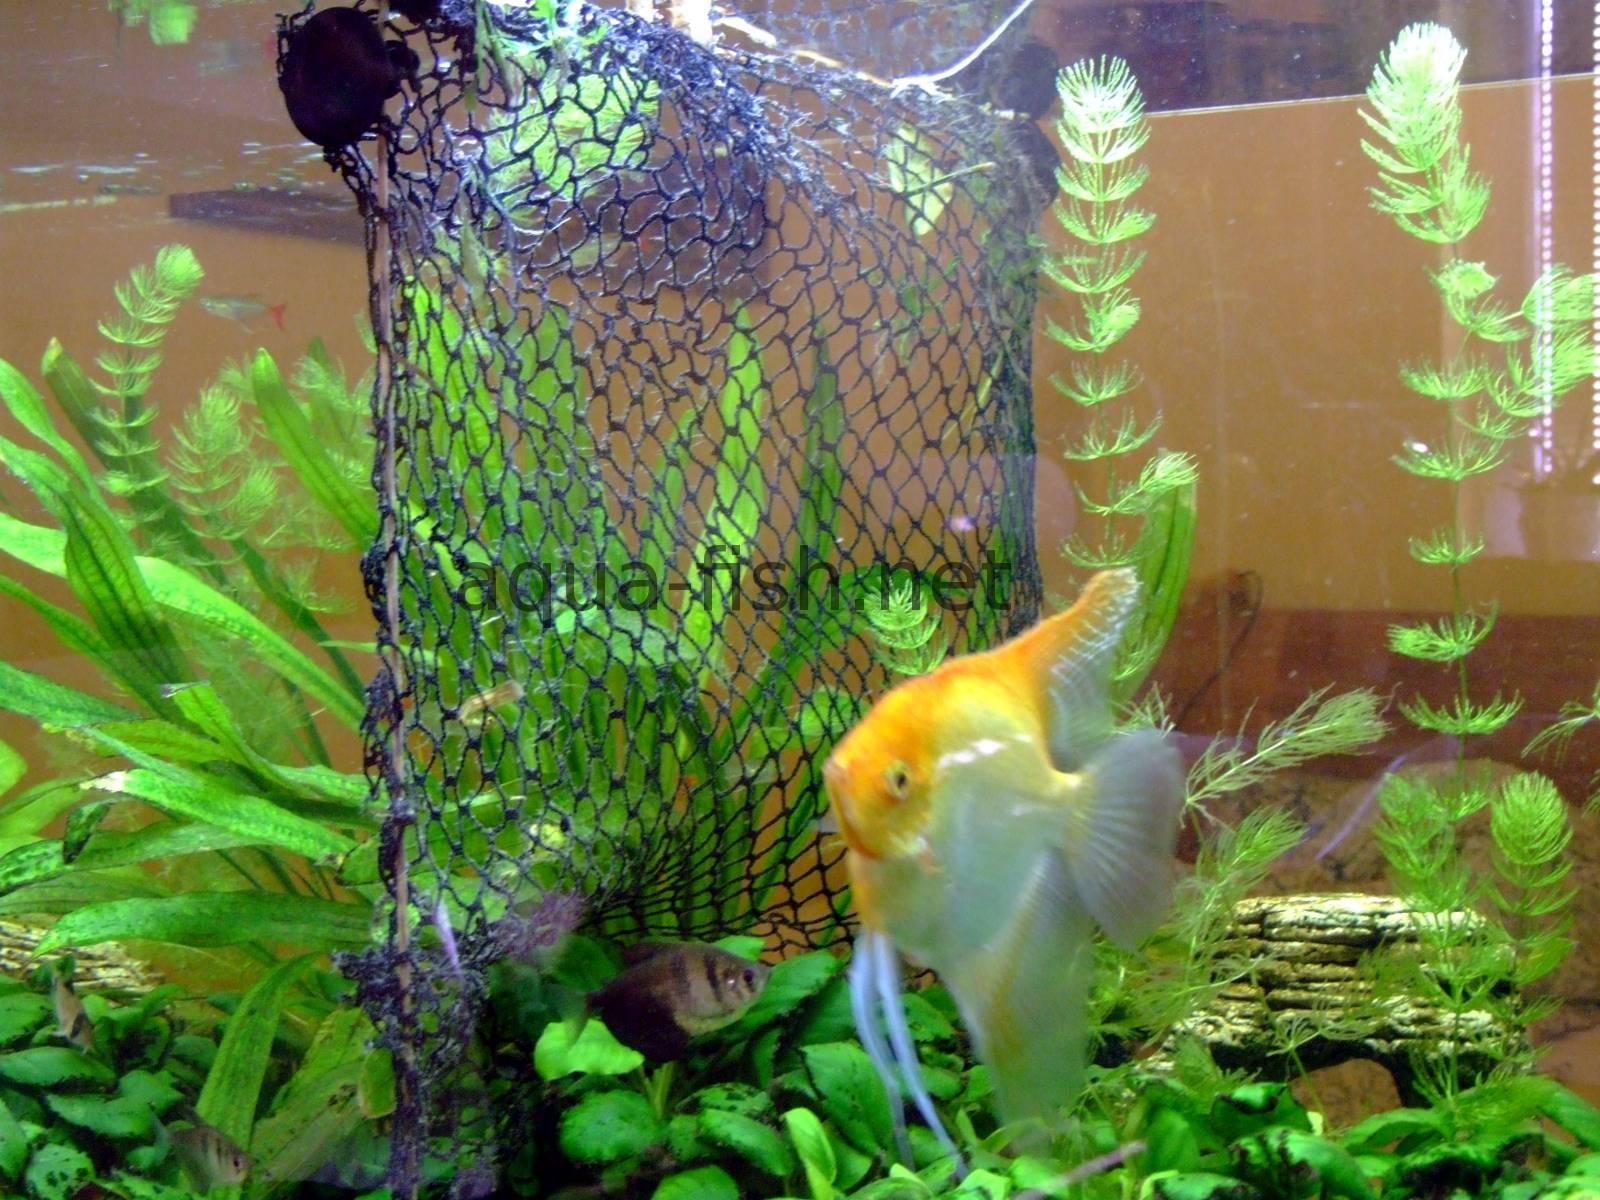
This method works best for tanks under 20 gallons and offers superior water flow for fry separation. The mesh allows visibility while preventing aggression-triggering reflections.
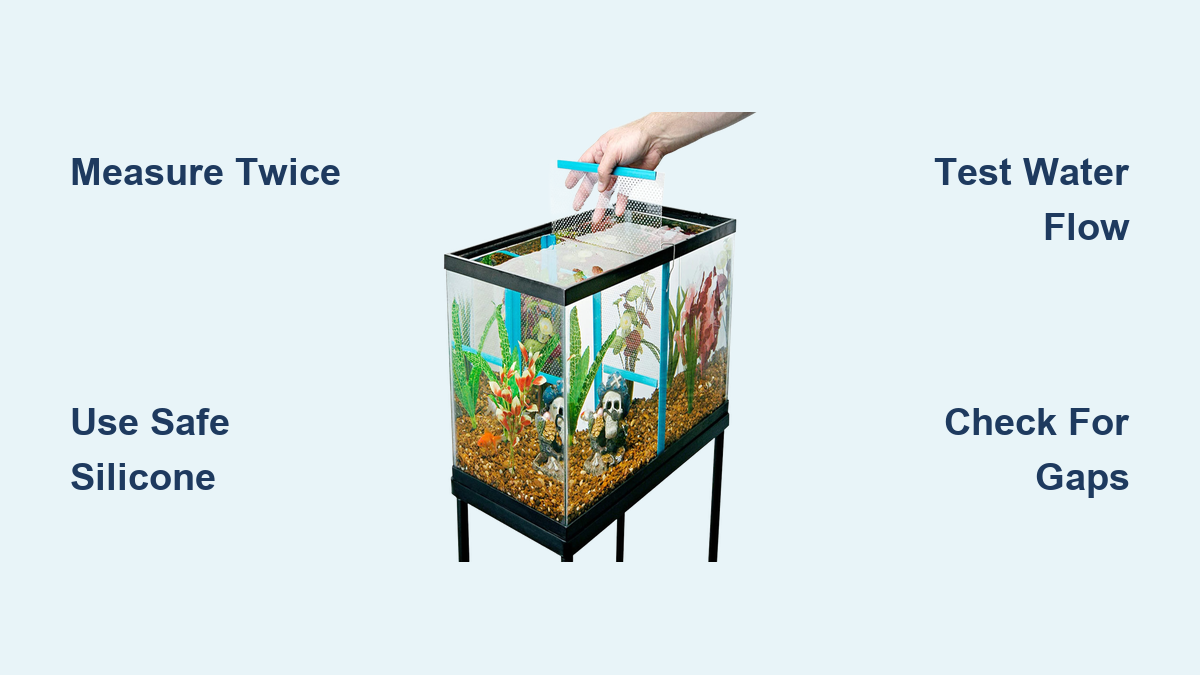
Measure Twice, Cut Once for Perfect Fit
Start with dry measurements of your tank’s interior width (front-to-back) and height (bottom-to-waterline). Measure at three points—left, center, right—as tanks often warp slightly. Subtract 1/8 inch from each dimension to allow for a snug friction fit. For example, a 20-gallon long (interior width: 30 inches) needs a mesh piece cut to 29 7/8 x 11 7/8 inches. Mark measurements with a permanent marker, then cut using serrated scissors in one smooth motion to avoid fraying.
Install a Leak-Proof Seal System
Wrap foam weather-stripping around the mesh perimeter using aquarium-safe super glue gel. Press firmly for 30 seconds per section to ensure adhesion. For tanks with silicone seams, apply a thin bead of aquarium sealant along the bottom glass edge where the divider will sit. Insert the mesh divider gently—never force it—and hold vertically for 60 seconds. Wait 48 hours before adding water to allow full silicone cure. Test for gaps by pouring a cup of tank water on one side; it should flow through within 30 seconds.
Rigid Plastic Divider: Quick Installation for Small Tanks
Ideal for temporary betta separations or hospital tanks, this method uses affordable office supplies with professional results.
Create Optimal Water Flow Holes
Cut your binder divider or acrylic sheet to size (subtracting 1/8 inch as above). Using a drill press (handheld drills cause cracks), drill 1/16-inch holes spaced 0.8 inches apart in a grid pattern. For fry protection, keep holes smaller than 1/8 inch—this blocks baby shrimp while allowing water exchange. Sand all edges with 220-grit paper to eliminate sharp points that could injure fish.
Secure Without Damaging Tank
Attach foam gasket strips to all edges with super glue gel. For adjustable height, glue plastic suction cup connectors to the top corners. Press the divider into place until the foam compresses slightly, creating a water-tight seal. Critical check: Insert a business card between divider and glass—if it slides freely, add more foam layers.
Glass Divider Installation for Large Community Tanks
For 30+ gallon tanks housing aggressive cichlids or territorial species, glass provides unmatched stability. This method requires careful execution but lasts decades.
Precision Cutting Avoids Catastrophic Leaks
Take exact interior measurements to a hardware store like Lowe’s—their glass cutting service is often free. Request the glass be cut 1/4 inch smaller than your tank’s width and height. Never use the thinnest glass option (typically 1/8 inch); it flexes under water pressure, risking cracks. For 55-gallon tanks, use 3/16-inch tempered glass. Clean the glass thoroughly with vinegar before installation to remove oils.
Silicone Bonding Technique for Permanent Security
Apply a continuous 1/4-inch bead of aquarium silicone along the tank’s bottom edge where the divider will stand. Position the glass panel slowly, wiggling slightly to spread the silicone evenly. Hold firmly for 90 seconds, then brace with foam blocks for 12 hours. Cure completely for 72 hours before filling—rushing this causes seal failure. Verify security by gently pressing the top edge; it should show zero flex.
Critical Fish Safety Checks You Must Perform
Skipping these steps risks fish injury or tank failure. Test your divider before adding fish:
- Escape proofing: Place small gravel shrimp on one side—if they squeeze through gaps within 10 minutes, reseal edges with foam
- Water flow verification: Add 1 drop of food coloring to one side; it should diffuse evenly within 2 minutes
- Reflection test: For bettas, cover one side with black paper—if flaring stops, your divider needs reduced visibility
- Stress monitoring: Observe fish for 24 hours—pacing, rapid gills, or hiding indicate divider anxiety
One aquarist prevented constant betta flaring by adding a removable black background to their acrylic divider, proving customization beats generic solutions.
Top 4 DIY Divider Mistakes That Harm Fish
Mistake 1: Using Non-Aquarium-Safe Sealants
Household silicones contain anti-mold agents toxic to fish. Solution: Only use products labeled “100% aquarium-safe” with no mildewcides. Test questionable sealants by submerging in a bucket with fish for 72 hours.
Mistake 2: Ignoring Glass Thickness Requirements
Too-thin glass (under 1/4 inch for 40+ gallon tanks) flexes and cracks under water pressure. Solution: For every 10 gallons over 20, add 1/16 inch to glass thickness. A 75-gallon tank requires 5/16-inch minimum.
Mistake 3: Creating Flow Blockages
Over-packing foam gaskets or using solid dividers starves one side of oxygen. Solution: Maintain at least 30% open area for water exchange. Use a flow meter app to verify equal current on both sides.
Mistake 4: Allowing Line-of-Sight Aggression
Clear dividers let fish see each other, causing chronic stress. Solution: For bettas or cichlids, use semi-opaque materials like frosted acrylic or add removable backgrounds.
Long-Term Divider Maintenance Schedule
A well-maintained divider lasts 3+ years. Follow this routine:
- Weekly: Remove during water changes and scrub algae with a soft toothbrush in old tank water—never use soap
- Monthly: Inspect for sharp edges or cracks; sand acrylic with 400-grit paper if needed
- Every 6 Months: Reapply silicone sealant to gasket edges if gaps appear
- Annually: Replace plastic mesh (it yellows and weakens) or check glass for stress fractures
Replace immediately if you notice cloudiness in acrylic (sign of chemical degradation) or persistent water leaks at seams.
Building your own aquarium divider transforms tank management from stressful to seamless. By following these precise methods—whether you choose flexible mesh for a betta tank or tempered glass for community setups—you’ll create a fish-safe barrier that outperforms commercial options at a fraction of the cost. Remember to prioritize material safety, perfect measurements, and water flow testing to prevent common pitfalls. Most importantly, observe your fish closely after installation; calm, active behavior confirms your divider is working. For ongoing success, incorporate monthly maintenance into your routine water changes. Ready to customize your tank? Start measuring tonight—your peaceful aquatic community awaits.