How to Remove Green Algae from Aquarium
Your aquarium water turns cloudy green overnight. Slimy green patches coat the glass, decorations, and plant leaves. You scrub it away only for it to return within days. This frustrating cycle affects 8 out of 10 freshwater aquarium owners. The truth? You can’t remove green algae permanently—algae spores exist in tap water, on plants, and even in the air. But you can eliminate visible growth within 72 hours and prevent recurrence by fixing the root causes. This guide delivers actionable, ecosystem-safe methods to regain crystal-clear water while protecting your fish, shrimp, and plants. Forget temporary fixes; you’ll learn how to starve algae at its source through precise nutrient control, strategic lighting, and biological cleanup crews proven in real shrimp tanks.
Why Your Aquarium Glass Gets Coated in Green Slime Within 48 Hours
Green algae isn’t a random invader—it’s a direct symptom of imbalanced tank conditions. Unlike toxic blue-green algae (cyanobacteria), true green algae appears as slippery green films on surfaces or free-floating particles clouding the water. It exploits three critical vulnerabilities in your setup: excess nutrients, uncontrolled lighting, and stagnant water flow. Spores enter through new plants, tap water during changes, or even airborne dust. When nitrates exceed 20 ppm or phosphates surpass 2 ppm, algae outcompetes your plants for resources. Most critically, leaving lights on longer than 8 hours daily or exposing your tank to direct sunlight triggers explosive growth. If you’ve recently overfed fish or skipped water changes, you’ve essentially served algae a buffet.
Critical Signs You’re Dealing With True Green Algae (Not Cyanobacteria)
- Texture: Smooth, slimy film easily scraped off glass (vs. thick, mat-like cyanobacteria that peels in sheets)
- Color: Bright emerald to dark green (cyanobacteria appears blue-green or reddish)
- Location: Covers all surfaces evenly (cyanobacteria clusters in low-flow areas)
- Response to cleaning: Returns rapidly within days if conditions remain unchanged
Immediate Physical Removal: Scrubbing Glass and Decor Without Killing Beneficial Bacteria

Removing visible algae requires precision to avoid crashing your nitrogen cycle. Never clean filter media, substrate, and decorations simultaneously—this destroys the bacterial colonies processing fish waste. Start with surface cleaning while preserving your tank’s biological balance.
Step-by-Step 30-Minute Algae Emergency Protocol
- Scrape glass first: Use a magnetic algae cleaner or dedicated toothbrush only on the viewing panel. For stubborn spots, dip the brush in 3% hydrogen peroxide (off-filter) and scrub for 15 seconds before rinsing with tank water.
- Clean decor in-tank: Remove rocks and driftwood one at a time. Scrub them underwater using a soft brush—never take them out completely. This preserves the biofilm on surfaces.
- Vacuum substrate strategically: Focus on high-waste areas near filters and feeding zones. Insert the vacuum 1/4 inch into gravel to lift detritus without disturbing deep bacteria colonies.
- Critical water change: Perform a 50% water change using old tank water you siphoned during vacuuming. This removes dislodged algae spores and dissolved nutrients. Never use tap water directly—it shocks fish and adds phosphates.
Pro Tip: Keep a separate bucket of tank water during cleaning. Use this to rinse decorations instead of tap water, preserving pH and temperature stability. Replace filter media in thirds monthly—never all at once.
Starve Algae at the Source: 6-Hour Lighting Schedule That Works

Light exposure is the #1 controllable trigger for green algae blooms. Most hobbyists unknowingly over-light their tanks by 2–4 hours daily. Direct sunlight through windows accelerates growth exponentially—just 30 minutes of morning sun can trigger a bloom.
Lighting Correction Protocol
- Set strict 6–8 hour photoperiod: Use an outlet timer ($5) to automate lights. Start at 6 hours if algae is severe; increase by 30 minutes weekly as it clears.
- Block ambient light: Position tanks away from windows. Cover three sides with background paper if relocation isn’t possible.
- Adjust spectrum: Switch to 6,500K LED bulbs (avoid full-spectrum “daylight” bulbs over 10,000K which promote algae). Reduce intensity to 50% during treatment.
Urgent Action: If water is pea-soup green, turn off lights completely for 48 hours after completing physical cleaning. Resume with 4-hour cycles.
Nutrient Control: How to Keep Nitrates Below 20 ppm and Phosphates Under 2 ppm

Excess nutrients feed algae like fertilizer. Fish waste, overfeeding, and tap water phosphates create the perfect storm. Testing reveals hidden imbalances—tap water often contains 1–5 ppm phosphates that accumulate weekly.
Weekly Nutrient Management Routine
- Test every 3 days: Use liquid test kits (API Freshwater Master) for nitrates and phosphates. Strips are unreliable below 5 ppm.
- Target levels: Nitrates <20 ppm, Phosphates <2 ppm. If tests exceed this:
- Perform 30% water changes every other day until levels drop
- Add phosphate remover media (Seachem PhosGuard) in filter
- Feeding adjustment: Give fish only what they eat in 90 seconds, once daily. Remove uneaten food after 2 minutes with a turkey baster.
| Parameter | Safe Level | Danger Zone | Correction Method |
|---|---|---|---|
| Nitrates | <20 ppm | >40 ppm | 30% water change + reduce feeding |
| Phosphates | <2 ppm | >5 ppm | Add phosphate remover + test tap water |
| Light | 6-8 hrs | >10 hrs | Install timer + block sunlight |
Biological Cleanup Crews: Shrimp and Snails That Eliminate Algae Overnight
Introducing the right algae-eaters creates a self-cleaning ecosystem. Avoid aggressive species like Chinese Algae Eaters that harm shrimp. Instead, deploy targeted grazers proven in heavily planted shrimp tanks.
Proven Algae-Eating Species for Different Tank Zones
- Glass and hardscape cleaners: Nerite snails (1 per 5 gallons)—their eggs won’t hatch in freshwater
- Substrate vacuumers: Malaysian Trumpet Snails (3 per 10 gallons)—aerate sand while eating detritus
- Plant leaf specialists: Amano shrimp (1 per 2 gallons)—consume hair algae and green film on delicate leaves
Real Tank Example: A 20-gallon shrimp tank with 15 Amano shrimp, 10 Nerites, and dense Java Fern went 14 months without manual algae cleaning. Key: The shrimp eat algae faster than it grows when nutrients are controlled.
Algaecide Emergency Protocol: When and How to Use Chemicals Safely
Chemical treatments like API Algaefix should be your absolute last resort—they kill beneficial bacteria and harm invertebrates. Reserve them for severe blooms that resist physical removal after 10 days of nutrient/light control.
Safe Spot-Treatment Method for Stubborn Algae
- Turn off filter and heater
- Mix 1 part 3% hydrogen peroxide with 9 parts tank water in a spray bottle
- Spray only on affected areas (avoid fish/plants)
- Wait 3 minutes, then restart filter
- Perform 25% water change after 1 hour
Critical Warning: Never use undiluted peroxide or commercial algaecides in shrimp tanks. If using API Algaefix, remove all shrimp/snails first and double-dose activated carbon afterward.
Complete Tank Reset: Bleach Sterilization Guide for Permanent Algae Eradication
When starting over, bleach is the only reliable method to kill algae spores in porous materials like driftwood. This isn’t regular maintenance—it’s for full system rebuilds after chronic algae issues.
Step-by-Step Bleach Reset Process
- Remove all livestock to a quarantine tank with aged water
- Disassemble completely: Take out sand, plants, decor, and filter
- Bleach soak: Mix 1 capful bleach per gallon of water. Submerge tank and non-electric parts for 15 minutes
- Triple-rinse: Spray every surface with dechlorinator (Sodium Thiosulfate), then rinse with tap water 3x
- Air dry 48 hours before reassembly
- Re-cycle: Add bottled bacteria (Tetra SafeStart) and run empty for 7 days before adding livestock
Pro Tip: Soak driftwood separately in bleach solution for 20 minutes—porous wood retains spores longer than glass.
Weekly Maintenance Schedule That Prevents Algae for 6+ Months
Consistency beats intensity. A 15-minute weekly routine prevents 95% of algae outbreaks by maintaining balance. Track parameters in a notebook—sudden changes indicate emerging problems.
Your Algae-Proof Weekly Checklist
- Monday: Test nitrates/phosphates. Vacuum substrate in high-waste zones
- Wednesday: Clean filter intake tube with old tank water. Trim fast-growing plants
- Saturday: 20% water change. Wipe viewing panel with algae magnet
- Daily: Feed once at consistent time. Remove uneaten food after 2 minutes
Expert Note: After 3 months of this routine, add fast-growing plants like Hornwort. They consume excess nutrients before algae can—creating natural competition.
Long-Term Prevention: Why “Algae-Free” Tanks Are a Myth (And What to Aim For Instead)
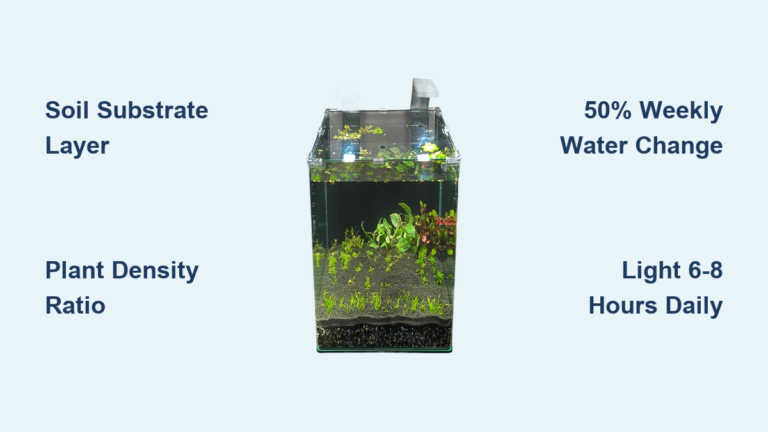
Accept that trace algae is normal—even pristine wild ecosystems have it. Your goal isn’t sterility but control where growth stays invisible. A healthy tank with balanced nutrients, appropriate lighting, and active cleanup crews will show zero visible algae on glass or decorations. Focus on these three pillars:
- Stability over perfection: Sudden changes in temperature or pH trigger blooms. Keep parameters within 0.5 pH units and 1°C daily fluctuation.
- Plant competition: Dense plant growth (30+ stems per 10 gallons) starves algae. Prioritize fast growers like Anacharis.
- Proactive monitoring: Test water every Sunday. If nitrates creep above 15 ppm, do an extra 15% water change immediately.
Green algae is your tank’s warning light—not a failure. By addressing nutrient imbalances within 48 hours of spotting the first green film, you’ll maintain crystal-clear water indefinitely. The most successful hobbyists don’t fight algae; they design ecosystems where it simply can’t gain a foothold. Start tonight with a 50% water change and 6-hour light schedule—you’ll see visible improvement by morning.