How to Use Aquarium Filter: Quick Guide
That frustrating moment when your new aquarium water turns cloudy overnight isn’t magic—it’s a filter setup mistake. When beneficial bacteria can’t thrive because your filter isn’t primed correctly or media is misplaced, ammonia spikes threaten your fish within hours. Learning how to use aquarium filter properly transforms murky water into a thriving ecosystem. This guide cuts through the confusion with exact steps for priming, media placement, and maintenance—no aquarium degree required. You’ll discover why skipping one critical submersion step burns out pumps and how to avoid the #1 mistake that crashes your nitrogen cycle.
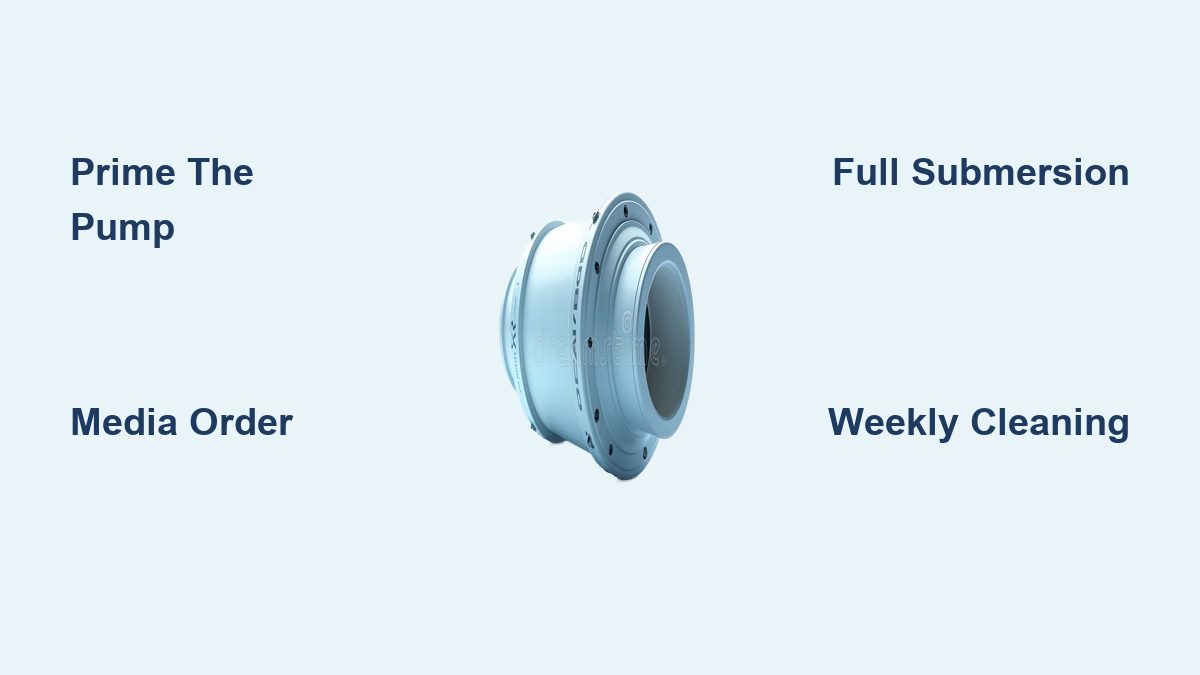
Prime Your Filter Pump to Avoid Costly Airlocks
Skipping proper priming causes 70% of new tank failures. Your filter won’t move water until air inside the housing gets replaced with water—a process called priming. Here’s exactly how to prime any filter type successfully:
- Turn off all electrical components and unplug the filter. Safety first—never handle electrical equipment near water while powered.
- Remove the filter cover and completely fill the housing chamber to the very top with aquarium water (not tap water). A single air bubble can cause failure, so tilt the unit to eliminate hidden pockets.
- Reassemble the filter while holding it level to prevent water spillage. For hang-on-back models, ensure the intake tube is submerged before reattaching.
- Plug in the filter and verify water flow within 10 seconds. If nothing happens, immediately unplug—this indicates an airlock.
Airlocks occur when air blocks the impeller’s path. Fix this by repeating the priming process while gently tapping the housing to dislodge trapped air. If flow still doesn’t start after three attempts, check for debris in the impeller chamber—a single grain of gravel can jam the mechanism. Pro tip: For canister filters, open the air valve during priming to release pressure. Never force-start a dry pump; this overheats the impeller in under 60 seconds, requiring costly replacements.
Install Filter Media in the Correct Order for Biological Balance
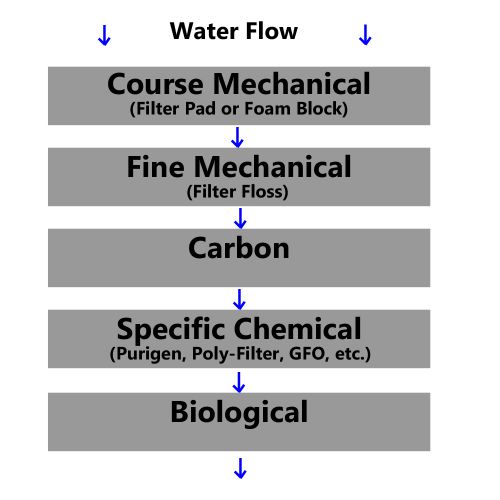
Your filter media sequence determines whether your tank stays healthy or crashes. Place components in this exact water-flow order—mechanical first, biological second, chemical third—to maximize efficiency. Most beginners reverse this, clogging biological media within days.
Stop Cloudy Water with Strategic Mechanical Filtration
Mechanical media traps visible debris like fish waste and uneaten food. Place coarse sponges or filter floss first in the water path where dirty water enters. This prevents gunk from reaching biological media. Replace floss monthly, but sponges only when torn—rinsing them in old tank water during water changes preserves bacteria. Warning: Overusing floss in tanks with messy fish (like goldfish) causes rapid clogging. If water flow drops within 48 hours, reduce floss thickness by 50%.
Grow Beneficial Bacteria on Biological Media Safely
Ceramic rings or bio-balls provide surface area for ammonia-eating bacteria. Place these after mechanical media so they stay clean. Never rinse biological media in tap water—chlorine kills essential bacteria. Instead, swish gently in a bucket of removed tank water during maintenance. Critical rule: Never replace all biological media at once. Swap just 20% monthly to avoid “new tank syndrome” where ammonia spikes kill fish. If your media looks slimy green, don’t panic—that’s healthy bacterial growth!
Use Chemical Filtration Only for Specific Emergencies
Activated charcoal absorbs medications or discoloration but isn’t needed for routine use. Place it last in the sequence so water passes through mechanical and biological stages first. Replace charcoal monthly since it becomes ineffective after 30 days. Skip it entirely in planted tanks—it strips essential nutrients. Only use chemical media when: treating sick fish (remove after medication), removing tannins from driftwood, or eliminating odors after cleaning.
Submerge Your Pump Completely to Prevent Burnout
A partially submerged pump is a ticking time bomb. Water cools the motor—without full coverage, the impeller overheats in under 2 minutes. Check your pump placement against these critical markers:
- Internal filters: Must sit at least 1 inch below the water line at all times. If your tank level drops during evaporation, raise the filter or add top-off water.
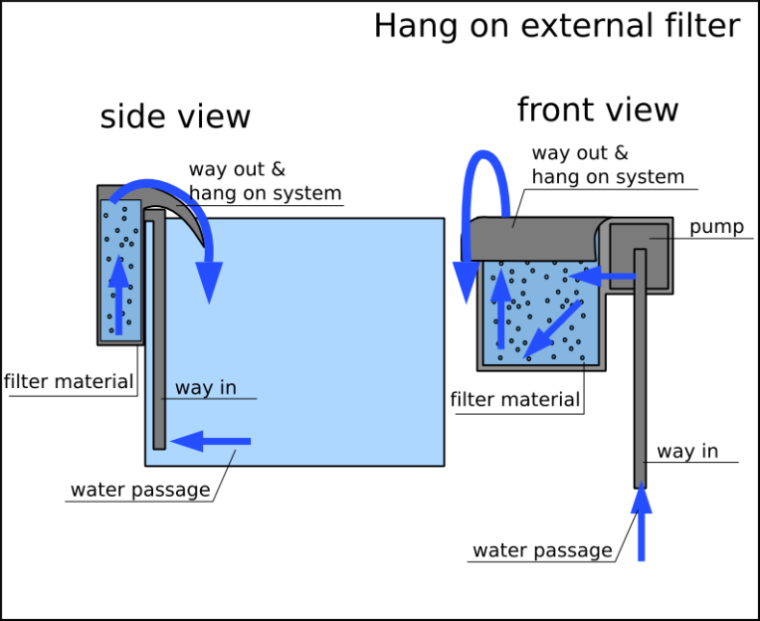
- Hang-on-back filters: Ensure the intake tube’s strainer is fully underwater. Adjust the hanger height if water splashes out.
- Canister filters: Verify all hoses are sealed and primed before startup—air pockets cause sputtering.
Symptoms of improper submersion include loud humming, smoke smell, or zero water flow. If you notice these, unplug immediately and refill the tank. Pro tip: Mark your tank’s ideal water level with a waterproof pen during setup. This prevents accidental low-water operation during routine maintenance.
Troubleshoot Filter Failures Before Calling a Professional

Most filter issues take under 10 minutes to fix if you diagnose correctly. Don’t panic—follow this decision tree before assuming equipment failure.
Zero Flow After Priming? Check These 3 Spots
If water won’t move after priming:
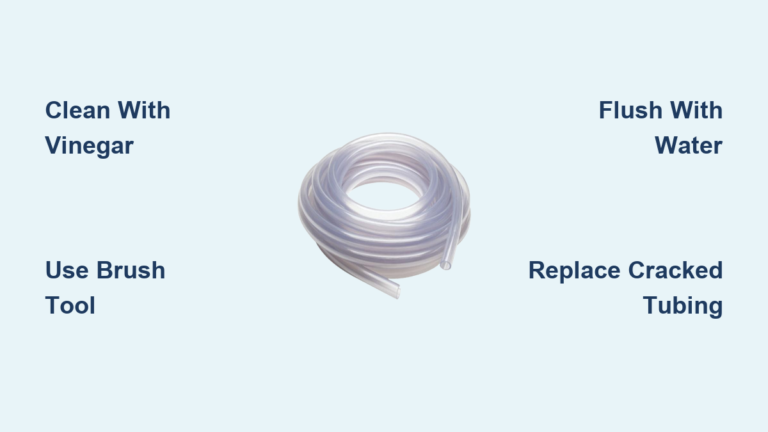
1. Inspect the impeller: Unplug the filter and remove the housing. Spin the impeller with your finger—it should rotate freely. If stuck, soak in vinegar for 15 minutes to dissolve mineral buildup.
2. Examine intake tubes: Blockages often occur at strainer openings. Use tweezers to remove hair or plant matter clogging the intake.
3. Verify hose connections: For canister filters, ensure hoses are fully seated on ports. A 1/8-inch gap causes air leaks that stop flow.
If flow restarts but stops again within minutes, your filter is undersized for the tank. Upgrade to a unit rated for 1.5x your tank’s actual water volume (remember decorations displace water).
Filter Vibrating Loudly? Silence It in 5 Minutes
Excessive noise means parts are loose or dirty:
– Turn off power and remove the impeller housing
– Clean the impeller chamber with a soft toothbrush (no soap!)
– Check O-rings for cracks and lubricate with petroleum jelly
– Reassemble tightly—hand-tighten only to avoid cracking plastic
If noise persists, the impeller may be chipped. Replace this $5 part before it damages the motor housing. Never ignore grinding sounds—this indicates metal-on-metal contact that destroys pumps.
Media Clogging in Days? Fix Your Feeding Routine
When filter media turns brown within 48 hours:
– Overfeeding is the culprit 90% of the time. Feed only what fish eat in 2 minutes, once daily
– Overstocking strains filtration—stick to 1 inch of fish per gallon max
– Wrong media order—mechanical media must come first to protect biological stages
Switch to coarse sponge instead of fine floss if you have messy eaters. Rinse media every 7-10 days in tank water—not tap water—to preserve bacteria. Pro tip: Add algae-eating snails to consume excess food before it clogs filters.
Maintain Your Filter for Trouble-Free Operation
A well-maintained filter runs quietly for years. Implement this tiered maintenance schedule to avoid emergencies:
- Weekly: During water changes, squeeze mechanical media in a bucket of removed tank water until debris clears. Never replace it dry—always keep it wet to preserve bacteria.
- Monthly: Disassemble the pump housing. Clean impeller vanes with an old toothbrush and check for hair wrap. Inspect O-rings for brittleness.
- Every 6 months: Replace worn impellers and cracked hoses. For canister filters, replace all O-rings annually to prevent leaks.
Critical warning: Never clean all media at once. Stagger replacements—do mechanical one week, biological the next. This maintains bacterial colonies so your tank doesn’t cycle repeatedly. If ammonia spikes after maintenance, add bottled bacteria immediately and reduce feeding by 50%.
Mastering how to use aquarium filter transforms it from a noisy appliance into the invisible engine of aquatic life. By priming correctly, sequencing media strategically, and maintaining submersion depth, you create stable water that lets fish thrive. Remember the golden rule: mechanical media first, biological second, chemical third—and never disturb all bacteria at once. Within 4-6 weeks of proper filter use, you’ll see dramatic improvements: clearer water, fewer algae outbreaks, and fish that actively explore instead of hiding. Your next step? Test water parameters weekly to catch issues before they escalate. A well-run filter means you spend less time troubleshooting and more time enjoying your underwater sanctuary.