How to Fix Aquarium Light Issues
Your aquarium lights flicker out mid-evening, plunging your tank into darkness. Within hours, stressed fish dart for cover while plants stop photosynthesizing—this isn’t just an inconvenience. A failed light disrupts your entire aquatic ecosystem, triggering algae blooms and endangering livestock. Knowing how to fix aquarium light issues quickly prevents cascading tank disasters. This guide delivers actionable diagnostics and repairs for LED, fluorescent, and halide systems—no electrician required for 90% of problems. You’ll learn to pinpoint failures in under 15 minutes and implement permanent fixes using basic tools.
Diagnose Your Aquarium Light Issue
Immediate Safety Steps Before Inspection
Always unplug the fixture and disconnect timers/controllers before touching anything. Water and electricity create lethal risks—treat every component as live until verified. Lay the fixture on a dry towel in a well-lit area away from your tank.
Spotting Physical Damage and Water Intrusion
Inspect these failure hotspots:
– Lens/covers: Cracks or warping (common in plastic housings) allow moisture entry
– Socket corrosion: Blue-green crust on bulb contacts indicates saltwater exposure
– Power cord damage: Fraying near plug or fixture entry points (bend cords to reveal hidden breaks)
– Internal fogging: Condensation inside the housing after 24 hours of drying signals seal failure
Pro Tip: Shine a flashlight through the lens at night. Pinpoint leaks by spotting moisture droplets where light refracts abnormally.
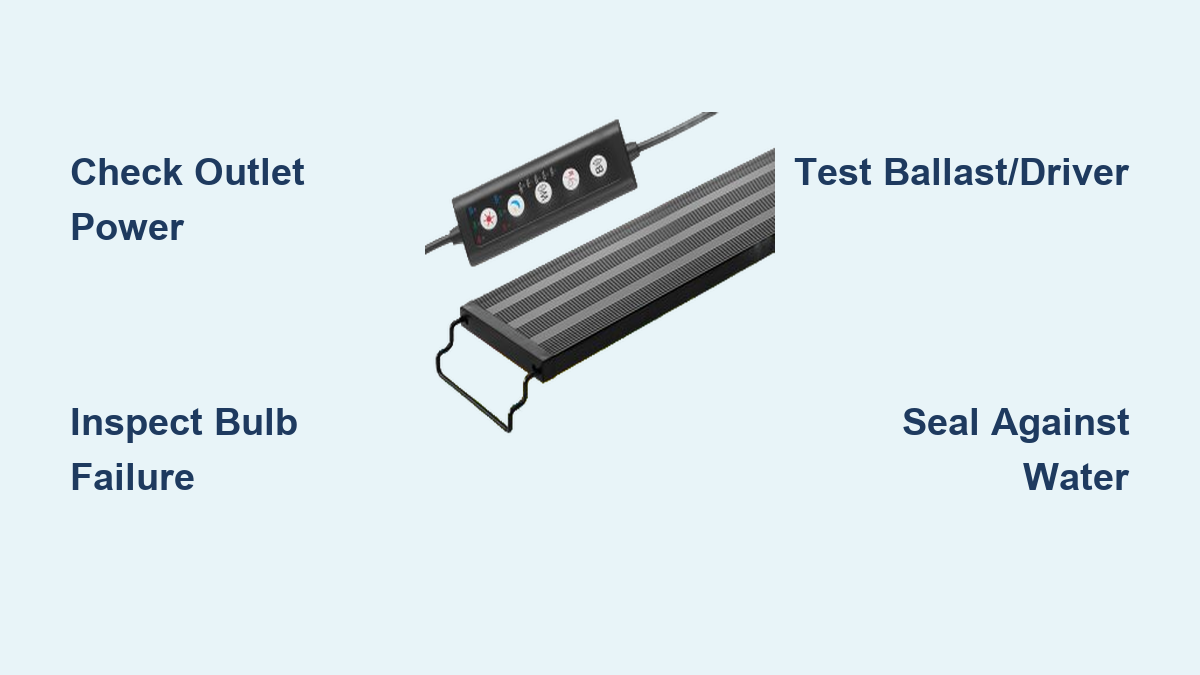
Troubleshoot Power Problems
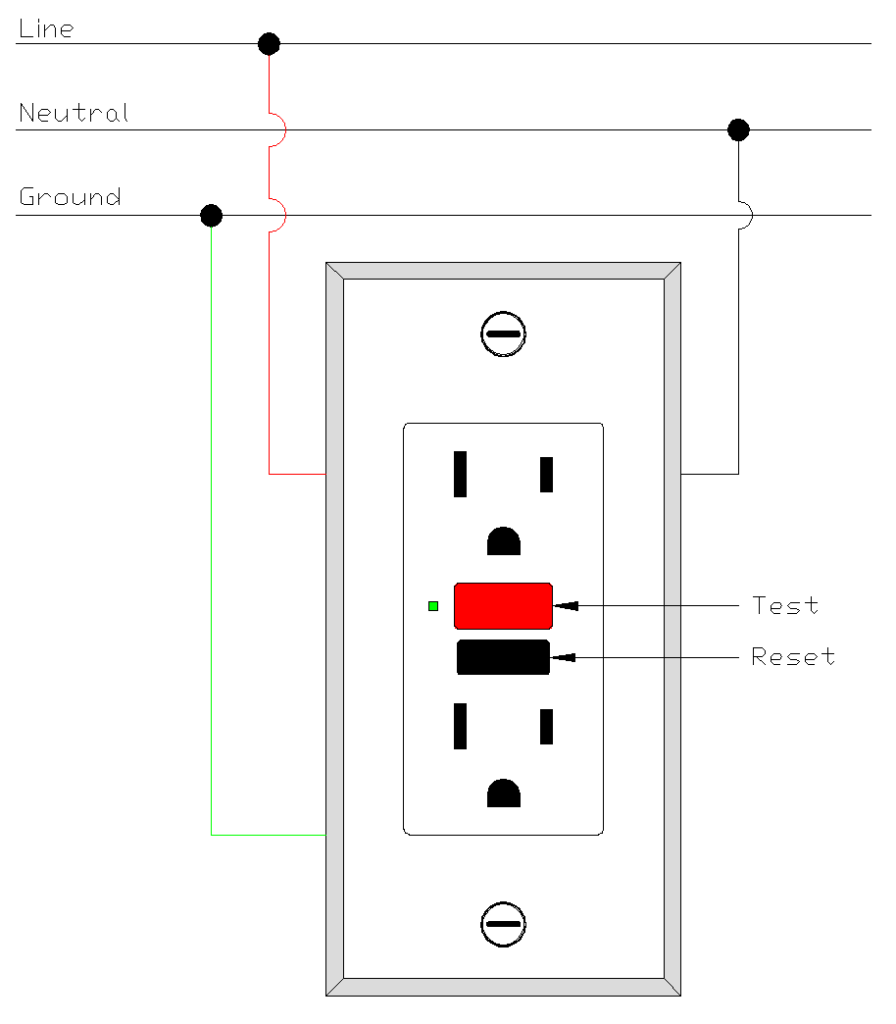
Verify the Outlet and Power Source
Plug a phone charger or lamp into the same outlet—never assume the outlet works. If dead, check your circuit breaker panel for tripped switches. For GFCI outlets (required near water sources), press the “Test” then “Reset” buttons firmly. If it won’t reset, unplug all devices on that circuit before retrying.
Check for Tripped GFCI Outlets and Circuit Breakers
GFCI outlets often hide behind cabinets or under stands. Trace the power cord’s entire path—many aquarium setups share circuits with refrigerators or pumps. If breakers trip repeatedly after resetting, stop immediately: this signals dangerous short-circuiting requiring professional help.
Inspect the Power Cord for Damage
Roll the cord between fingers feeling for internal wire breaks. Test continuity with a multimeter:
1. Set to resistance mode (Ω)
2. Touch probes to both prongs of the unplugged cord
3. Flex the cord along its length
A fluctuating reading means broken wires inside the insulation—replace the cord before proceeding.
Identify and Replace Faulty Bulbs and Tubes

Testing Fluorescent Tubes for Failure
Rotate the tube 90° in its sockets—if it flickers on, corroded contacts are the culprit. Black rings at both ends confirm end-of-life failure (replace every 9-12 months). Critical check: Ensure the starter (small silver cylinder near the tube) isn’t swollen or leaking tar—this $3 part causes 40% of fluorescent failures.
Diagnosing LED Light Failures
For patchy darkness:
– Single dark sections = failed LED chips (irreparable; replace strip)
– Entire fixture dead = driver failure (check for burnt smell near power supply)
– Intermittent operation = loose DC wiring (wiggle connectors while powered to spot flickering)
Recognizing Halide Bulb End-of-Life Signs
Metal halide bulbs dim gradually over 12-18 months. If you see:
– Pinkish tint instead of crisp white/blue light
– Delayed ignition (>5 minutes to reach full brightness)
– Visible black deposits inside the arc tube
Replace immediately—expired bulbs overheat and shatter.
Identify and Replace Bad Components
Testing and Replacing a Faulty Ballast
Symptom checklist:
✅ Loud buzzing during operation
✅ Oily residue leaking from metal housing
✅ Flickering persists after tube/starter replacement
Replacement process:
1. Photograph original wiring connections
2. Disconnect input (line) and output (load) wires
3. Match new ballast’s specs: identical wattage, lamp type (T5/T8), and voltage
4. Reconnect wires exactly as documented—wrong wiring destroys bulbs
Time estimate: 25 minutes for standard fluorescent fixtures.
Fixing Failed LED Drivers and Power Supplies
Use a multimeter to test DC output:
– Set to 20V DC mode
– Touch probes to output wires (red/black)
– Normal reading: 12V or 24V (matches label)
– Faulty reading: Below 10V or zero
Replace with an IP67-rated waterproof driver—standard electronics store units fail rapidly near aquariums.
Repairing Corroded Wiring and Connections
Cut corroded sections with wire strippers. Reconnect using:
1. Marine-grade heat shrink tubing (not electrical tape)
2. Dielectric grease on bare contacts to prevent future corrosion
3. Waterproof wire nuts rated for wet locations
Never splice wires inside the fixture housing—keep connections outside the splash zone.
Fix or Replace Your Fixture

When Simple Repairs Are Enough
If you’ve fixed:
– Only the bulb/starter
– A single loose wire nut
– External power cord damage
Your fixture is likely safe for 6+ more months. Reassemble with fresh silicone sealant on all seams.
Intermediate Repairs: Ballast and Driver Replacement
Cost comparison: A new T5 ballast costs $15 vs. $60+ for a full fixture. Prioritize repairs when:
– Housing is intact with no cracks
– Less than 50% of internal wiring shows corrosion
– Original parts are still available online
Signs It’s Time for a New Fixture
Replace immediately if you see:
– Rust bleeding through metal housings
– Melted wire insulation near sockets
– Repeated failures after component swaps
– Fixtures older than 5 years (modern LEDs save 60% energy)
Pro Tip: Choose fixtures with removable power supplies—this isolates electronics from tank moisture.
Perform Regular Maintenance
Monthly and Quarterly Light Fixture Checks
– Monthly: Wipe lens with vinegar solution to remove salt creep; check for condensation inside housing
– Quarterly: Tighten all wire nuts (vibration loosens them); inspect cord strain relief at plug/fixture junctions
Annual Bulb and Component Replacement Schedule
| Component | Replacement Interval | Warning Signs |
|———–|———————-|—————|
| T5/T8 Tubes | 9-12 months | Blackened ends, flickering |
| LED Strips | 3-5 years | Color shift, dark sections |
| Metal Halide | 12-18 months | Pink tint, slow ignition |
| Starters | 18 months | Swelling, leakage |
Critical: Replace bulbs before failure—dying lights emit harmful UV levels that damage fish eyes.
Expert Tips for a Bright Tank
Sealing Repairs Against Water Intrusion
After any disassembly, apply aquarium-safe silicone to:
– Cord entry points (pull cord through before sealing)
– Lens gasket channels (use thin bead; excess blocks light)
– Screw holes (prevents capillary wicking)
Let cure 72 hours before reinstalling over water.
Matching Replacement Parts Correctly
Ballast/driver mismatches cause instant failure. Verify:
– Fluorescent: Lamp type (T5HO = high output), quantity (2-lamp vs. 4-lamp)
– LED: Input voltage (120V AC), output (12V/24V DC), wattage (match or exceed original)
Never substitute automotive or household parts—they lack waterproofing.
When to Call a Professional Electrician
Stop repairs immediately and call an electrician if:
– You smell ozone or burning plastic during testing
– Circuit breakers trip while the fixture is unplugged (indicates wiring fault in walls)
– Aluminum components show white, powdery corrosion (galvanic reaction requiring system overhaul)
Final Note: Consistent lighting maintains your aquarium’s biological balance—address failures within 24 hours to prevent ecosystem collapse. Implement quarterly maintenance checks using this guide’s schedule, and keep spare bulbs/drivers on hand for instant swaps. For persistent electrical issues, consult an aquarium specialist rather than risking DIY repairs near water. Your tank’s health depends on reliable light, and now you have the proven methods to restore it safely.