How to Decorate Aquarium with Stones: Easy Tips
Your fish deserve more than a bare glass box. A thoughtfully arranged stone landscape transforms your aquarium into a living masterpiece while creating vital habitats for aquatic life. When done correctly, how to decorate aquarium with stones becomes the foundation for a thriving ecosystem—not just a pretty backdrop. Most beginners make critical mistakes with reactive rocks that destabilize water chemistry or unstable arrangements that endanger fish. This guide reveals exactly how to select, prepare, and position stones for breathtaking results that last years. You’ll learn professional techniques used by aquascapers to create depth, stability, and biological balance safely.
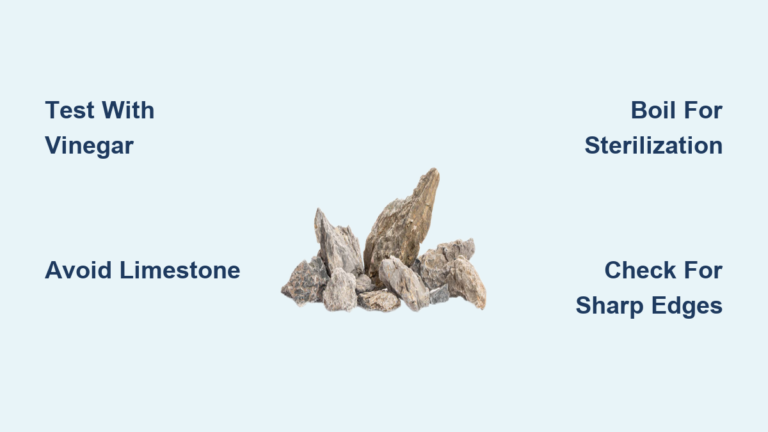
Test Every Stone for Safety Before Tank Entry (Avoid pH Spikes)

Never assume a rock is aquarium-safe. Reactive stones like limestone or coral will dissolve in water, causing dangerous pH spikes that kill fish overnight. The vinegar test is your non-negotiable first step: Place white vinegar on the stone’s surface. Vigorous fizzing means high carbonate content—immediately discard it for most freshwater tanks. Safe inert options include granite, quartz, and slate that show no reaction. For absolute certainty, submerge suspect stones in a bucket of dechlorinated water for 7 days. Test pH and hardness at start and end—any change over 0.5 pH or 2 dGH makes it risky for sensitive species like tetras or shrimp.
Why Beach Stones Are Time Bombs
Found stones introduce parasites, salt residue, and pollutants. Even smooth river rocks may harbor pesticides from agricultural runoff. If you must use natural stones, sterilize them: Soak 24 hours in 1:20 bleach solution, rinse thoroughly, then soak 3 days in dechlorinated water with triple-dose water conditioner (changing water daily). Most experts skip this risk entirely—dedicated aquarium stores sell pre-tested stones for under $20.
Recognize Safe Stone Types Instantly
- Seiryu Stone: Blue-gray with dramatic ridges (inert, ideal for Iwagumi style)
- Dragon Stone: Porous, reddish-brown (lightweight and shrimp-friendly)
- River Rocks: Smooth, rounded surfaces (zero sharp edges for goldfish)
- Slate: Flat, layered pieces (perfect for cave-building)
Where to Source Safe Aquarium Stones (Skip Risky Beach Finds)
Landscaping stores offer the best value for large aquascapes. Look for “pond rocks” or “river rock” sections where stones are already screened for aquatic use. Avoid “decorative” garden rocks treated with sealants. Reputable aquarium suppliers like CaribSea or Mr. Aqua sell pre-sterilized stones with safety certifications—worth the premium for nano tanks under 20 gallons. Never collect from beaches; salt leaching can take months and trigger persistent algae blooms even after rinsing.
Budget Shopping Hacks That Actually Work
- Ask for “culls”: Rock suppliers often sell imperfect pieces at 70% off for aquascaping
- Check construction sites: New builds sometimes give away granite scraps (request pH testing first)
- Avoid dollar stores: Their “aquarium rocks” frequently contain reactive minerals
Design Your Layout Using the Rule of Thirds (No Symmetry!)
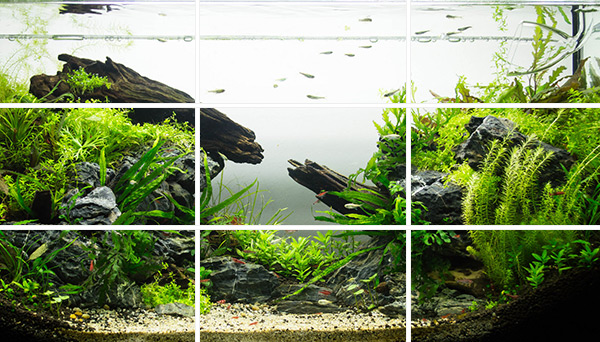
Centered stone arrangements look artificial and boring. Professional aquascapers use the rule of thirds: Mentally divide your tank into a 3×3 grid. Place your largest “focal stone” where grid lines intersect (e.g., 1/3 from left edge). This creates dynamic tension. For a 20-gallon tank, position a dramatic Seiryu stone at the lower-right intersection point, then build smaller rocks toward the back-left. Never center your main stone—it kills depth perception.
Three Stone Styles That Guarantee Wow Factor
- Iwagumi Minimalist: One dominant Oyaishi stone + two smaller supporting rocks (ideal for shrimp tanks)
- Nature Aquarium: Slope substrate from front to back, placing dragon stone clusters to mimic mountain ranges
- Cichlid Canyon: Stack slate vertically to form caves (leave 2-inch gaps for fish passage)
Build a Stable Stone Hardscape: 5-Step Setup Guide
Start with a completely empty tank on a level surface. Slope your substrate 2-3 inches deeper at the back for instant depth. Now follow these critical steps:
- Position your focal stone first: Place it tilted slightly backward (5-10 degrees) for natural erosion effect
- Anchor base stones: Press largest rocks 1/3 into substrate—never let them sit flat
- Create micro-terraces: Stack smaller stones using the “cotton method”: Dab super glue gel on cotton floss, press between rocks
- Test stability: Shake tank gently—zero movement means success
- Fill gaps: Tuck fine gravel around bases to hide unnatural edges
⚠️ Critical Warning: Never stack stones directly on glass. Always bury bases in substrate to prevent pressure cracks. If rocks shift during step 4, restart—unstable scapes cause 80% of aquarium disasters.
Create Depth in Small Tanks with Strategic Stone Placement
For tanks under 30 gallons, forced perspective is essential. Place larger, textured stones in the foreground (front third of tank). Position identical but smaller stones in the background—your brain perceives them as “farther away.” Angle all stones toward the viewer’s eye level. In a 10-gallon tank, use this trick: Place a 3-inch dragon stone 2 inches from front glass, with a 1.5-inch matching stone 6 inches behind it. The tank instantly feels 50% deeper.
Pro Depth-Boosting Techniques
- Vary heights: Stagger stone peaks like a mountain range (no flat tops)
- Hide bases: Bury lower 40% of stones in substrate for “emerging from earth” effect
- Strategic shadows: Position lights to cast shadows behind stones—creates hidden zones
Match Stone Arrangements to Your Fish Species (Cichlids vs. Shrimp)
Goldfish need smooth river rocks with zero crevices—they’ll get stuck and suffocate in gaps smaller than their bodies. For African cichlids, use Texas holey rock stacked vertically to form caves (its carbonate content actually benefits their hard-water habitat). Shrimp tanks demand porous stones like lava rock with microscopic tunnels for breeding. Never use sharp-edged stones with bettas—their flowing fins tear on rough surfaces.
Species-Specific Stone Cheat Sheet
| Fish Type | Best Stones | Critical Avoidance |
|---|---|---|
| Cichlids | Tufa, Slate | Smooth river rocks (no grip) |
| Shrimp/Nano | Dragon Stone, Lava | Large flat stones (no hiding spots) |
| Goldfish | Rounded river rocks | Any crevices >1 inch |
| Community Tanks | Seiryu, Quartz | Reactive carbonate rocks |
Secure Stones with Super Glue to Prevent Deadly Collapses

Gravity wins in water—unsecured stacks will collapse. For vertical arrangements, use cyanoacrylate super glue gel (not liquid). Apply to porous rock surfaces—it bonds instantly underwater. The “cotton method” is foolproof: Place cotton floss where rocks meet, saturate with glue, press stones together for 30 seconds. Within 2 minutes, you’ll have rock-solid stability. For massive boulders, use aquarium epoxy putty as underwater mortar—roll into 1/4-inch ropes between layers.
💡 Pro Tip: Test glue bonds by submerging glued rocks overnight before final placement. Weak bonds fail within hours.
Clean Algae on Stones Without Harming Your Tank Ecosystem
Green spot algae on stones is normal—but hair algae means trouble. Never scrub stones with soap or bleach in-tank. During water changes, remove affected rocks and dip in 3% hydrogen peroxide (1:3 ratio with tank water) for 15 seconds. For stubborn cases, introduce Nerite snails—they graze algae without disturbing stones. If algae covers >30% of stones, reduce light to 6 hours daily and add floating plants like water lettuce to block excess light.
Algae Prevention Protocol
- Weekly: Use a soft toothbrush to remove new growth during water changes
- Monthly: Add 1 Amano shrimp per 5 gallons (they target stone algae)
- Never: Scrape stones with metal tools—it scratches surfaces, worsening future growth
Final Note: A perfectly decorated stone aquascape balances art and biology. You’ve now mastered how to decorate aquarium with stones safely—from testing reactive rocks to building shrimp-friendly caves. Remember: Stability prevents 90% of disasters, and species-specific arrangements reduce fish stress. For your next project, try the Iwagumi style with just three stones—it’s beginner-friendly and creates instant zen. Test your new hardscape after 72 hours: If water parameters stay stable and fish explore every crevice, you’ve created a true underwater sanctuary.