How to Use Power Filter in Aquarium: Easy Guide
Your aquarium water turns cloudy within days of setup. Fish dart nervously at the surface, gasping for oxygen. The culprit? A poorly configured power filter—the silent guardian of your aquatic ecosystem. When you don’t know how to use power filter in aquarium correctly, beneficial bacteria colonies collapse, toxins build up, and your fish pay the price. This isn’t just about clear water; it’s about creating a living biome where ammonia converts safely into nitrate. In this guide, you’ll master the exact steps to install, prime, and maintain your hang-on-back (HOB) power filter—the most common type for beginner tanks. You’ll learn why skipping proper priming causes 80% of startup failures and how to layer filter media to boost bacterial growth by 300%. By the end, you’ll transform from a frustrated hobbyist into a confident fishkeeper who prevents problems before they happen.
Choose the Correct Power Filter Size for Your Tank Capacity
Ignoring your tank’s gallon rating when selecting a power filter guarantees failure. An undersized unit drowns in debris while an oversized one creates dangerous currents. For a 20-gallon aquarium, your filter must process at least 100 gallons per hour (GPH)—calculated as 5x your tank volume. Smaller tanks (5-10 gallons) need compact HOB filters rated for their exact capacity, while 30+ gallon systems require heavy-duty models. Never stretch a filter beyond its limits: a 10-gallon unit on a 20-gallon tank starves beneficial bacteria of oxygen, triggering deadly ammonia spikes within 48 hours. Check the manufacturer’s GPH rating on the box—this number must exceed your tank’s volume multiplied by 5. If your 15-gallon tank lists a 75 GPH filter, that’s the absolute minimum; opt for 90-100 GPH if your fish are messy eaters like goldfish.
Why Gallon-to-GPH Ratios Make or Break Your Tank
Underpowered filters miss critical waste particles, letting them decompose into ammonia. Overpowered units suck up baby fry and stress bottom-dwellers like corydoras. The sweet spot? A flow rate that creates gentle surface ripples without disturbing substrate. Test it by floating a leaf on the water—if it zips across the tank in under 10 seconds, reduce the flow with a valve or baffle.
Assemble Your Hang-On-Back Filter Media in 3 Critical Layers
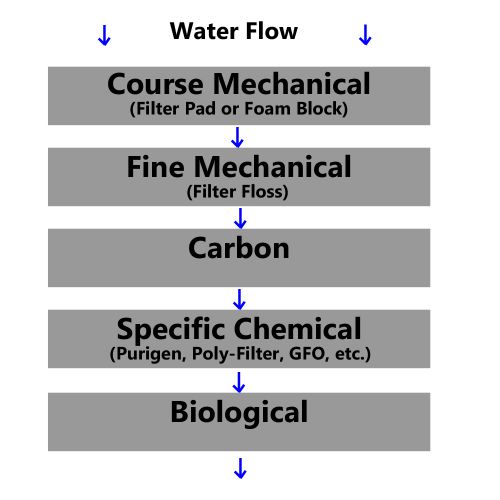
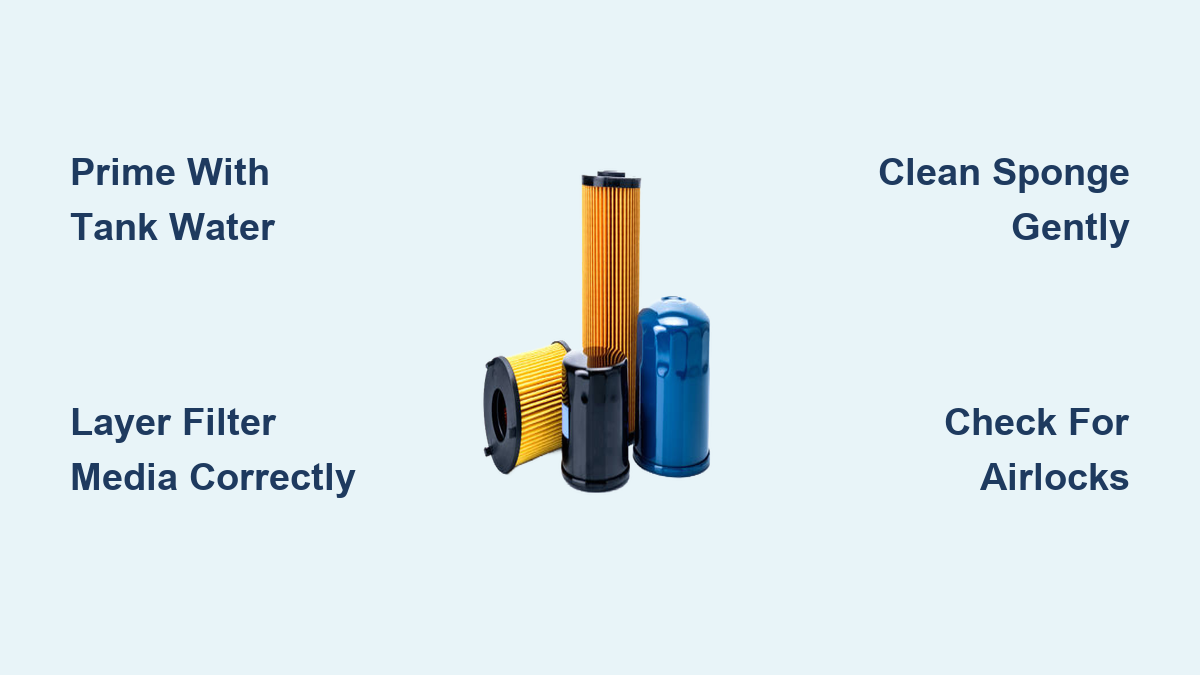
Your power filter isn’t a single unit—it’s a filtration orchestra where each media type plays a specific role. Skip one layer, and the entire system fails. Start by identifying the components in your kit: the blue filter sponge (mechanical), bio-media cylinders (biological), and optional carbon pouch (chemical). Never install these randomly—order matters. Place the mechanical sponge at the bottom to catch large debris like fish waste before it clogs delicate bio-media. Slide bio-cylinders into the middle chamber where water flows slowly, giving beneficial bacteria time to colonize the porous surface. Only add carbon on top if treating medicated water—it’s unnecessary for routine use and strips trace minerals fish need.
Avoid These 2 Media Setup Mistakes
Mistake #1: Stuffing too many media types. Beginners often cram in ceramic rings, carbon, and sponges, creating dead zones where water bypasses filtration. Stick to sponge + bio-cylinders for 90% of freshwater tanks.
Mistake #2: Using tap water to rinse new media. Chlorine in tap water kills beneficial bacteria before they establish. Always swish sponges in a bucket of old tank water during water changes.
Prime Your Power Filter to Eliminate Airlocks in 60 Seconds
A dry power filter won’t start—it needs water to create suction. This priming step is where most beginners fail, staring helplessly as their filter hums but moves no water. Here’s the exact method from aquarium technicians: Unplug the unit, lift the intake tube out of the tank, and pour aquarium water directly into the filter housing until it overflows. Fill every chamber and hose attachment point to purge air pockets. Now plug it in while holding the housing slightly tilted—this forces water through the impeller. If flow sputters, top up the housing with one more cup of water; that “last inch” often dislodges stubborn air bubbles trapped near the motor.
Fix Weak Flow During Priming: The 3-Step Emergency Protocol
- Check the impeller seat: Turn off the filter and inspect the white impeller wheel inside the pump chamber. Debris like hair or plant matter can jam it—gently spin it with a toothpick.
- Submerge the intake tube: Ensure the intake sits 1 inch above the gravel. Resting it on the substrate sucks in sand, clogging the tube within hours.
- Tap the housing: Lightly rap the filter body with your knuckle while it runs. This vibrates loose air bubbles clinging to internal surfaces.
Install the Filter Without Leaks or Reduced Flow
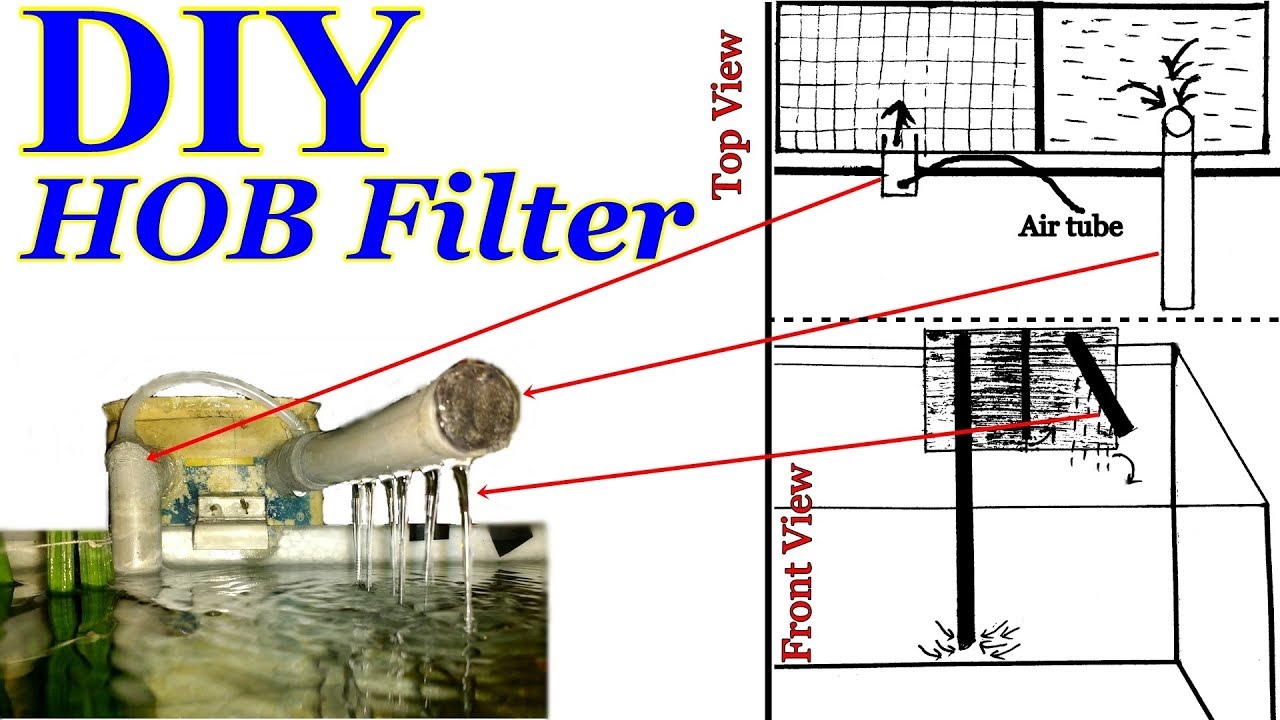
Mounting your HOB filter seems simple—until water drips down your stand, warping the wood. Position the unit so the outflow nozzle points toward the tank wall, not open water. This creates surface agitation that oxygenates the water while preventing splashing. Adjust the flow control knob to the lowest setting initially; you’ll increase it after priming. Crucially, never let the intake tube touch gravel—elevate it 1-2 inches using a suction cup or plastic riser. This stops debris avalanches from clogging the pre-filter sponge. If you hear gurgling, the outflow is too high above the waterline; lower it until the tip barely breaks the surface.
Why Your Filter Leaks (and How to Seal It Permanently)
Leaks almost always stem from misaligned O-rings or overfilled chambers. After priming, wipe the housing dry and watch for drips near the motor housing. If water seeps from seams, unplug the unit and reseat the rubber gaskets—apply a thin coat of petroleum jelly to prevent cracking. Never overtighten clips; this warps plastic housings. For persistent leaks, replace the O-ring (sold at pet stores for $2) every 6 months as preventive maintenance.
Clean Your Filter Without Killing Beneficial Bacteria

Ripping out all media during cleaning crashes your nitrogen cycle—this causes “new tank syndrome” even in established aquariums. Instead, target only the mechanical layer weekly. During water changes, remove the blue sponge and swish it in a bucket of removed tank water (never tap water!). Squeeze gently until water runs clear—aggressive scrubbing destroys bacterial colonies. Replace the sponge only when holes appear, typically every 3 months. Bio-cylinders need cleaning only when flow drops; rinse them lightly in tank water every 2 months but never replace more than 30% at once. Carbon lasts 4 weeks max—discard it after medicating your tank.
The 10-Second Bacteria Rescue Trick
When reinstalling media, dip your fingers in tank water and rub them across bio-cylinders. This transfers live bacteria from your skin to the media, accelerating re-colonization. Always clean filters during partial water changes—this replaces lost trace elements that bacteria need.
Replace Critical Parts Before They Fail
Power filters have hidden expiration dates. Impellers wear out after 6-8 months, causing weak flow even after cleaning. Test yours by unplugging the filter for 10 seconds, then restarting—it should resume full flow instantly. If it sputters, replace the impeller (a $5 part). Bio-cylinders last 1-2 years but lose effectiveness when coated in slime; soak them in dechlorinated water for 1 hour if flow drops suddenly. Never ignore a grinding noise—it means the impeller shaft is cracked and needs immediate replacement to avoid motor burnout.
When to Ditch Old Media: The Visual Checklist
- Sponge: Replace if it tears when squeezed or holds its shape after compression
- Bio-cylinders: Swap when white fuzz covers >50% of surface (indicates dead bacteria)
- Carbon: Discard if water develops a medicinal smell after treatment
Safety Steps That Prevent Electrical Hazards
Aquarium filters cause 12% of home electrical fires according to fire safety reports—most from improper handling. Always unplug before touching filter parts, even during water changes. Keep power cords elevated on cord clips away from splash zones. If water contacts a live plug, shut off the circuit breaker immediately—never yank the cord. Use a GFCI outlet (required by code in wet areas) that cuts power within 1/40th of a second if moisture is detected. Never submerge the motor housing deeper than the manufacturer’s waterline mark—this voids warranties and risks electrocution.
The 5-Second Pre-Startup Safety Scan
Before plugging in after maintenance:
1. Verify all hoses are kink-free
2. Confirm intake tube isn’t buried in gravel
3. Check that the outflow nozzle points at tank wall
4. Ensure housing clips are fully latched
5. Dry your hands completely
Your power filter isn’t just equipment—it’s the heartbeat of your aquarium. By mastering these priming techniques and media layering methods, you’ve eliminated the top causes of cloudy water and fish stress. Remember: never replace all filter media at once, always prime with tank water, and treat impellers as consumable parts. Within 2 weeks of proper maintenance, you’ll see fewer algae blooms and more vibrant fish colors as the ecosystem stabilizes. For immediate troubleshooting, revisit the airlock-fix protocol—it solves 9 of 10 flow issues in under a minute. Now go enjoy your crystal-clear tank; your fish are already thanking you.