How to Set Up Spray Bar in Aquarium
Your aquarium spray bar isn’t just a filter attachment—it’s the engine driving your entire aquatic ecosystem. When you set up spray bar in aquarium systems correctly, you create invisible currents that distribute oxygen, nutrients, and CO2 while preventing deadly dead zones where algae thrive. Most beginners position their spray bars too deep or at wrong angles, causing murky water, stressed fish, and frustrated plant growth. Within 10 minutes of proper adjustment, you’ll see plants swaying gently and debris moving toward filter intakes. Whether you’re running a low-tech community tank or a high-tech planted aquarium, this guide delivers the exact positioning techniques professionals use to achieve crystal-clear water and thriving aquatic life.
Spray Bar Placement Just Below Water Surface
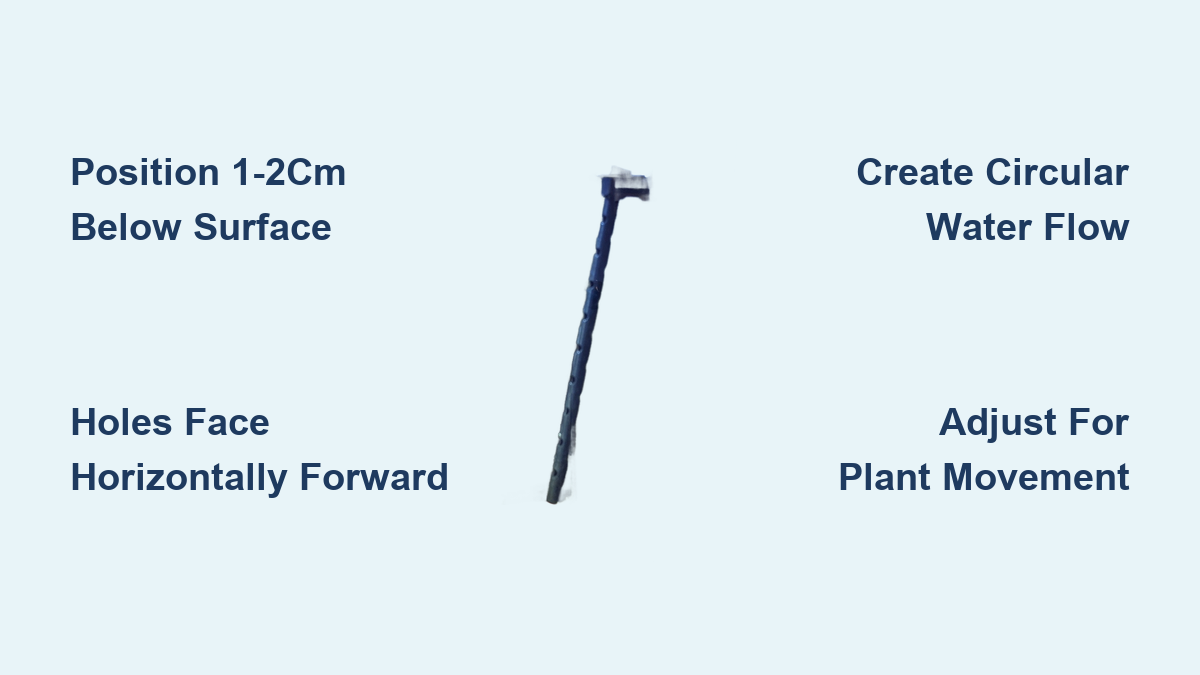
Position your spray bar exactly 1-2 centimeters below the water’s surface along the back glass of your tank. This specific height creates the ideal surface agitation for gas exchange without splashing water onto your hood. The holes must face horizontally toward the front glass—not upward or downward—to initiate that crucial circular flow pattern. If your water level sits 1 inch below the tank rim, your spray bar should sit 0.5 inches below the surface.
Critical adjustments to make now:
– Use adjustable filter outlet attachments to fine-tune the height
– Ensure the bar runs parallel to the tank’s back wall for even flow distribution
– Verify holes are clean and unobstructed (clogged holes cause uneven currents)
Many hobbyists make the fatal error of mounting spray bars too deep, thinking it reduces surface disturbance. But this creates dangerous undercurrents that uproot plants and exhaust bottom-dwelling fish. Your spray bar belongs in the top inch of water—any deeper sabotages surface gas exchange.
Why Surface-Level Positioning Matters Most
Surface agitation is non-negotiable for healthy aquariums because 90% of gas exchange happens at the water-air interface. When your spray bar sits just below the surface, its horizontal flow creates microscopic ripples that dramatically increase oxygen absorption. In non-CO2 tanks, this ripple should cover 100% of the surface area—visible as a consistent “shimmering” effect. For CO2-injected systems, aim for gentle undulations that break protein films without creating whitecaps.
Pro tip: Lower your water level by 1 inch before installing the spray bar. This creates space for the surface ripple while preventing overflow during filter priming. Once flow stabilizes, gradually refill to your normal level.
Creating Circular Flow With Horizontal Hole Direction
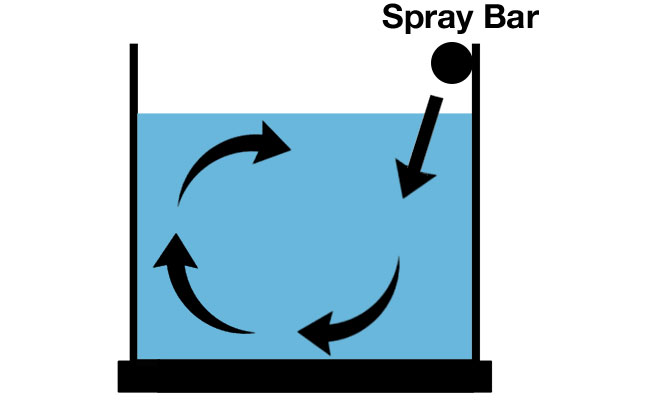
Your spray bar must generate a complete water loop: surface flow across the tank, downward movement along the front glass, substrate-level return current, and upward flow along the back wall. Achieve this by pointing all spray bar holes horizontally toward the front glass with zero upward or downward tilt. The water stream should reach within 1 inch of the opposite glass without splashing.
Step-by-step flow calibration:
1. Start with maximum filter flow and observe where the stream hits the front glass
2. If it splashes above the waterline, lower the spray bar by 3mm increments
3. If it doesn’t reach the front, increase flow rate or shorten the spray bar
4. Drop fish food flakes to trace flow paths—adjust until particles complete full loops
5. Reduce flow until plants sway gently without being flattened
This circular pattern prevents detritus accumulation in corners and ensures even nutrient distribution. In tanks wider than 24 inches, angle the outermost holes slightly inward to cover dead zones.
Troubleshooting Weak Flow Patterns
When your spray bar stream can’t reach the opposite side, dead spots form in corners. Fix this immediately by:
– Installing a small powerhead opposite the spray bar to “push” water across
– Adding a second spray bar section if using dual filter outlets
– Upgrading to a higher-GPH canister filter (minimum 5x tank volume per hour)
Watch plant movement after adjustments—every stem must exhibit gentle, continuous motion. If Anubias leaves remain still while Vallisneria bends violently, your flow is uneven. Rotate the spray bar slightly toward the stagnant area using flexible hose connectors.
Non-CO2 Tank Spray Bar Configuration

In low-tech aquariums without CO2 injection, your spray bar must maximize atmospheric gas exchange. Position it 1 centimeter below the surface and angle holes 5-10 degrees upward to create vigorous surface rippling. This “choppy” water dramatically increases oxygen absorption while pulling in trace atmospheric CO2 for plant growth.
Optimal setup sequence:
1. Mount spray bar horizontally along the back wall
2. Tilt entire assembly upward slightly using adjustable mounts
3. Set flow rate to create visible ripples covering 100% of surface
4. Add an air-driven sponge filter at the opposite end for supplemental circulation
This dual-action approach (spray bar + sponge filter) creates ideal conditions for low-light planted tanks. The surface agitation should produce a soft “shushing” sound—not a loud gurgle. If using low-wattage lighting, maintain this strong surface movement 24/7 to compensate for minimal CO2 availability.
Critical Warning for Non-CO2 Systems
Never position your spray bar deeper than 2 inches below the surface in non-CO2 tanks. This common mistake starves plants of carbon dioxide, triggering explosive algae growth. Test your setup by observing duckweed—if it clumps in corners instead of drifting across the entire surface, your circulation is inadequate. Reduce flow intensity only if surface agitation causes excessive evaporation.
CO2-Injected Tank Spray Bar Positioning
For high-tech planted aquariums with CO2 injection, your spray bar must preserve expensive carbon dioxide while maintaining circulation. Position it 3-5 inches below the surface (about one-third down from waterline) and angle holes 15 degrees downward toward the substrate. This creates strong subsurface currents without disturbing the critical gas exchange layer.
Precision setup checklist:
– Measure depth from water surface to spray bar holes
– Use a protractor app to verify 15° downward angle
– Set flow rate to create visible leaf movement in mid-water plants
– Confirm surface shows only gentle undulations—no bubbles breaking
Your goal is subsurface turbulence that distributes CO2-rich water to plant roots while minimizing surface disruption. In 48″ tanks, angle the outer holes slightly more downward to prevent surface agitation at the ends.
Avoiding Costly CO2 Loss Mistakes
Upward-pointing spray bars in CO2 tanks waste up to 70% of injected carbon dioxide. If your drop checker turns blue within 2 hours of turning on CO2, immediately:
1. Lower the spray bar by 1-inch increments
2. Increase downward angle of holes
3. Reduce filter flow rate by 20%
4. Install a surface skimmer if protein film persists
Never combine spray bars with air stones in CO2 tanks—the bubbles will destroy your carbon dioxide saturation. Instead, use wave makers for supplemental circulation below the surface layer.
Eliminating Dead Spots With Flow Testing
Dead spots appear as cloudy water pockets or debris piles in tank corners. Diagnose them by sprinkling fine fish food flakes across the surface. If particles accumulate anywhere within 30 seconds, you have circulation failure. Fix immediately by:
Adjustment protocol:
– For front-corner dead zones: Angle spray bar holes toward problem area
– For back-wall dead zones: Lower spray bar height by 5mm
– For substrate dead zones: Add a small powerhead near the bottom
– For persistent issues: Install a second spray bar section at 90° angle
Re-test after each adjustment. Perfect flow shows all particles completing full tank circuits within 60 seconds. In heavily planted tanks, position spray bars above dense plant groupings to prevent current blockage.
Plant Movement as Your Flow Gauge
Your plants are the ultimate flow indicators. If Java ferns remain motionless while Hornwort bends violently, your circulation is uneven. Ideal conditions show:
– Foreground plants: Gentle side-to-side sway (2-3 inches)
– Midground plants: Moderate bending without leaf folding
– Background plants: Continuous undulation without stem breakage
Adjust spray bar angles until all plant types exhibit this natural movement. In tanks with red plants like Rotala, maintain slightly stronger flow to prevent brown algae outbreaks.
Final Spray Bar Calibration Checklist
Before considering your spray bar setup in aquarium complete, verify these six critical points:
1. Water surface shows uniform ripple coverage (non-CO2) or gentle undulation (CO2)
2. Spray bar sits precisely 1-2cm below surface (non-CO2) or 3-5cm (CO2)
3. All plants exhibit species-appropriate movement patterns
4. No debris accumulates in corners after 24 hours
5. Surface agitation creates zero splashing onto tank hood
6. Fish swim comfortably without fighting currents
Make micro-adjustments during the first week as plants establish. In new setups, temporarily increase flow to prevent initial algae blooms, then reduce to maintenance levels once plants mature. For tanks with bettas or other slow swimmers, position spray bars to create calm zones near the surface using rock formations.
The perfect spray bar setup transforms your aquarium into a self-sustaining ecosystem where water clarity improves daily and plants grow vigorously. By positioning your spray bar at the exact height and angle for your specific tank type, you’ve created the foundation for long-term success. Remember that flow needs change as plants grow—revisit this calibration every 4-6 weeks. Within 30 days, you’ll notice fewer algae outbreaks, happier fish, and that unmistakable glow of a truly thriving planted aquarium. For immediate troubleshooting, always observe plant movement first—it’s nature’s most accurate flow meter.