How to Use Aquarium Siphon Pump: Easy Steps
That frustrating gurgle instead of a steady flow? You’re not alone. Millions of aquarium owners struggle with siphons that won’t start or lose suction mid-clean, leaving debris trapped in gravel and wasting precious tank maintenance time. The how to use aquarium siphon pump process hinges on physics, not luck—and getting it wrong risks disturbing your fish or even emptying your entire tank. This guide reveals the exact height adjustments, bulb techniques, and gravel maneuvering steps that transform siphoning from chaotic to controlled. You’ll learn to initiate a rock-solid siphon in under 30 seconds and clean substrate without sucking up your prized sand or gravel.
Position Your Waste Bucket for Maximum Gravity Pull
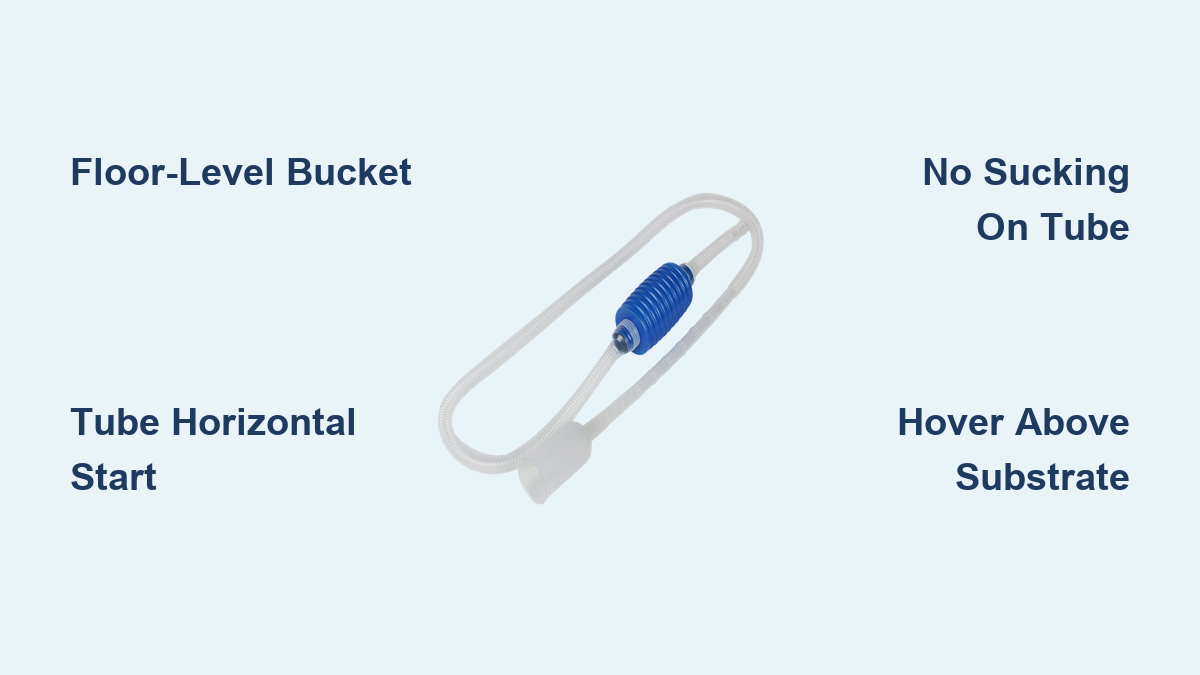
Your bucket’s height relative to the tank makes or breaks suction strength. Place the waste bucket directly on the floor—not on a chair or counter—to create the critical height difference gravity needs. Even 6 inches of drop doubles suction power compared to bucket-and-tank-level scenarios. Never compensate by propping up your aquarium; this creates dangerous instability risks and voids warranty coverage on most tanks. For stand-mounted aquariums, slide the bucket fully underneath the stand. If using a rimless tank, ensure the bucket sits at least 12 inches below the waterline. This positioning leverages gravity to create a self-sustaining water highway from tank to bucket.
Why Floor-Level Placement Beats All Alternatives
- Physics in action: Water flows toward the lowest point. A floor bucket creates steeper descent = faster flow
- Real-world impact: A 24-inch height difference moves 2x more water per minute than a 6-inch difference
- Danger zone: Propping tanks on books or boxes risks catastrophic tipping—especially with overfilled tanks
Set Up the Siphon Tube for Instant Flow
Submerge the wide gravel tube end completely in tank water before starting. Hold it almost horizontally (15-30 degree angle) while initiating flow—this traps water more effectively than vertical positioning. Keep the narrow discharge tube fully submerged in the waste bucket during setup. Check all connections: twist the pump bulb onto the tube until snug (no gaps visible), and ensure the hose clamp secures the tube-to-bulb junction. Air leaks here cause the most common siphon failures.
Critical Tube Positioning Mistakes to Avoid
- Mistake: Pointing tube straight down into gravel during startup
Consequence: Air pockets form, breaking suction - Mistake: Letting tube end touch tank bottom
Consequence: Debris clogs intake before flow begins - Fix: Float tube 2 inches above substrate while starting siphon
Start the Siphon Without Splashing or Spills
Orient the pump bulb with the flow arrow pointing toward the discharge tube (away from the tank). Squeeze firmly and rapidly 3-5 times—like pumping a bicycle tire—until water visibly flows through the transparent bulb. Stop squeezing the moment water moves steadily; over-pumping forces air back into the system. For bulb-less models, submerge the entire tube, cap the tank-end with your thumb, lower the bucket-end into the waste container, then release your thumb. Never suck on the tube—this introduces bacteria and risks chemical exposure from tank treatments.
Troubleshooting Stubborn Siphons in 60 Seconds
Problem: Bulb squeezes feel “mushy” with no water movement
Fix: Tighten all connections while submerged—loose bulb joints leak air
Problem: Water starts flowing then stops abruptly
Fix: Lower bucket further or tilt tube horizontally during restart
Problem: Siphon works but won’t pull debris from gravel
Fix: Ensure bucket is at least 18 inches below tank waterline
Clean Gravel Without Losing Substrate or Disturbing Fish

Once water flows steadily, lower the wide tube end to hover 1/2 inch above the substrate. Use a slow “in-and-out” motion: push gently into gravel (1-2 inches deep), then pull back up while maintaining slight suction. This stirs debris without burying the tube. For fine sand substrates, keep the tube 1 inch above the surface and move in small circles—never plunge deep. Cover sections systematically: clean one tank quadrant per session to avoid oxygen depletion. Stop when water runs visibly clearer (usually 15-20% of tank volume removed).
Substrate-Specific Cleaning Techniques
| Substrate Type | Tube Depth | Motion Speed | Debris Risk |
|---|---|---|---|
| Coarse gravel | 1-2 inches | Medium | Low |
| Fine gravel | 1/2 inch | Slow | Moderate |
| Sand | Hovering | Very slow | High |
| Plant soil | 1/4 inch | Minimal | Critical |
Warning: Pushing tube deeper than 2 inches in any substrate causes instant clogs. If gravel enters the tube, lift it immediately—don’t force continued suction.
Stop the Siphon Safely and Refill Correctly
Lift the discharge tube end out of the waste bucket before water drops below 6 inches in the tank. Never let the siphon run dry—this draws air into the system and requires full restart. When refilling:
1. Treat new water with conditioner (1 drop per gallon) while filling
2. Match temperatures within 2°F using a thermometer
3. Pour slowly against tank glass to avoid disturbing substrate
Critical mistake: Adding untreated tap water directly to tank. Chlorine in just 1 cup can kill beneficial bacteria colonies.
Fix Common Siphon Failures Before They Wreck Your Tank

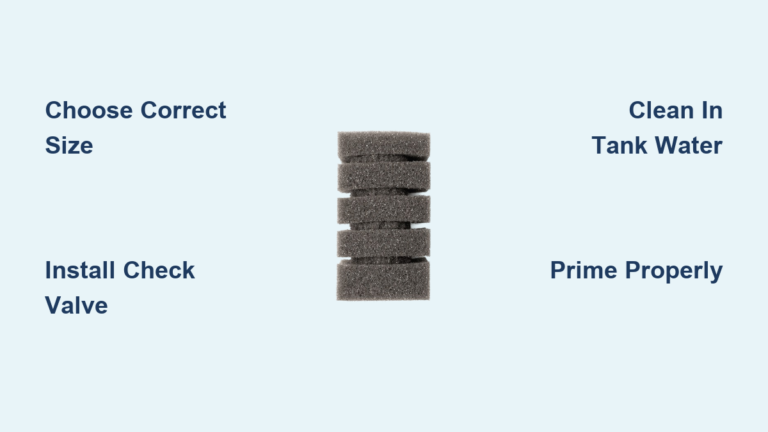
Weak suction despite correct height? Check for hairline cracks in the pump bulb—replace if rubber feels brittle. Air leaks often hide where the bulb connects to rigid tubing; apply aquarium-safe silicone sealant to joints. For recurring clogs, install a pre-filter sponge over the intake tube (cut to fit snugly).
Emergency Clog Clearance Protocol
- Lift tube from tank but keep discharge end in bucket
- Disconnect tube from bulb at bucket end
- Blow forcefully into tank-end to eject debris
- Reconnect and restart siphon immediately
Never clear clogs by shaking the tube over your tank—this sprays contaminated water onto equipment.
Pro Cleaning Hacks for Busy Fish Keepers
Start cleaning 15 minutes before lights-out when fish are least active. Stir debris in one area first, then siphon that spot immediately before particles settle. For planted tanks, target water changes near filter outflow where detritus accumulates fastest. After cleaning, leave filter media in old tank water (not tap!) to preserve bacteria colonies.
Time-saver: Pre-position your waste bucket on a rolling cart. One tug moves it from under-stand to sink for draining—no lifting heavy water.
Prevent Substrate Loss During Sand or Soil Cleaning
Fine substrates demand specialized technique. Hold the tube vertically 1 inch above sand while moving in slow figure-eights. Suction should lift only the top 1/8 inch of debris. For planted tanks with nutrient soil, limit depth to 1/4 inch and avoid root zones. If substrate enters the tube, stop immediately—soil breakdown releases ammonia.
Pro tip: Vacuum only 30% of the tank floor per session in soil-based setups to maintain microbial balance.
A properly executed siphon session removes 80% of harmful waste while preserving your tank’s ecosystem. By mastering bucket height positioning and substrate-specific techniques, you’ll cut cleaning time in half and eliminate cloudy water after changes. Remember: gravity is your ally—never fight it by raising tanks or forcing clogged tubes. When your siphon flows like a silent waterfall, you’ve created the stable environment fish thrive in. Now go reclaim your weekend—your tank (and sanity) will thank you.