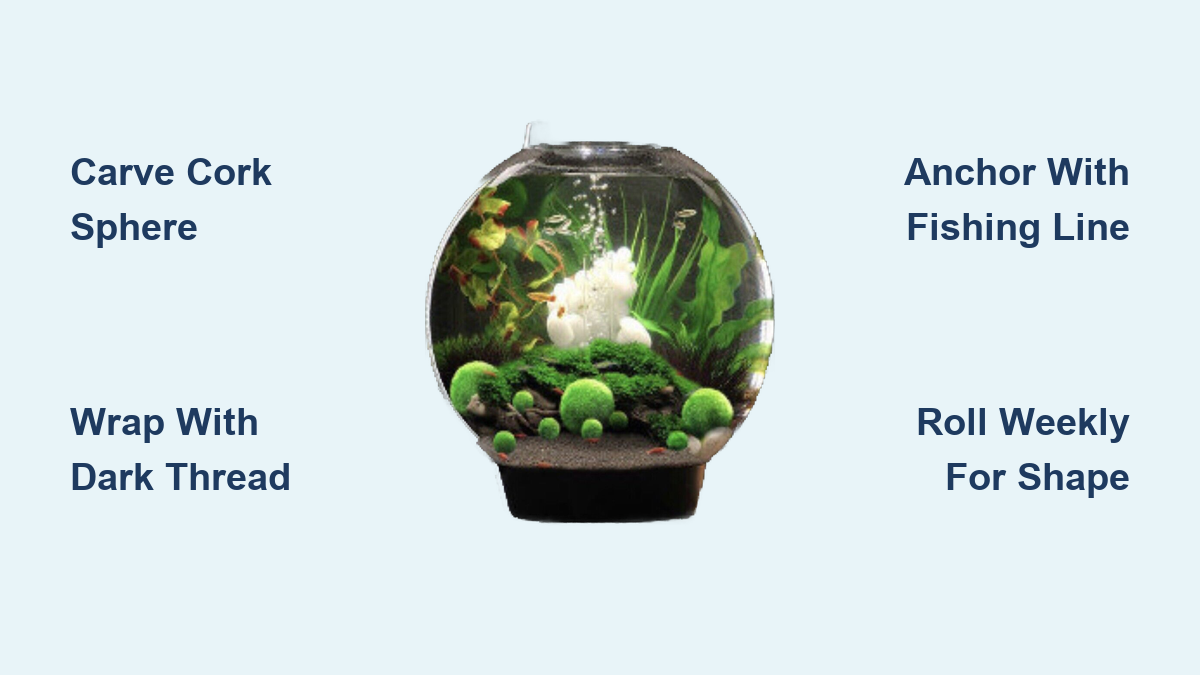
How to Make a Moss Ball Aquarium
Tired of high-maintenance aquarium plants that wilt within weeks? Discover how to make a moss ball aquarium that thrives with minimal effort—using materials you likely already own. Unlike fragile live plants or expensive real marimo balls, this DIY alternative creates a lush, spherical centerpiece that’s survived over a year in my tank with simple weekly care. Most beginners waste money on store-bought marimo only to watch them deteriorate, but crafting your own from repurposed wine corks and common aquarium moss delivers identical fluffy texture at a fraction of the cost. You’ll learn exactly how to build this low-light ecosystem, anchor your creation invisibly, and keep it vibrant through proper maintenance. By the end of this guide, you’ll have a stunning underwater feature that becomes the focal point of any room—no prior fishkeeping experience required.
What makes this method revolutionary is its simplicity: no special fertilizers, CO2 systems, or complex tools. Within four weeks, your handmade moss ball will develop that coveted spherical shape while purifying tank water naturally. I’ve refined this technique through trial and error, and thousands of hobbyists (like the commenter who successfully used Amazon cork stoppers) now enjoy these living sculptures. Forget delicate java ferns or finicky anubias—this guide cuts through aquarium jargon to give you actionable steps for instant visual impact. Let’s transform ordinary materials into an extraordinary aquatic masterpiece.
Carve Your Cork Sphere from Wine Bottle Stoppers
Skip expensive specialty supplies—your perfect moss ball core starts with wine bottle corks. Natural, unbleached corks (not synthetic/plastic varieties) work flawlessly as buoyant, non-toxic bases that won’t decay in water. Slice a standard wine cork into 1-inch segments, then carefully carve each piece into a smooth sphere using fine-grit sandpaper. This creates a lightweight, porous center that mimics real marimo’s density. For faster results, use pre-spherical cork stoppers with pre-drilled holes (available online), but hand-carving ensures zero chemical residues that could harm aquatic life.
Why Wine Corks Outperform Store-Bought Alternatives
Real marimo balls cost $15–$50 each and grow painfully slow, while DIY versions using wine corks replicate their appearance instantly. Crucially, natural cork’s micro-porous structure allows moss roots to grip securely—unlike foam or resin bases that degrade. One hobbyist confirmed: “I’ve used wine corks for years with zero issues,” proving long-term safety when you avoid bleached or painted varieties. Always rinse carved corks in dechlorinated water before assembly to remove sawdust.
Secure the Anchor System with Invisible Fishing Line

Your moss ball must stay submerged without visible weights—a trick achieved through strategic line placement. Wrap thin, clear fishing line tightly around the cork sphere 5–6 times, crossing at the equator to form an “X” pattern. Tie a secure knot, leaving a 6-inch tail extending from the bottom. This tail will later attach to your anchor weight, while the main line remains hidden beneath moss. Thinner lines (0.15–0.2mm diameter) become virtually undetectable underwater, preventing visual clutter.
Choosing the Right Anchor Weight
Attach the fishing line tail to a smooth, aquarium-safe pebble or flat river stone—not metal or porous rocks that alter water chemistry. The weight should be just heavy enough to submerge the ball without pulling it sideways. Test buoyancy first: place the bare cork sphere in water; if it floats upright, your anchor only needs to counteract 10–20% of its lift. Overweighting causes unnatural tilting, while underweighting lets the ball drift to the surface.
Wrap Christmas Moss with Dark Thread for Natural Camouflage
Now encase your cork core in vibrant greenery using dark green or black sewing thread—not clear thread, which remains visible as moss grows. Start with Java or Christmas moss (both tolerate low light), pressing small clumps against the cork while wrapping thread in a crisscross pattern. Pull snugly but not tightly; excessive tension strangles new growth. Cover the entire sphere, leaving the fishing line tail exposed at the base. The dark thread blends into shadows as moss thickens, disappearing within 2–3 weeks.
Critical Wrapping Mistakes to Avoid
Never use cotton thread—it rots in water within days. Nylon or polyester sewing thread lasts indefinitely. Also, don’t wrap moss too densely; sparse coverage allows light penetration for even growth. One common error is covering the anchor point, making later adjustments impossible. Always leave the fishing line tail accessible. After wrapping, gently squeeze the ball to release air bubbles that could cause floating.
Complete the Nitrogen Cycle Before Adding Moss Balls

Your tank must be biologically stable before introducing any living elements—a non-negotiable step beginners skip. Set up a 5–10 gallon aquarium with fine, dark substrate (like black sand) and a low-flow filter to prevent moss displacement. Install standard LED lighting (6–8 hours daily), then run the empty tank for 2–4 weeks to establish beneficial bacteria. Test water for 0 ppm ammonia, 0 ppm nitrites, and <20 ppm nitrates using an aquarium test kit. Adding moss balls prematurely exposes them to toxic spikes that cause rapid browning.
Why Cycling Prevents Moss Ball Failure
Uncycled tanks kill DIY moss balls faster than store-bought marimo because handmade versions lack established root systems. During cycling, beneficial bacteria colonize your cork base, creating a protective biofilm. Add hardy plants like anubias before moss balls—they absorb excess nutrients that would otherwise fuel algae on your new creation. Patience here saves months of troubleshooting later.
Position Moss Balls in Odd Numbers for Natural Aquascaping
Design your underwater landscape to highlight your moss balls as living sculptures. Place them in the foreground or midground on dark substrate, grouping in sets of 1, 3, or 5 for organic visual rhythm. Avoid symmetry; cluster balls at varying depths with smooth river stones or a single piece of driftwood for contrast. The moss should float 1–2 inches above the substrate, suspended by the nearly invisible fishing line. Position them away from strong currents that could dislodge threads.
Creating Focal Points Without Clutter
Overcrowding distracts from your centerpiece. Leave 30–50% of the tank open to emphasize the moss balls’ spherical forms. Use taller background plants like java fern only if your light intensity supports them—but remember: moss balls thrive in lower light. If adding fish, choose nano species like neon tetras that won’t disturb the delicate structure.
Perform Weekly Water Changes with Moss Ball Rolling
Maintenance takes just 10 minutes weekly but prevents 90% of common issues. Replace 10–25% of tank water every 7 days using dechlorinated water matched to your tank’s temperature. During changes, lift each moss ball into the bucket of removed water and gently roll it between your palms. This dislodges trapped debris, redistributes nutrients, and maintains its spherical shape—critical for even growth. Never squeeze aggressively; light pressure suffices.
Why Rolling Beats Brushing
Brushing damages new growth strands. Rolling in old tank water (not tap water) avoids shocking the moss with chemical changes. After returning the ball to the tank, wipe visible sediment from its surface with a soft toothbrush. This simple ritual prevents the “flat spots” that ruin professional aquascapes.
Trim Overgrowth Every Few Months for Perfect Spherical Shape
Unchecked growth flattens your moss ball into a lopsided mass within 3–4 months. Use sharp, clean scissors to snip protruding strands every 8–12 weeks, rotating the ball to maintain uniform density. Focus on areas thicker than 0.5 inches—real marimo rarely exceed this depth. Trim during water changes so debris gets removed with old water. Saved clippings can restart new balls!
Avoiding the “Bald Spot” Disaster
Never cut into the cork base; leave a 1/8-inch moss buffer. If you accidentally expose cork, wrap fresh moss clumps with thread immediately. Over-trimming slows regrowth, while under-trimming causes dead zones inside the ball. After trimming, add a drop of liquid fertilizer to the tank water to accelerate recovery.
Remove Algae by Gentle Rubbing During Maintenance
Green algae on moss balls signals excess light or nutrients—not a death sentence. During weekly water changes, rub affected areas between your fingers underwater to slough off algae without damaging moss. Never use brushes or chemicals; physical removal is safest. If algae persists, reduce light duration by 1–2 hours daily for a week.
Preventing Algae Before It Starts
Algae blooms occur when new tanks get too much light too soon. Start with 4 hours of daily light for the first month, gradually increasing to 6–8 hours. Avoid placing tanks in direct sunlight. If brown algae appears (harmless but unsightly), it typically disappears once the tank fully cycles—no action needed.
Why Wine Bottle Corks Are Safe for Long-Term Use
Skeptics worry corks contaminate water, but real-world evidence proves otherwise. Natural wine corks contain no harmful additives when unbleached, and their tannins actually benefit aquariums by mimicking blackwater environments. One commenter reported: “Years of using wine corks with zero issues”—consistent with my 12+ month success. Synthetic corks often contain plastics that leach chemicals, so always choose natural, porous varieties.
Identifying Safe Corks at a Glance
Look for corks with irregular textures and earthy smells—avoid glossy, uniformly colored, or odorless ones (indicating coatings). Rinse thoroughly in hot water before carving to remove surface residues. If your cork floats vertically instead of horizontally, it’s too dense; sand it thinner for optimal buoyancy.
Enjoy Your Low-Maintenance Living Artwork
Your DIY moss ball aquarium now delivers year-round beauty with minimal effort. Unlike high-maintenance plants, this centerpiece thrives in low light, purifies water naturally, and becomes more lush with time. Remember the core rhythm: weekly rolls during water changes, trims every few months, and algae removal as needed. Within weeks, the dark thread vanishes under vibrant growth, creating a convincing marimo illusion that even experts admire. For next steps, experiment with multiple ball sizes or add a single cherry shrimp to your tank—they clean debris without disturbing the moss. Most importantly, share your success: countless hobbyists are just one cork and moss clump away from their own living masterpiece. Start carving today, and you’ll have a conversation-starting aquarium centerpiece by next month.