How to Use Filter Media in Aquarium: A Simple Guide
You just filled your new aquarium, carefully arranged the gravel and plants, and now you’re staring at crystal-clear water—but this pristine environment is biologically dead. Without beneficial bacteria to process fish waste, ammonia levels will spike within days, poisoning any fish you add. The traditional nitrogen cycle takes 4-6 weeks of tedious waiting, but there’s a proven method to bypass this dangerous period: using filter media from an established aquarium. This living bacteria colony instantly kickstarts your tank’s ecosystem, transforming it from sterile to fish-ready in hours. In this guide, you’ll learn exactly how to transfer and deploy used filter media to achieve a stable, healthy aquarium on day one—while avoiding critical mistakes that could sabotage your cycle.
Optimal Placement for Used Filter Media Transfer
Where you position the established filter media determines how quickly your new tank cycles. The bacteria need constant water flow and oxygen to thrive, so strategic placement is non-negotiable.
Direct Filter Media Swap for Maximum Impact
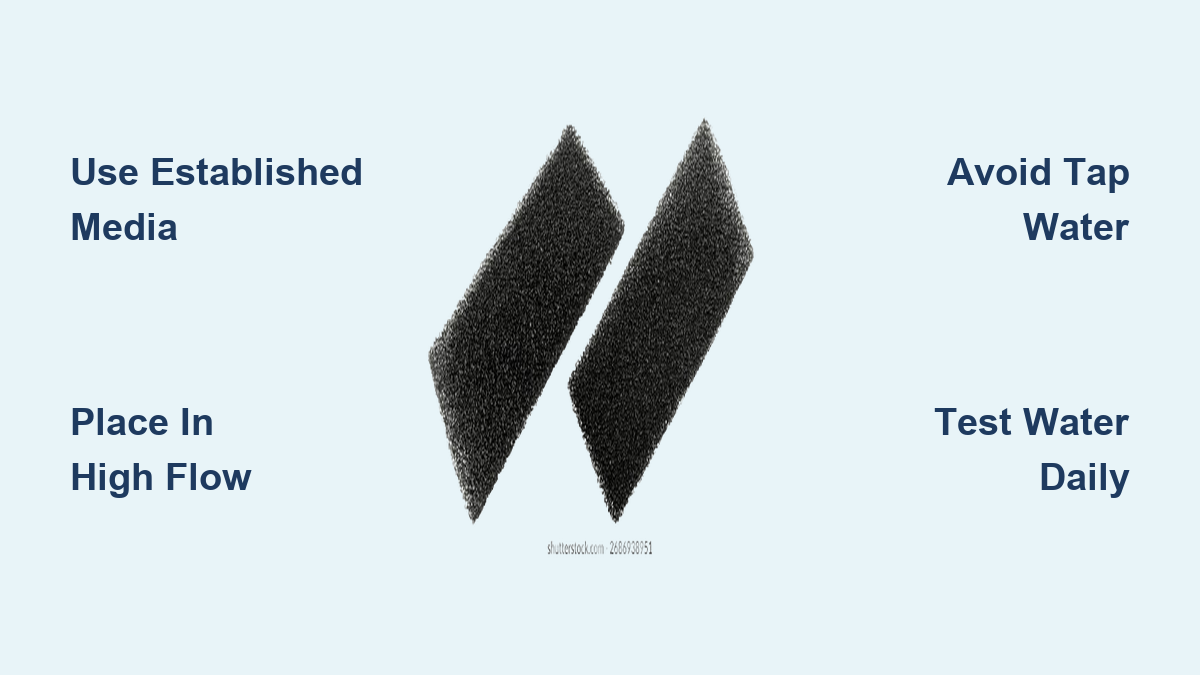
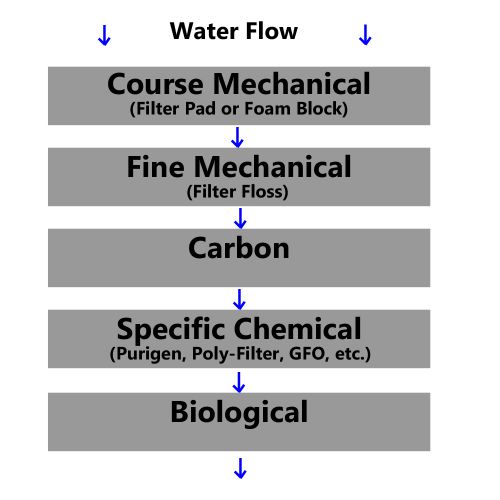
Replacing your new filter’s media with used media from a healthy tank delivers the fastest results. For hang-on-back (HOB) filters like the AquaClear, remove the fresh carbon pads or sponges and slot in the established ceramic rings or sponge blocks. This places billions of nitrifying bacteria directly in the high-flow path, where they immediately begin converting ammonia. If your filter uses cartridges, cut the used sponge media to fit snugly inside the housing—never compress it tightly, as this restricts water flow and suffocates bacteria.
Tank Placement When Filters Are Incompatible
When filter types mismatch (e.g., transferring sponge media to a canister filter), submerge the used media directly in your new tank. Clip it near the filter outlet using a media bag or suction cups so water flows through it constantly. Though slightly slower than in-filter placement, this method works because bacteria detach and colonize your new filter media within 48 hours. For sponge filters, simply drop the entire used unit into your tank—the porous structure releases bacteria continuously while providing instant biological filtration.
Filter Type Compatibility for Seamless Transfer

Not all filters accept foreign media equally. Matching the source and destination systems prevents wasted effort and ensures bacterial survival.
Hanging Filters: The Plug-and-Play Solution
HOB filters with modular media chambers (like Whisper or Penguin models) let you swap 50-75% of the media without disrupting flow. Always retain some new media to maintain mechanical filtration while the bacteria multiply. Never remove all media from the donor tank—take only 20-30% of their established media to avoid crashing their cycle.
Sponge Filters: The Universal Bacteria Carrier
Sponge filters are ideal for media transfer since their porous structure houses dense bacterial colonies. If your new tank uses a different filter type, run the used sponge filter alongside your primary filter for 1-2 weeks. The constant water agitation releases bacteria into the tank, which then colonize your main filter. After cycling, you can repurpose the sponge as a backup filter or donate it back to the source tank.
Step-by-Step Fish Introduction Protocol
Adding fish too soon after media transfer is the #1 cause of cycle failure. Follow this phased approach to prevent deadly ammonia spikes.
Step 1: Insert the used filter media as described, then run the filter continuously for 24 hours.
Step 2: Add only 1-2 hardy “pioneer” fish (like zebra danios or white cloud minnows) per 10 gallons. This provides minimal ammonia to feed the bacteria without overwhelming them.
Step 3: Test water daily for ammonia and nitrite using a liquid test kit. Acceptable levels: Ammonia ≤0.5 ppm and nitrite ≤0.5 ppm.
Step 4: Wait 7-10 days before adding more fish. Only proceed when both readings hit zero for 3 consecutive days—this confirms the bacteria colony has expanded to handle the bioload.
Fishless Cycling Acceleration with Used Media

Skip fish-in cycling entirely by jumpstarting a fishless cycle with established media. This method is safer and faster when done correctly.
Ammonia Dosing for Bacteria Growth
After adding used media, dose pure ammonia (not household cleaners) to maintain 1-2 ppm concentration. Test daily: When ammonia drops to zero within 12 hours and nitrite appears, add another dose. The used media slashes cycling time from 6 weeks to 7-10 days. Never exceed 2 ppm—higher concentrations stall bacterial growth.
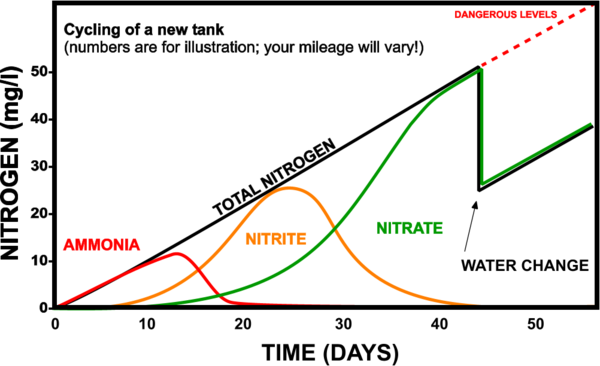
Critical Testing Timeline
Track progress with this sequence:
1. Days 1-3: Ammonia drops rapidly; nitrite appears
2. Days 4-7: Nitrite spikes then falls; nitrate becomes detectable
3. Day 8+: Ammonia and nitrite consistently read zero; nitrate rises
Only add fish after passing step 3. Skipping this verification risks fish loss.
Alternative Media Transfer Techniques
When direct media swaps aren’t possible, these community-tested methods still deliver results.
The Gentle Swish Method for Bacteria Release
Submerge the used media in a bucket of your new tank’s water. Squeeze it gently 5-6 times to release free-floating bacteria into the water. Return the media to the donor tank—it retains 70-80% of its bacterial load. Pour the “bacteria tea” directly into your filter intake. This works best with sponge media and avoids disrupting either tank’s filtration.
Dual-Filter Bacteria Boosting
Run your new filter in a friend’s established tank for 2-4 weeks before moving it to your aquarium. Place it alongside their existing filter to avoid flow issues. This fully colonizes your media without removing any from the donor tank—a foolproof method for large or complex systems.
Critical Mistakes That Sabotage Media Transfers
Even with perfect technique, these errors can derail your cycle. Avoid them at all costs.
- Using dried-out media: Bacteria die within 30 minutes of exposure to air. Always transport media submerged in source tank water.
- Overstocking based on media volume: A fist-sized sponge from a 5-gallon tank won’t cycle a 55-gallon immediately. Stock at 25% of the donor tank’s bioload initially.
- Rinsing media in tap water: Chlorine kills bacteria instantly. Clean media only in dechlorinated tank water.
- Ignoring media age: Media older than 6 months has significantly fewer viable bacteria. Confirm the donor tank has cycled within the last 3 months for best results.
Pre-Transfer Media Preparation for Peak Performance
Maximize bacterial survival by prepping the media before transfer.
Oxygenate During Transport
Place media in a sealed container filled with source tank water, leaving 20% air space. Gently shake every 15 minutes during transit to maintain oxygen levels—bacteria suffocate in stagnant water. Never seal media in an airtight bag without water.
Pre-Feed Media for Rapid Colonization
Soak the media in a solution of 1 drop of liquid bacteria food (or crushed fish flake) per cup of tank water for 1 hour before transfer. This “wakes up” dormant bacteria and gives them immediate nutrients to reproduce upon entering your new tank.
Long-Term Maintenance for Cycle Stability
Your success hinges on preserving the bacterial colony after transfer.
Safe Media Cleaning Protocols
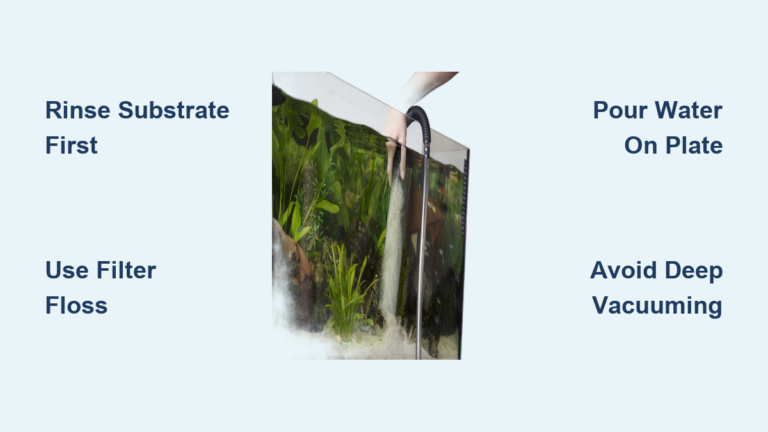
Never replace all media at once—this crashes your cycle. When cleaning, rinse only 1/3 of the media monthly in a bucket of tank water (not tap water). Squeeze gently; aggressive scrubbing destroys bacterial biofilms. Replace media in staggered stages over 3 months.
When to Supplement with Starter Cultures
If ammonia spikes occur despite using established media, add a liquid bacteria supplement like Seachem Stability. This isn’t a shortcut—it’s insurance against undetected gaps in your bacterial coverage. Dose daily for 3 days while testing parameters.
Using established filter media correctly transforms aquarium cycling from a stressful gamble into a predictable science. By placing media strategically, matching filter types, and following the phased fish introduction protocol, you’ll achieve a stable nitrogen cycle in under 10 days—90% faster than traditional methods. Remember: Always test water parameters before adding fish, never let media dry out, and take only what the donor tank can spare. Once established, this bacterial colony will sustain your aquarium for years with minimal maintenance. For next steps, explore our guide on identifying healthy filter media by color and texture to ensure your cycle stays robust long-term. Your fish deserve a safe home from day one—this method delivers exactly that.