How to Set Up a Saltwater Reef Aquarium
Watching vibrant corals sway in ocean currents during a snorkeling trip in Hawaii sparked my journey into saltwater reef keeping—a pursuit far more complex than freshwater aquariums but infinitely more rewarding. Unlike fish-only tanks, a thriving reef ecosystem demands precise chemistry, specialized equipment, and patience measured in months, not weeks. Yet with the right approach, even beginners can create a miniature ocean paradise at home. This guide cuts through the overwhelm to deliver actionable steps for building a stable 40-75 gallon reef tank, focusing on hardy soft corals and critical water parameters. You’ll learn exactly how to avoid the most common setup disasters while establishing the biological foundation for long-term success—no marine biology degree required.
The secret lies in methodical preparation: skipping steps like proper cycling or using RODI water guarantees algae explosions and livestock loss. But do it right, and within 8 weeks you’ll have a mature system ready for your first mushroom corals. Forget “plug-and-play” promises—this is science-backed reefing where stability trumps speed. Let’s transform your living room into a slice of the Pacific, one calibrated parameter at a time.
Reef Tank Budget Planning: Realistic Costs for a 40-75 Gallon System
Before buying a single piece of equipment, map your financial commitment. A quality 40-75 gallon reef setup requires $800-$1,500 upfront—not including livestock. This range covers essential gear like a protein skimmer ($200-$400), RODI system ($150), and live rock ($300 for 75 lbs). Crucially, ongoing costs add $100 monthly for salt mix, test kits, and electricity. Many beginners underestimate these expenses, leading to corner-cutting on critical items like inaccurate hydrometers or weak lighting.
Why size matters for stability
Choose a 40-75 gallon tank as your starting point. Larger volumes buffer against rapid parameter swings—critical when ammonia spikes can kill corals overnight. A 20-gallon tank demands near-daily testing and water changes, while 75 gallons offers forgiveness for new reefers. Never compromise on tank stand strength; a 50-gallon system weighs 600+ lbs. Place it on a level floor away from windows (to prevent algae blooms) and near a floor drain for maintenance emergencies.
Critical Saltwater Reef Equipment: Protein Skimmer, RODI, and Lighting Must-Haves
:strip_icc()/saltwater-aquarium-setup-2925685-a981f3ac73aa41739083e7fe702f26b5.jpg)
Skip generic “starter kits”—they often include inadequate gear. Your non-negotiables:
- RODI water system: Tap water contains phosphates and silicates that fuel hair algae. Use only RODI for mixing saltwater and top-offs. Budget $120 for a basic 5-stage unit; bottled water costs $200+/month long-term.
- Reef-specific lighting: Soft corals like zoanthids need 150-200 PAR intensity. Invest in programmable LEDs (e.g., Kessil A360X) that simulate sunrise/sunset cycles—$300 minimum for a 40-gallon tank.
- Protein skimmer: Even FOWLR tanks need one for organic waste removal. The AquaC Remora handles 40-75 gallons ($250) and prevents nitrate buildup.
- Test kit trifecta: Master your water chemistry with Salifert test kits for alkalinity, calcium, and phosphate. Dip strips give false readings; liquid kits detect dangerous 0.05 ppm phosphate levels.
Pro Tip: Rent a sump pump from your local fish store for initial setup. Moving 100+ lbs of live rock without one risks back injury and tank cracks.
How to Cycle a Saltwater Reef Tank: 8-Week Fishless Cycling Process

Rushing this phase causes 90% of beginner reef failures. Here’s the exact sequence:
Week 1-2: Ammonia Spike Setup
Fill your tank with RODI water mixed to 1.025 specific gravity using Instant Ocean salt mix. Add 75-120 lbs of live rock (the bacteria factory) and plug in heaters (76-78°F). Inject 4 drops of pure ammonia per 10 gallons daily using an eyedropper—never use fish food as it clouds water and creates inconsistent ammonia levels. Test twice daily with your master kit until ammonia hits 2-4 ppm.
Week 3-6: Nitrite Conversion Phase
As nitrosomonas bacteria multiply, ammonia drops while nitrite surges (often to toxic 5+ ppm). Maintain ammonia at 2 ppm by adding more pure ammonia when tests read near zero. This phase tests your patience—wait until nitrite also drops to zero before proceeding. If stalled, add a bacterial accelerator like Dr. Tim’s One and Only.
Week 7-8: Nitrate Completion Check
Once ammonia and nitrite consistently read 0 ppm for 72 hours, test nitrate. Acceptable levels are <20 ppm. If higher, perform a 25% water change. Critical sign of readiness: Your protein skimmer produces dark, coffee-colored foam daily.
Fallow Period: Why 3 Weeks of Empty Tank Time Prevents Disaster
After cycling completes, resist adding livestock immediately. Run the tank empty for 14-21 days while:
– Testing alkalinity (target 8-9 dKH) and calcium (380-420 ppm) daily
– Letting nuisance algae bloom and recede naturally
– Seeding the tank with copepods (e.g., Tigriopus) to establish microfauna
This “fallow” period lets beneficial bacteria colonize every surface. Skip it, and your first corals will starve amid unstable parameters. Monitor with a refractometer—salinity must hold steady at 1.025 without top-offs.
First Reef Tank Livestock: Choosing Hardy Clownfish and Soft Corals

Adding Clean-Up Crew (Week 9)
Start with 1 snail per 5 gallons (Nerites for glass, Trochus for rock) and 2 blue-legged hermit crabs per 10 gallons. Warning: Avoid scarlet hermits—they become aggressive algae grazers. Add them at night with tank lights off to reduce stress.
Introducing Your First Fish (Week 10-12)
Only after 3 months of tank maturity:
1. Quarantine all fish for 4 weeks in a separate 10-gallon tank with hyposalinity treatment
2. Add hardy species first: Ocellaris clownfish or lawnmower blennies (research max size—blennies grow to 4″)
3. Float the acclimation bag for 15 minutes, then drip-tank method over 90 minutes
Critical mistake: Never add tangs to small tanks. A yellow tang needs 100+ gallons—starting with one in a 40-gallon tank guarantees stunted growth and aggression.
Soft Coral Selection Guide for Beginners
| Coral Type | Lighting Needs | Flow Requirement | Growth Rate |
|---|---|---|---|
| Mushrooms | Low (50 PAR) | Gentle pulse | Fast |
| Zoanthids | Medium (100 PAR) | Moderate surge | Moderate |
| Leather Toadstools | Medium-high (150 PAR) | Strong chaotic | Slow |
Add only 1-2 corals initially. Place mushrooms on sand (they’ll spread), zoanthids on rock ledges, and leathers in high-flow zones. Acclimate using a 30-minute drip method—sudden parameter changes cause coral expulsion.
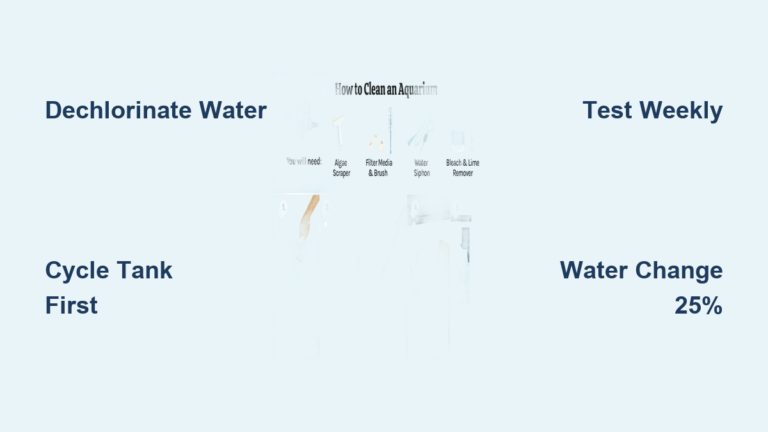
Weekly Reef Maintenance: Water Changes That Prevent Algae Explosions
Your survival depends on consistency. Every 7 days:
1. Test alkalinity, calcium, phosphate, and nitrate before water changes
2. Replace 10-15% with pre-mixed saltwater (aged 24+ hours at 78°F)
3. Siphon detritus from sand beds using a gravel vacuum
4. Clean protein skimmer collection cup and powerhead intakes
Time-saving hack: Mix saltwater in 5-gallon buckets during Week 1 of the cycle. Store in labeled containers with dates—this ensures water chemistry matches your tank during changes. Never skip testing; a 0.5 dKH alkalinity drop stresses corals more than a 2°F temperature swing.
Top 5 Saltwater Reef Setup Mistakes and How to Fix Them
Mistake 1: Skipping RODI Water for Top-Offs
Consequence: Tap water top-offs introduce phosphates, causing red slime algae in 72 hours.
Fix: Install an auto top-off (ATO) system ($80) using RODI water. Test phosphate weekly—keep below 0.03 ppm.
Mistake 2: Overstocking Fish Before 6 Months
Consequence: Adding 3 fish at once crashes the cycle, spiking ammonia to 1.0 ppm.
Fix: Follow the “1 fish per month after 3 months” rule. A 50-gallon tank maxes at 6 small fish (e.g., 2 clownfish + 1 blenny + 1 goby).
Mistake 3: Ignoring Alkalinity Stability
Consequence: Daily alkalinity swings cause coral recession and tissue necrosis.
Fix: Dose 2-part buffer (e.g., B-ionic) only after water changes, targeting 8.2 dKH. Never adjust more than 0.5 dKH per day.
Mistake 4: Using Tap Water for Salt Mixing
Consequence: Silicates in tap water trigger brown diatom outbreaks that smother corals.
Fix: Rinse live rock in new saltwater (not tap!) during setup. If diatoms appear, add 10 Nassarius snails—they consume them in 3 days.
Mistake 5: Adding Corals Before 4 Months
Consequence: Immature tanks lack copepods for coral feeding, causing starvation.
Fix: Wait until you see microfauna crawling on glass. Supplement with Reef Roids (1/8 scoop weekly) for the first soft corals.
When to Call It Quits: Salvaging a Failed Reef Setup
If your tank hits week 12 with persistent ammonia or algae covering >50% of rocks:
1. Remove all livestock immediately
2. Perform a 50% water change with new saltwater
3. Replace 30% of live rock with fresh uncured rock to reboot bacteria
4. Run the tank fallow for 30 days with 24/7 skimmer operation
This reset takes 6 weeks but saves months of frustration. Remember: Even pro reefers lose tanks. Your first failure teaches more than 10 successful cycles—document every parameter change to avoid repeating mistakes.
Final Note: A thriving reef tank isn’t built in a day—it’s grown over seasons. Your reward? Watching zoanthids pulse under moonlight settings as clownfish nestle into anemones you nurtured from polyps. Start small with mushrooms, master water changes, and let stability be your compass. In 12 months, you’ll glance at that first 40-gallon tank with pride, knowing you didn’t just set up an aquarium—you cultivated an ecosystem. Now mix your saltwater, test your refractometer, and begin. The ocean awaits.