How to Build a Custom Aquarium: Step-by-Step Guide
You’ve researched your fish species, measured your space, and realized no standard tank meets your needs. For bichir enthusiasts, that perfect 48″ x 36″ x 16″ footprint with less height but more swimming space simply doesn’t exist off-the-shelf. Building your own custom aquarium solves this problem, letting you create exactly what your aquatic inhabitants need while saving money compared to professional custom builds. This guide delivers precise, step-by-step instructions for constructing a safe, watertight aquarium that will last for years—whether you’re crafting a specialized bichir habitat or designing a unique display for any aquatic setup.
Essential Materials Checklist for Your Custom Aquarium Build
Before cutting your first panel, gather these critical supplies to avoid mid-project delays. For a 48″ x 36″ x 16″ tank, you’ll need 1/2″ thick glass or 3/4″ acrylic sheets cut to precise dimensions: one bottom panel (48″x36″), two side panels (48″x16″), and two end panels (36″x16″). Use a high-quality 100% silicone sealant (like GE Silicone I) for glass construction or Weld-On #3 acrylic cement for acrylic builds—never standard hardware store adhesives. Complete your toolkit with a precision glass cutter or acrylic saw, straight edge, tape measure, isopropyl alcohol, paper towels, painter’s tape, and a plastic spreader. Professional builders emphasize that skipping proper tools guarantees failure—your cousin might build tanks with Home Depot adhesive, but that doesn’t mean you should risk your aquatic investment.
Glass vs. Acrylic: Choosing Your Tank Material Wisely

Your material decision impacts everything from cost to longevity. Each option has specific advantages that make it ideal for certain applications.
Why Glass Works Best for Scratch-Resistant Budget Builds
Glass offers superior scratch resistance at a lower price point—critical if you have bottom-dwelling fish like bichirs that might kick substrate against the walls. A 48″ x 36″ bottom panel requires 1/2″ thick glass to prevent bowing under water pressure. Unlike acrylic, glass only needs edge support from your stand, not full bottom support. The trade-off? Glass weighs significantly more (a filled 48″x36″x16″ tank approaches 500 pounds) and demands precise cutting skills. Remember that silicone creates a mechanical bond with glass rather than a chemical weld, so seam preparation becomes absolutely critical.
When Acrylic Is Worth the Extra Care
Acrylic shines for complex shapes and large footprints like your 48″ x 36″ bichir tank. At 3/4″ thickness, it provides excellent clarity while being half the weight of equivalent glass. The real advantage? Acrylic’s chemical welding process creates molecular bonds between panels that are stronger than the material itself. However, you must support the entire bottom surface—unlike glass, which only requires edge support. Acrylic scratches more easily, but these can be buffed out, unlike permanent glass scratches. For your shallow 16″ deep tank, 3/4″ acrylic delivers the perfect balance of strength and cost without jumping to expensive 1″ thickness.
Calculating Panel Thickness: Preventing Catastrophic Failure
:strip_icc()/glassthickness_chartenh_600-56a81eed5f9b58b7d0f0da12.jpg)
Getting thickness wrong causes the most DIY aquarium disasters. For your 16″ tall bichir tank, side panels need 1/4″ per foot of height—so 1/4″ minimum, though 1/2″ provides crucial safety margin. The bottom panel must be significantly thicker to support the entire water column’s weight—1/2″ glass or 3/4″ acrylic for your 48″x36″ footprint. Ignoring the 3:1 safety factor (three times the theoretical minimum thickness) risks catastrophic failure under pressure. Professional builders universally recommend erring on the side of thicker material—your 48″x36″ tank’s wide span demands extra rigidity that standard aquarium thickness charts might underestimate.
Building Your Custom Aquarium: Step-by-Step Assembly
Follow this precise sequence to avoid common construction errors that lead to leaks and structural failure.
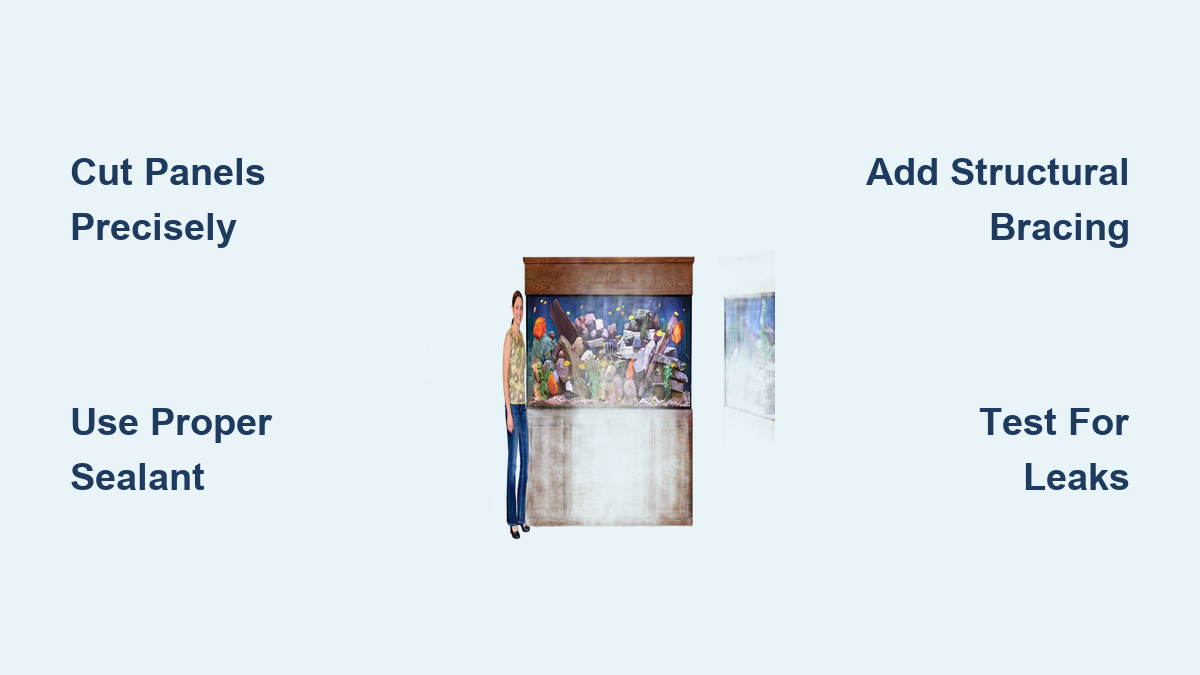
Cutting and Preparing Perfect Panels
Measure twice, cut once—especially critical for your 48″x36″ footprint where minor errors compound. For glass, score along a straight edge with a quality glass cutter, then snap cleanly. Acrylic requires a fine-tooth saw with slow, steady pressure to prevent melting. Sand all edges smooth with 220-grit sandpaper, then clean bonding surfaces with isopropyl alcohol—any oil or dust causes seam failure. Lay your bottom panel on a perfectly flat surface before proceeding. This preparation stage takes nearly as long as assembly but prevents 90% of leaks.
Acrylic Chemical Welding Technique for Flawless Seams
For acrylic tanks, apply Weld-On #3 through a needle-tip applicator along the edge of your side panel. Immediately press the adjoining panel into position—the cement chemically fuses the material within seconds. Work on one seam at a time in a well-ventilated area. For your 48″x36″ tank’s width, add internal bracing during assembly; a single cross-brace spanning the 36″ width prevents dangerous bowing. Remember that acrylic cement creates toxic fumes—never skip proper ventilation during this critical step.
Creating Watertight Silicone Seams for Glass Tanks
Apply a consistent 1/8″ bead of 100% silicone along the bottom panel’s edge. Position your side panel and secure with painter’s tape every 6 inches. Smooth the interior seam with a plastic spreader dipped in soapy water to create a concave fillet—the most watertight profile. Work methodically around all four sides before the silicone skins over (typically 5-10 minutes). Never apply silicone to both surfaces—that creates weak adhesion points. This technique creates the mechanical bond that holds your glass tank together under water pressure.
Mandatory Leak Testing Before Adding Livestock
After 48 hours of curing time (don’t rush this!), place your tank on a protected surface and fill slowly. Check seams every hour for the first 6 hours, then let sit 24 hours. Any seepage requires complete disassembly—attempting field repairs on a wet tank fails 9 times out of 10. Joey Mullen of DIY Fishkeepers emphasizes that skipping proper leak testing turns minor flaws into catastrophic failures once the tank is fully loaded with substrate and equipment.
Critical Bracing for Wide-Footprint Tanks Like Your 48″x36″ Design

Your 48″x36″ footprint creates extreme lateral pressure that standard tanks don’t face. For glass tanks, a perimeter top frame is non-negotiable—you cannot skip this with such a wide span. Acrylic versions need internal cross-bracing spanning the 36″ width. Marineland’s deep-dimension tanks solve this with factory-installed bracing, but DIY versions require careful engineering. The 16″ height helps reduce pressure compared to their 27″ models, but the width demands serious structural consideration. Without proper bracing, your front and back panels will bow outward within weeks, creating dangerous stress points.
Avoiding Costly DIY Aquarium Mistakes: Proven Tips
Top Five Construction Errors That Cause Leaks
- Rushing the curing process: Silicone needs 48 hours at 70°F to reach 90% strength—colder temperatures double required time
- Inadequate seam size: Skimping on silicone creates weak points; maintain consistent 1/8″ beads on all seams
- Poor surface preparation: Oils from fingers cause 70% of seam failures—clean with alcohol immediately before assembly
- Ignoring bottom support: Acrylic tanks require full surface support; glass only needs edge support
- Incorrect thickness calculations: Your 48″x36″ footprint needs thicker material than standard charts suggest
Cost vs. Professional Build Analysis
While DIY acrylic saves about $200 versus professional builds (like Midwest or Innovative Plastics), consider what you’re sacrificing. On a $1,500 tank, that’s only 13% savings—not worth losing the lifetime warranty for most beginners. However, if you need specialized dimensions like your 48″x36″x16″ bichir tank that professionals don’t offer, DIY becomes worthwhile. Always get quotes from local glass shops first—some match DIY costs while providing professional quality.
Final Sealing and Professional Finishing Techniques
After passing your 48-hour leak test, apply a second interior silicone bead to all seams for maximum security—this “double seal” technique catches micro-failures in the first pass. For glass tanks, add a black silicone background that hides equipment and creates visual depth. Acrylic builders can flame-polish edges with a propane torch for crystal-clear finishes. Install plumbing for your filtration system before adding substrate, then begin the nitrogen cycle with ammonia. Remember that your custom aquarium needs 4-6 weeks of cycling before adding sensitive species like bichirs.
Final Note: Building a custom aquarium requires precision but delivers unmatched satisfaction when your unique aquatic environment thrives. For your 48″ x 36″ bichir tank, prioritize proper bracing and thickness calculations over speed—the wide footprint creates unique engineering challenges. Always perform thorough leak testing before adding livestock, and consider whether DIY savings justify the risk for your specific dimensions. With careful execution using these proven techniques, your custom aquarium will provide decades of enjoyment while perfectly meeting your fish’s specialized needs.