Best Aquarium Setup for Beginners (2026 Guide)
Nothing beats the mesmerizing beauty of a thriving aquarium, but for many new hobbyists, the initial aquarium set up for beginners becomes overwhelming and leads to frustration. The truth is, most new tank failures stem from skipping critical steps in the setup process, not from inherent difficulty. By following a precise sequence that prioritizes water chemistry and biological balance over immediate fish addition, you’ll create a stable ecosystem where aquatic life flourishes. This guide cuts through the confusion with actionable steps, specific product recommendations, and the exact timeline you need to transform your vision into a vibrant underwater world—without the common pitfalls that derail 70% of first-time aquarium owners.
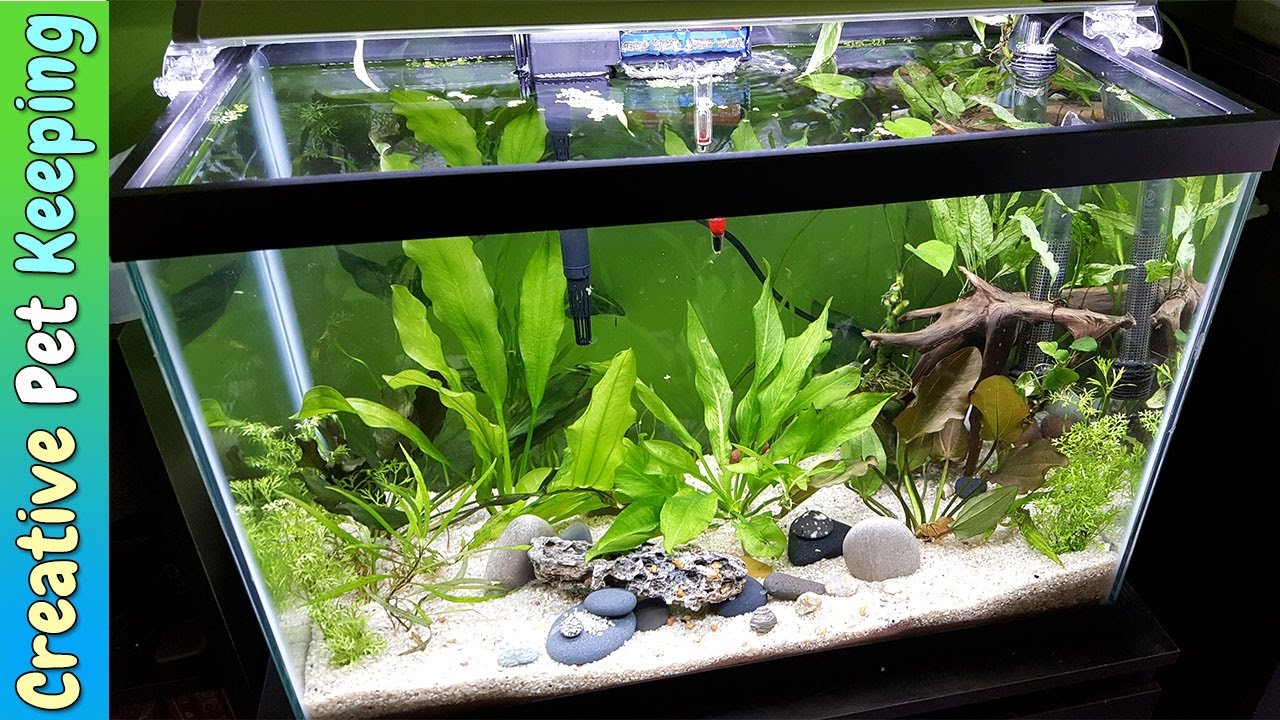
Why a 20-Gallon Tank Is Your Best First Aquarium Choice
Choosing the right tank size makes or breaks your beginner experience. While small 5- or 10-gallon tanks seem appealing, they create unstable water conditions that fluctuate dramatically with minor changes—like a single fish waste deposit or slight temperature shift. A 20-gallon tank provides the necessary water volume buffer to maintain stable parameters, giving you breathing room to learn proper maintenance without constant crisis management. This size comfortably houses a small community of fish while still fitting in most living spaces, making it the sweet spot for beginners who want both visual impact and manageable upkeep.
How Tank Size Affects Water Stability for Beginners
Water chemistry swings occur much faster in smaller volumes—imagine how quickly a cup of coffee cools versus a full pot. In a 5-gallon tank, a single dead plant or overfeeding incident can spike ammonia to lethal levels within hours, while the same issue in a 20-gallon tank gives you 24-48 hours to correct it. This buffer period is crucial for new aquarists still learning testing protocols and water change procedures. The extra space also allows proper fish schooling (most community fish need 6+ companions) and creates distinct territories that reduce aggression.
Calculating True Aquarium Costs: $250 Budget Breakdown
Don’t be fooled by the $20 tank price tag—your complete aquarium set up for beginners requires essential equipment that totals approximately $250 for new gear. This includes the tank ($40), AquaClear 50 filter ($40), 75W Eheim Jager heater ($25), LED lighting ($25), API test kits ($35), substrate ($15), decorations ($40), and water conditioner/biological starter ($15). Smart shoppers can reduce costs by purchasing during Petco’s $1-per-gallon sales or finding quality secondhand equipment, but never compromise on the filter, heater, or test kits—these are non-negotiable for success.
Essential Aquarium Equipment Checklist for New Owners
Your aquarium’s long-term health depends entirely on proper equipment selection and placement. Many beginners purchase “starter kits” that include undersized filters and unreliable heaters, dooming their tank before it even begins. Instead, invest in proven components that create stable conditions right from day one. The right equipment not only prevents common disasters but actually makes maintenance easier—counterintuitive as that may seem when staring at the initial price tag.
Must-Have Filtration: Why AquaClear 50 Outperforms Budget Filters
The AquaClear 50 power filter is the gold standard for 20-gallon beginner tanks because it delivers triple-action filtration: mechanical (trapping debris), biological (housing beneficial bacteria), and chemical (optional carbon media). Unlike cheap hang-on-back filters that clog within weeks, this model features a large media basket that maintains consistent flow even as it collects waste. Install it with the intake positioned away from direct substrate contact to prevent sucking up gravel, and angle the outflow toward the tank wall to create gentle water movement that oxygenates the entire column without stressing fish.
Heater Selection Guide: Preventing Temperature Swings with Eheim Jager
Temperature stability matters more than the exact number—fish tolerate 76°F consistently better than fluctuating between 74-78°F. The 75W Eheim Jager heater maintains precise temperatures within ±0.5°F, far superior to cheaper glass heaters that often swing 2-3 degrees. Position it near the filter outflow for even heat distribution, fully submerged horizontally with at least 1 inch of clearance from decorations. Always pair it with a JW Fusion thermometer (not the sticker type) placed opposite the heater to verify actual water temperature—never trust the heater’s dial setting alone.
Lighting Mistakes That Cause Algae Blooms in New Tanks
New aquarium owners often leave lights on for 12+ hours daily, thinking it helps plants grow, but this triggers aggressive algae blooms. Install a simple warm-spectrum LED (6500K) on an automatic timer set for 8 hours daily—this mimics natural daylight cycles and prevents algae while still showcasing fish colors. Avoid blue or cool-toned lights entirely during the first 8 weeks, as these wavelengths accelerate algae growth in new tanks. If you notice green water within days of setup, immediately reduce lighting to 4 hours and perform 25% water changes every other day.
Step-by-Step Aquarium Assembly: From Empty Tank to Water Ready
The physical setup process seems straightforward but contains critical nuances that determine long-term success. One misplaced heater or improperly rinsed substrate can derail your entire project. Follow this precise sequence to avoid common assembly errors that create problems weeks later when you least expect them.
Surface Preparation Checklist: Avoiding Catastrophic Tank Leaks
Place your tank on furniture rated for at least 250 pounds—20 gallons of water weighs 167 pounds alone, plus substrate, decorations, and the tank itself. Never use standard bookshelves; aquarium stands must distribute weight evenly across the entire bottom panel. Position the tank away from direct sunlight (which causes algae) and at least 6 inches from walls for equipment access. Before adding any water, place a level on the empty tank and adjust furniture legs until perfectly balanced in both directions—this prevents uneven glass stress that leads to cracks.
Proper Substrate Rinsing Technique to Prevent Cloudy Water
Rinse aquarium gravel in a clean bucket using a kitchen strainer until water runs completely clear—this typically takes 5-7 rinses. Never use soap or cleaners, as residue will kill beneficial bacteria. Pour the rinsed gravel into the tank in a 1-inch layer, sloping slightly higher in the back for visual depth. When adding decorations, place large rocks and driftwood first, creating caves and sight barriers that reduce fish stress. Remember: aquarium-safe decorations only—avoid anything with metal components or sharp edges that could injure fish.
Critical Equipment Placement: Where NOT to Position Your Heater
Install the filter first with media pre-rinsed in dechlorinated water, then position the heater horizontally near the filter outflow (not against the glass). Submerge both completely before filling, then slowly add room-temperature, dechlorinated water down a plate to avoid disturbing the substrate. After filling, add a double dose of Seachem Stability bacterial starter and plug everything in. Let the system run for 24 hours before proceeding—this identifies equipment failures while you still have empty-tank access.
The Nitrogen Cycle Explained: Why Fishless Cycling Saves Lives

The single most critical step in your aquarium set up for beginners is establishing the nitrogen cycle—a biological process that converts toxic fish waste into harmless compounds. Skipping this (by adding fish immediately) causes “new tank syndrome,” responsible for 80% of beginner aquarium failures. This invisible process takes 4-8 weeks but requires minimal effort beyond daily testing and occasional water changes.
Week-by-Week Nitrogen Cycle Timeline for New Aquariums
During week 1, ammonia spikes to 2-4 ppm as bacteria begin colonizing filter media. In weeks 2-3, nitrites surge while ammonia drops—a dangerous period requiring daily testing. By week 4, nitrates appear as both ammonia and nitrites approach zero, signaling cycle completion. Track progress with the API Freshwater Master Test Kit (not strips, which lack accuracy for ammonia). When your tank processes 2 ppm ammonia to 0 ppm within 24 hours, it’s ready for fish—no sooner.
How to Accelerate Cycling: Double Dosing Seachem Stability
Add a pinch of fish food daily or 3-5 drops of pure ammonia to feed growing bacteria colonies. Maintain water temperature at 82-84°F using your heater—warmer water accelerates bacterial reproduction. Double dose Seachem Stability on day one, then add normal doses every other day. Test parameters daily during this phase, and if ammonia exceeds 4 ppm, perform a 25% water change to prevent bacterial die-off. Properly accelerated, most tanks complete cycling in 3-4 weeks instead of 8.
Recognizing Cycle Completion: 0 ppm Ammonia and Nitrite
Your tank is truly cycled when consecutive tests show 0 ppm ammonia, 0 ppm nitrite, and some nitrates (5-20 ppm). Never add fish based on calendar time alone—only water chemistry confirms readiness. Before introducing fish, prepare yourself for the first water change: siphon 25% of water while vacuuming substrate, then add dechlorinated, temperature-matched replacement water. This establishes the maintenance rhythm essential for long-term success.
Water Chemistry Testing Protocol Every Beginner Must Follow
Testing isn’t optional—it’s your early warning system for invisible threats. Ammonia and nitrite at any detectable level will kill fish, yet these toxins are completely invisible to the naked eye. Commit to this testing schedule from day one, and you’ll prevent 95% of beginner aquarium disasters before they harm your fish.
API Test Kit vs. Strips: Why Liquid Tests Prevent Fish Deaths
Test strips provide inaccurate ammonia readings that give false security—the liquid API Freshwater Master Test Kit is the only reliable option for beginners. Perform full tests (ammonia, nitrite, nitrate, pH) daily during cycling, then weekly once established. Record results in a maintenance log to spot trends—sudden pH drops or rising nitrates indicate problems before fish show symptoms. Always test before and after water changes to verify effectiveness.
Critical Parameters: Ammonia Must Stay at 0 ppm in New Tanks
Any ammonia reading above 0 ppm requires immediate action: 50% water change with Prime-dosed water. Ammonia burns fish gills even at 0.25 ppm, causing respiratory distress that often gets misdiagnosed as disease. Nitrites must also read 0 ppm—these prevent blood from carrying oxygen, causing fish to gasp at the surface. Nitrates should stay below 20 ppm through regular water changes; levels above 40 ppm stress fish and trigger algae blooms.
pH Stability > Perfect pH: What Really Matters for Fish Health
Most beginners obsess over achieving “perfect” pH numbers, but stability matters far more than the specific value. A tank with stable pH 7.6 supports healthier fish than one fluctuating between 6.8-7.4. Test your tap water first to understand your baseline—most community fish thrive between 6.5-7.5, but chasing exact numbers through chemical buffers often causes dangerous swings. If your tap pH falls within range, don’t adjust it; focus instead on consistency through regular maintenance.
First Fish Selection: Beginner-Friendly Species That Thrive
:strip_icc()/GettyImages-1413740339-5aea18fdc25b41039fa8dc91d687f527.jpg)
Your initial stocking choices determine whether your aquarium becomes a self-sustaining ecosystem or a constant battle. Select hardy species that tolerate minor parameter fluctuations while your tank matures, and resist the temptation to add too many fish too soon.
Top 5 Beginner Fish: Guppies, Tetras and Corydoras Ranked
Start with a small school of neon tetras (6-8 fish) or ember tetras—these colorful fish school tightly, creating instant visual impact while producing minimal waste. Add 6 corydoras catfish to clean the substrate, and one dwarf gourami as a centerpiece fish. Avoid common goldfish and plecos—they grow too large for 20-gallon tanks and produce excessive waste. Never add “starter fish” like zebra danios that outgrow small tanks; choose species that stay under 2 inches as adults.
Fish Acclimation Mistake 90% of Beginners Make (Don’t Add Store Water!)
Float the sealed bag for 15 minutes to equalize temperature, then use the drip method: place fish in a bucket, start a slow siphon (2-4 drops per second) of tank water into the bucket for 60 minutes, doubling the water volume twice. Net the fish into your tank, but discard ALL store water—it often contains diseases or incompatible water chemistry. Adding even a cup of store water has introduced ich outbreaks in otherwise healthy tanks.
Proper Schooling Numbers: Why 6+ Tetras Is Non-Negotiable
Schooling fish like tetras become stressed and reclusive when kept in groups smaller than 6. In groups of 8+, they display natural behaviors, swim confidently, and actually become more resistant to disease. Their collective activity also helps establish biological balance faster than solitary fish. Wait until your tank has cycled for at least 2 weeks before adding your first school, and introduce them all at once rather than gradually.
Weekly Maintenance Routine That Prevents 95% of Aquarium Problems
Consistent maintenance—not expensive equipment—creates long-term aquarium success. Dedicate just 30 minutes weekly to these critical tasks, and you’ll avoid the common water quality crashes that destroy beginner tanks.
25% Water Change Formula: Temperature Matching and Prime Dosing
Every 7-10 days, siphon 25% of water into a clean bucket while vacuuming substrate debris. Prepare replacement water by adding Prime at 5x the normal dose (to neutralize chloramine), then match temperature within 2°F of tank water using a thermometer. Pour slowly down the tank side to avoid disturbing substrate. This routine removes nitrates before they accumulate while replenishing essential minerals fish need.
Gravel Vacuum Technique: Removing Debris Without Killing Bacteria
Hold the vacuum ½ inch above substrate, allowing debris to siphon out while leaving gravel behind. Work systematically across the tank bottom, focusing on high-traffic areas where waste accumulates. Never clean more than 1/3 of the substrate in one session—this preserves enough beneficial bacteria to maintain biological balance. Stop vacuuming when water runs slightly cloudy; completely clear water indicates you’ve removed too much organic matter.
Filter Media Maintenance: Why You Should Never Replace It All
Rinse mechanical filter media (sponges, floss) in old tank water every 4 weeks—never tap water, which kills beneficial bacteria. Replace only 1/3 of media at a time, staggering changes over three months. Chemical media like carbon should be replaced monthly, but biological media (ceramic rings) should never be fully replaced—these house your essential bacterial colonies. A well-maintained filter should never require complete media replacement.
Troubleshooting New Tank Emergencies: Ammonia Spikes and Algae
Even with careful setup, new aquariums experience common issues. Recognizing these problems early and applying targeted solutions prevents minor issues from becoming tank-killing disasters.
Ammonia Crisis Protocol: Immediate 50% Water Change Steps
If your test shows any ammonia above 0 ppm, perform a 50% water change immediately with Prime-dosed water. Add ammonia-neutralizing media like Seachem Matrix to your filter, and reduce feeding to every other day. Test again in 12 hours—repeat water changes if ammonia remains detectable. During ammonia spikes, increase aeration by pointing filter output toward the surface to maximize oxygen exchange, as ammonia impairs fish’s ability to absorb oxygen.
Green Water Algae Fix: Reducing Light and Nutrients
Green water (suspended algae) typically appears 2-3 weeks into cycling due to excess light and nutrients. Immediately reduce photoperiod to 4 hours daily, perform 25% water changes every other day, and add Amano shrimp if your tank is cycled. Never clean the glass during an algae bloom—this removes competing algae that would otherwise starve the green water. Within 10-14 days of reduced light and nutrients, the bloom will clear naturally.
Cloudy Water Causes: Bacterial Bloom vs. New Tank Syndrome
White or gray cloudy water usually indicates a bacterial bloom from excess organic material—common when overfeeding or adding too many fish too soon. This typically clears on its own within 7-10 days as bacterial colonies stabilize. If accompanied by high ammonia, it’s new tank syndrome from adding fish before cycle completion—immediately remove fish to a quarantine tank and restart cycling. Never use clarifiers during bacterial blooms, as these remove beneficial bacteria along with the problem.
Your patience during the initial setup process pays exponential dividends—every hour invested in proper aquarium set up for beginners saves days of troubleshooting later. Focus on mastering the nitrogen cycle, consistent testing, and gradual stocking rather than rushing to see fish. Within 8-12 weeks of diligent setup, you’ll enjoy a stable, thriving ecosystem that provides stress relief and fascination for years to come. Remember: the most successful aquariums aren’t created through expensive equipment, but through understanding and respecting the delicate biological balance that makes underwater life possible.