How a Sump Pump Works in Aquariums
Your reef tank’s vibrant corals and darting fish depend on a silent powerhouse you never see—the sump system. While most aquarists focus on the display tank, the real magic happens in that secondary reservoir tucked beneath it. This isn’t just extra water; it’s a meticulously engineered life-support system where your sump pump orchestrates a continuous water ballet. Understanding how a sump pump work aquarium systems is the key to unlocking unprecedented water stability and clarity. If your tank struggles with algae blooms, fluctuating parameters, or visible equipment clutter, the solution likely lies in this hidden chamber. By the end of this guide, you’ll know exactly how water flows through your sump, why the return pump is non-negotiable for serious setups, and how to avoid catastrophic flooding.
What Exactly Is a Sump Pump in Aquarium Systems?
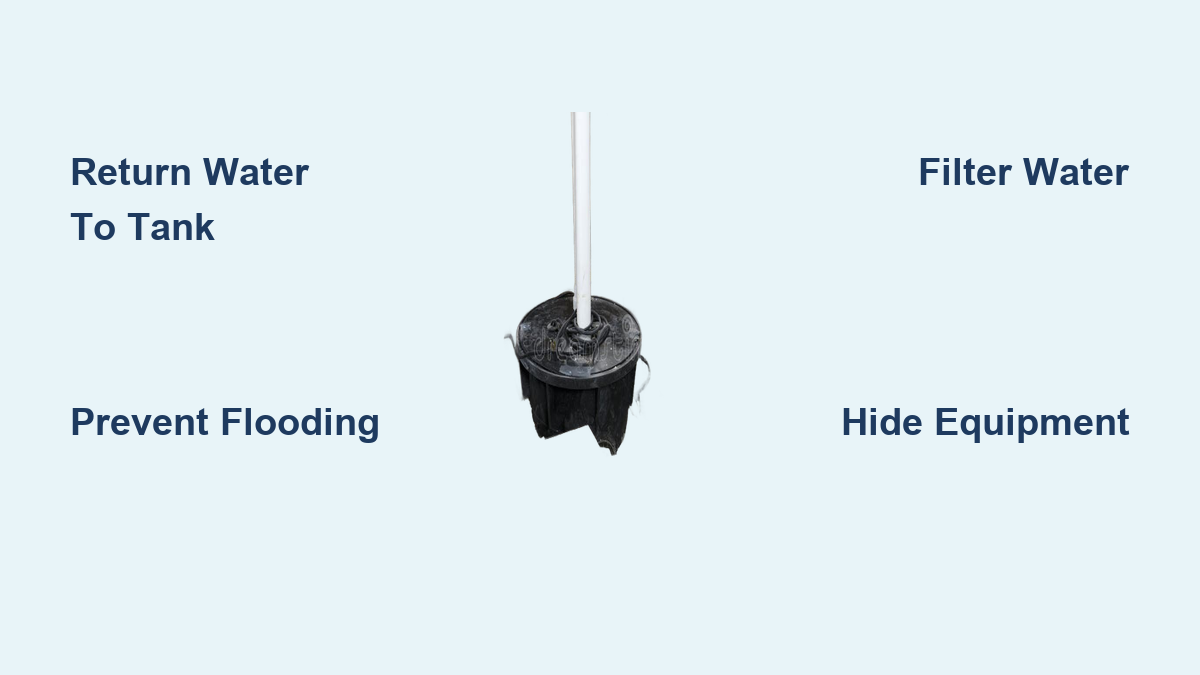
The term “sump pump” specifically refers to the return pump housed in your sump’s final chamber—it’s the engine that pushes filtered water back to your display tank. Unlike a sump used in basements (which removes floodwater), an aquarium sump pump recirculates water in a closed loop. It’s always submerged in the sump’s return chamber, drawing in pre-filtered water and propelling it upward through rigid PVC or flexible tubing. Crucially, this pump must generate enough head pressure to overcome the vertical distance between the sump and your display tank’s waterline. For example, a 48-inch tall tank requires a pump rated for at least 4 feet of head height. Underpowered pumps cause sluggish flow, while oversized ones create dangerous water surges—both sabotage the delicate balance your livestock needs.
Why Your Display Tank Relies on This Submerged Workhorse
Without the sump pump, your entire system would grind to a halt. It creates the negative pressure that pulls water through the overflow, ensuring continuous circulation. If this pump fails, water stops flowing to the display within minutes, leading to oxygen depletion and toxic ammonia spikes. Smart aquarists always install a battery backup for this critical component—it’s the difference between a minor hiccup and a tank disaster.
How Gravity and the Sump Pump Create a Closed Water Loop
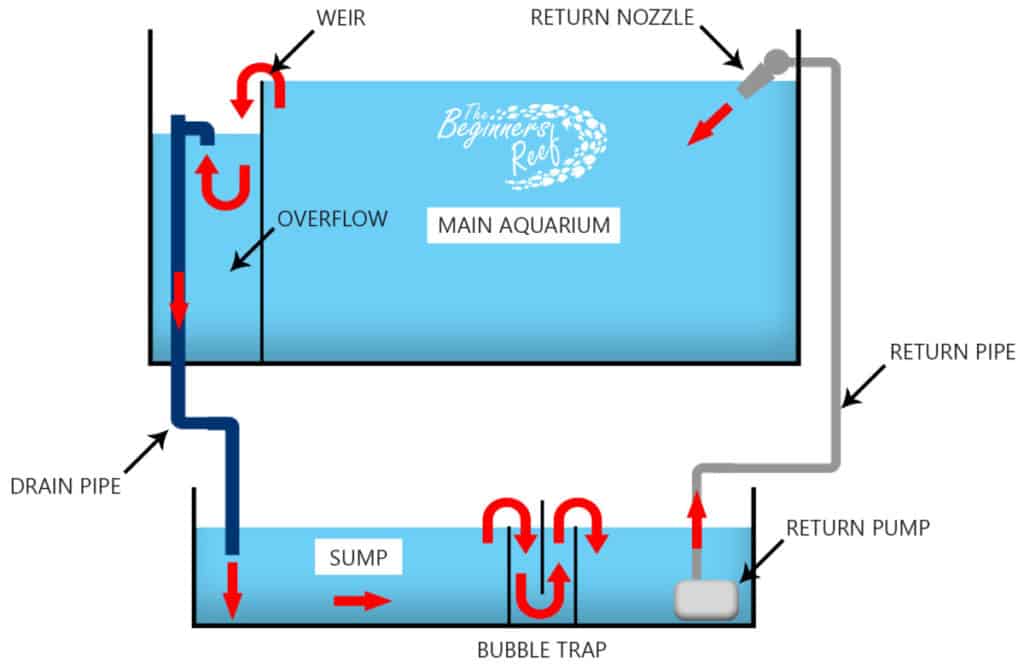
Your aquarium’s stability hinges on a perfectly balanced push-pull relationship between gravity and the return pump. Here’s the real-time cycle: The sump pump forces water up the return line into your display tank. As water fills the display, it rises until it hits the overflow weir (a U-shaped barrier at the tank’s top edge). Gravity then takes over, pulling water down the overflow pipe into the sump’s first chamber. This creates a self-regulating system where the pump’s output exactly matches the overflow’s drainage capacity. When properly tuned, the display tank’s water level remains laser-straight at the weir height—no messy splashing or dangerous drops.
Critical Signs Your Flow Balance Is Off
- Water piling up at the overflow: Drain capacity is too low (increase pipe diameter or add more standpipes)
- Gurgling sounds from the overflow: Air is being sucked into the drain (adjust standpipe height)
- Display tank water level dropping: Pump is overpowering the overflow (reduce pump flow rate)
Stage 1: Mechanical Filtration—Catching Debris Before It Decomposes
As overflow water enters the sump’s front chamber, it immediately encounters the first line of defense: mechanical filtration. This isn’t optional—it’s where 80% of visible problems start. Water flows through filter socks (reusable mesh tubes) or filter floss (fine synthetic pads) that trap fish waste, uneaten food, and plant fragments. These materials act like a sieve, preventing organic matter from breaking down in your main tank where it would release ammonia. Without this stage, your display would resemble a murky pond within days.
Pro Maintenance Tip: The 24-Hour Rule
Never let filter media sit fouled for more than 24 hours. Decomposing debris in clogged socks becomes a pollution factory. Keep spare socks on hand and rotate them during water changes—rinse used ones in old tank water (not tap water) to preserve beneficial bacteria.
Stage 2: Biological Filtration—Where Beneficial Bacteria Save Your Tank
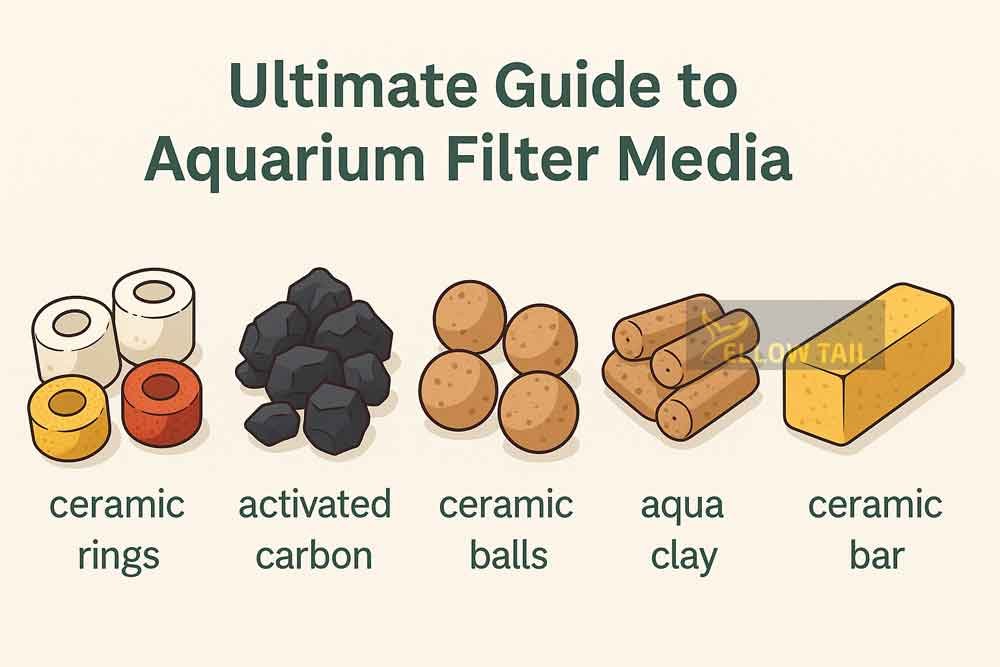
After mechanical cleaning, water flows into the middle chamber housing your biological media—typically ceramic rings, bio-balls, or specialized porous blocks. This is the nitrogen cycle’s command center. Billions of nitrifying bacteria colonize these surfaces, converting deadly ammonia (from fish waste) into nitrite, then into less toxic nitrate. The media’s microscopic pores provide 100x more surface area than bare tank walls—this is why sumps outperform canister filters for heavy bioloads. In saltwater tanks, this chamber often doubles as a refugium where macroalgae absorb nitrates.
Why Placement Matters More Than You Think
Biological media must sit after mechanical filtration. If debris reaches it first, bacteria get smothered in sludge. Always sequence: mechanical → biological → (optional) chemical. Never place heaters directly against media—they’ll cook your bacterial colonies.
Stage 3: The Return Chamber—Your Equipment Command Center

The final sump chamber is where filtered water pools before the sump pump sends it home. But it’s far more than a holding tank—it’s your stealth equipment hub. Here’s what belongs here:
– The return pump (submerged in the chamber’s deepest point)
– Heaters (safely hidden away from fish)
– Protein skimmer collection cup (for saltwater)
– Auto top-off (ATO) sensor (monitoring water level)
This strategic placement solves two critical problems: It hides unsightly gear for a pristine display, and it positions heaters in fast-flowing water for even heat distribution. No more “hot spots” near equipment or burnt corals.
Flood Prevention Checklist for This Chamber
- Ensure 2–3 inches of “dry space” above normal water level
- Install an ATO system to replace evaporated water
- Place the pump on a raised platform so it runs dry before the chamber empties
Overflow Safety: How to Stop a Power Outage From Draining Your Tank
The overflow box is your system’s Achilles’ heel—poor design here causes 90% of sump-related floods. During power failures, the return pump stops, but gravity keeps pulling water down the overflow. Without protection, your display tank could drain completely into the sump, overflowing onto your floor. Siphon breaks (small air holes drilled near the overflow’s top) and Durso standpipes (tall vertical pipes with slots) prevent this by breaking the siphon effect. Always choose a “silent overflow” system like BeanAnimal or Herbie style—these use multiple standpipes to eliminate gurgling while maximizing safety.
The 100% Flood Test You Must Perform
Before adding livestock, simulate a power outage: Unplug the return pump and watch the overflow. Water should drain until it’s below the siphon break holes, then stop. If water keeps flowing, add more dry space to your sump or enlarge the siphon breaks.
5 Unbeatable Benefits of a Properly Tuned Sump Pump System
Doubles Your Effective Water Volume for Bulletproof Stability
Adding a 20-gallon sump to a 100-gallon display creates a 120-gallon system. This extra volume dilutes toxins, buffers pH swings, and stabilizes temperature—critical for sensitive corals. In tests, sump-equipped tanks show 40% less parameter fluctuation during feeding spikes.
Eliminates Visible Equipment for a Natural Display
Heaters, probes, and skimmers vanish into the sump, leaving only aquascape visible. This isn’t just aesthetic—it prevents fish from damaging equipment and removes burn hazards near corals.
Enables Advanced Filtration Impossible in Display Tanks
Need a 10-inch tall protein skimmer? Or a deep sand bed for denitrification? Sumps provide the vertical space hang-on filters lack. You can customize chambers for refugiums, chemical reactors, or even a quarantine zone.
Solves the Evaporation Nightmare in Saltwater Tanks
All evaporation occurs in the sump—not your display. An auto top-off system adds freshwater here daily, maintaining perfect salinity without manual intervention. No more “salt creep” crust on your tank walls.
Makes Water Changes Effortless and Less Stressful
Drain water directly from the sump’s return chamber instead of netting fish. Add supplements here too—they disperse evenly before reaching the display. Maintenance becomes a 10-minute chore instead of a 45-minute ordeal.
Sump vs. Canister Filter: When Your Tank Outgrows Hang-On Gear
| Critical Factor | Sump System | Canister Filter |
|---|---|---|
| Max Tank Size | 100+ gallons (reef-ready) | Under 75 gallons |
| Filtration Flexibility | Custom chambers for skimmers/reactors | Fixed media trays |
| Water Volume Boost | Adds 15–30% to total system | Zero volume gain |
| Power Outage Safety | Built-in flood prevention | Drains display tank completely |
| Heater Placement | Hidden in fast-flowing sump water | Exposed in display (burn risk) |
| Best For | Reef tanks, cichlid tanks, high-bioload systems | Small planted freshwater tanks |
Choose a sump if: You keep corals, large fish, or notice frequent ammonia spikes. Stick with canister if: Your 30-gallon planted tank has stable parameters and minimal equipment needs.
Sizing Your Sump Pump and Tank for Zero Floods
Your sump must hold all water that drains from the display during a power outage. Calculate this:
(Display tank surface area × overflow height) + Drain pipe volume
For a 60″×30″ tank with 1″ overflow:
(60×30×1) = 1,800 cubic inches + 500 cubic inches (pipes) = 2,300 cubic inches (≈10 gallons)
Your sump needs at least 10 gallons of dry space below the overflow intake. Never fill it beyond 70% capacity. For pumps, choose one rated for 20% more flow than your overflow’s max drainage—this ensures the display never overflows during operation.
3 Deadly Sump Pump Mistakes Even Experts Make
- Ignoring head pressure: A pump rated for “1,000 GPH” only delivers that flow at zero height. At 4 feet of lift, it might drop to 600 GPH. Always check the pump’s performance curve chart.
- Skipping the check valve: Without one on the return line, a power outage can siphon sump water back into the display. Install it above the waterline.
- Overcrowding the return chamber: Leaving less than 2″ of surface space causes pump cavitation (air bubbles) that burns out impellers. Keep this zone uncluttered.
Final Note: A properly designed sump pump system transforms aquarium keeping from reactive maintenance to proactive ecosystem management. By harnessing gravity’s reliability and the pump’s precision, you create a self-regulating environment where water quality stays pristine with minimal intervention. Start with a sump sized at 20% of your display volume, prioritize overflow safety features, and position your return pump for optimal head pressure. Within weeks, you’ll see fewer algae outbreaks, calmer fish, and corals that thrive—not just survive. The real test? When you open your tank after vacation and everything looks perfect. That’s the sump pump working silently while you sleep. Ready to upgrade? Measure your overflow height tonight and calculate your ideal pump specs—you’ll never look at your aquarium the same way again.